I tired this a bit but it has up and downsides.
Yes it’s easier to edit the UVs but you also need to fight the remesher and reprojection of the sculpt.
Overall it doesn’t seem to save much time ![]()
I tired this a bit but it has up and downsides.
Yes it’s easier to edit the UVs but you also need to fight the remesher and reprojection of the sculpt.
Overall it doesn’t seem to save much time ![]()
This is very similar to my approach but actually using UV sculpting instead of mesh sculpting ![]()
How well did the UV sculpting perform for you? Was it bearable/usable?
Also a tip: Just use U → Project from View (Bounds) instead of doing it from an orthographic camera. That’s faster ![]()
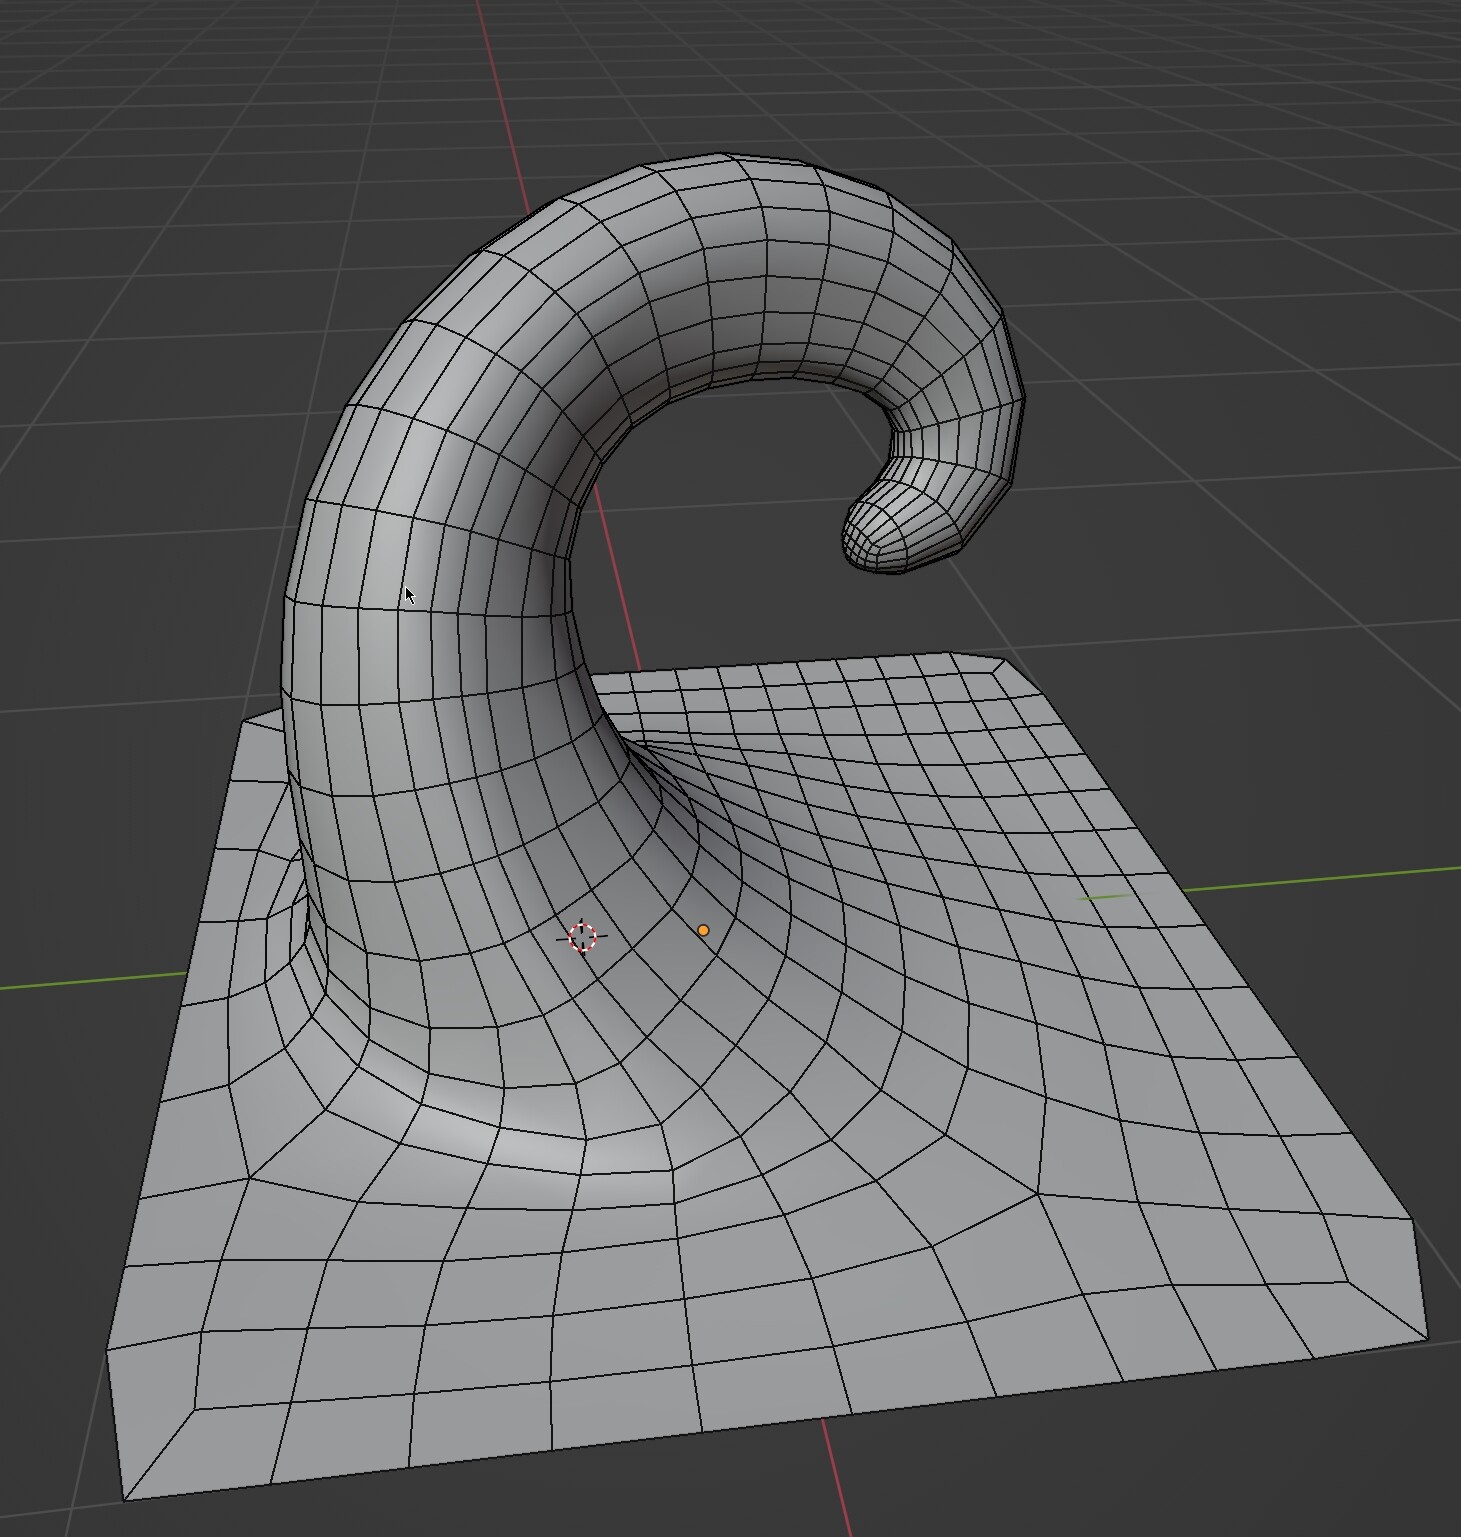
It gets quite easy if you use Quad Remesher instead of Quadriflow. Here is the same object remeshed with Quad Remesher. The down side is that it is a paid addon.
I think that the main advantage of this method over working with the highres mesh directly is that this can help with meshes where the fairing or other flattening methods fail to work properly with dense meshes. It is just easier to deal with simpler objects really whether working in the UV editor or in the sculpt mode.
The other advantage is that you have the multires to keep working on object to refine it further.
Quad Remesher
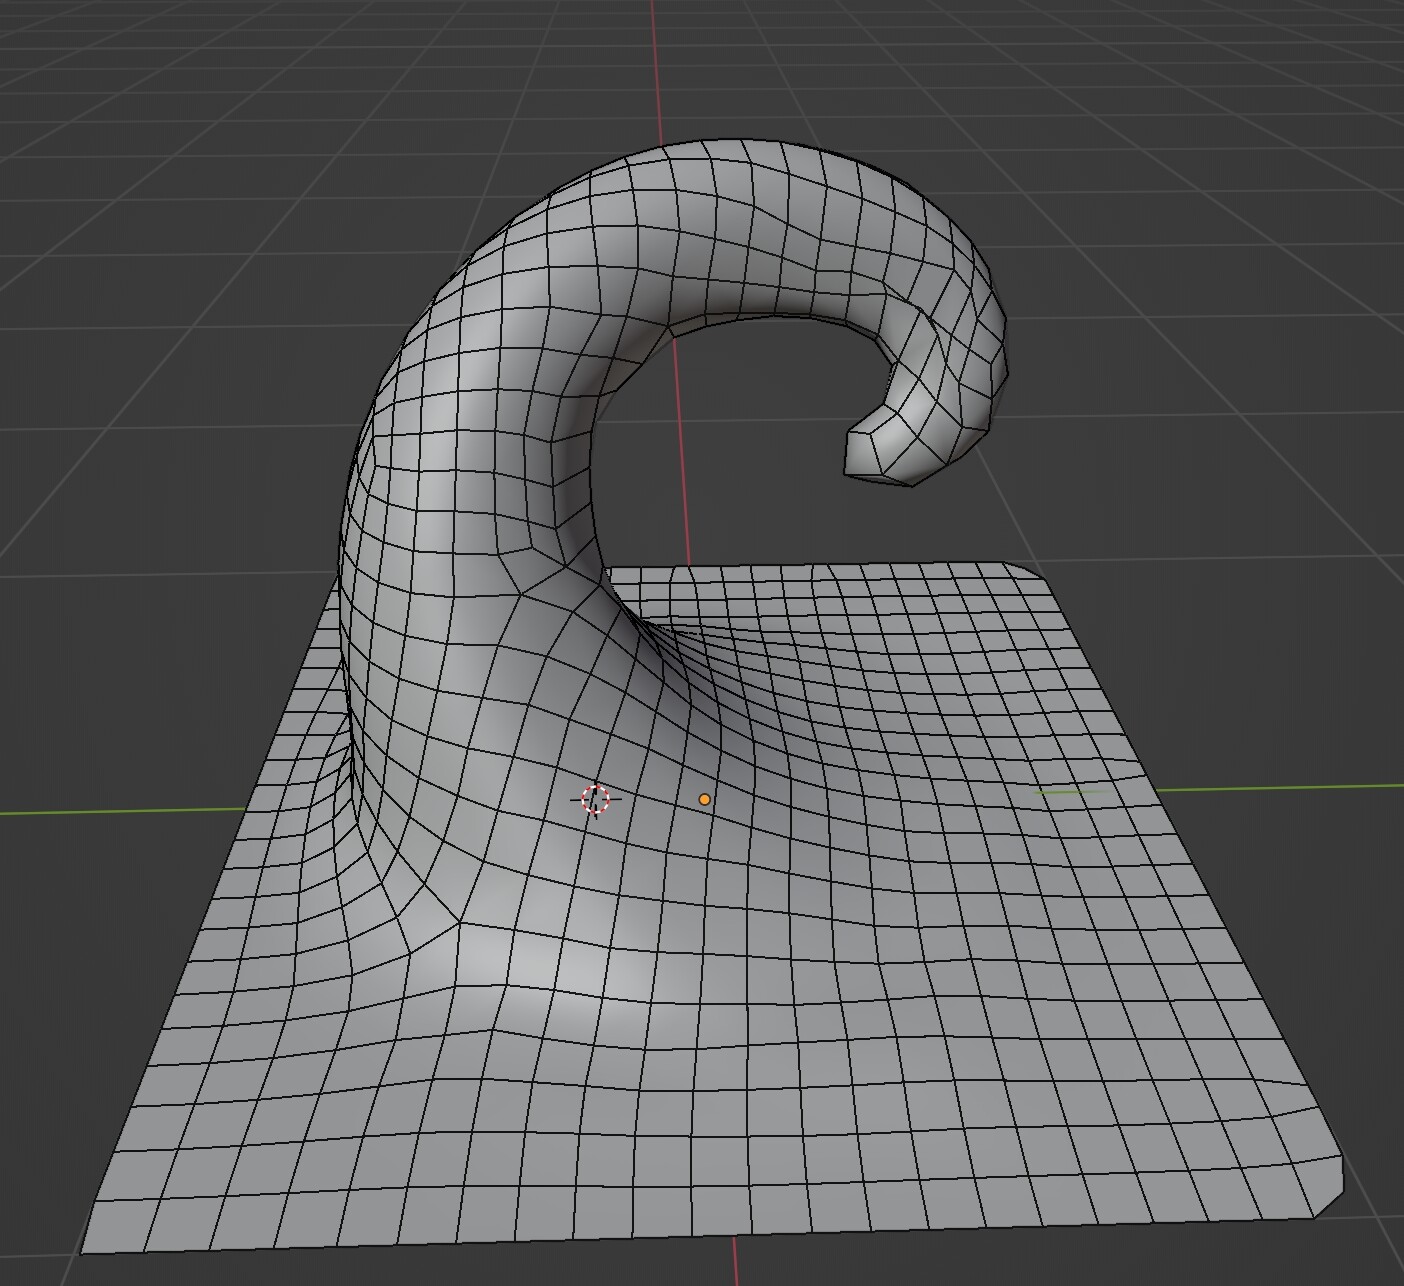
Quadriflow
For new Blender users who would like to know more about Quad Remesher: here’s a dedicated topic…
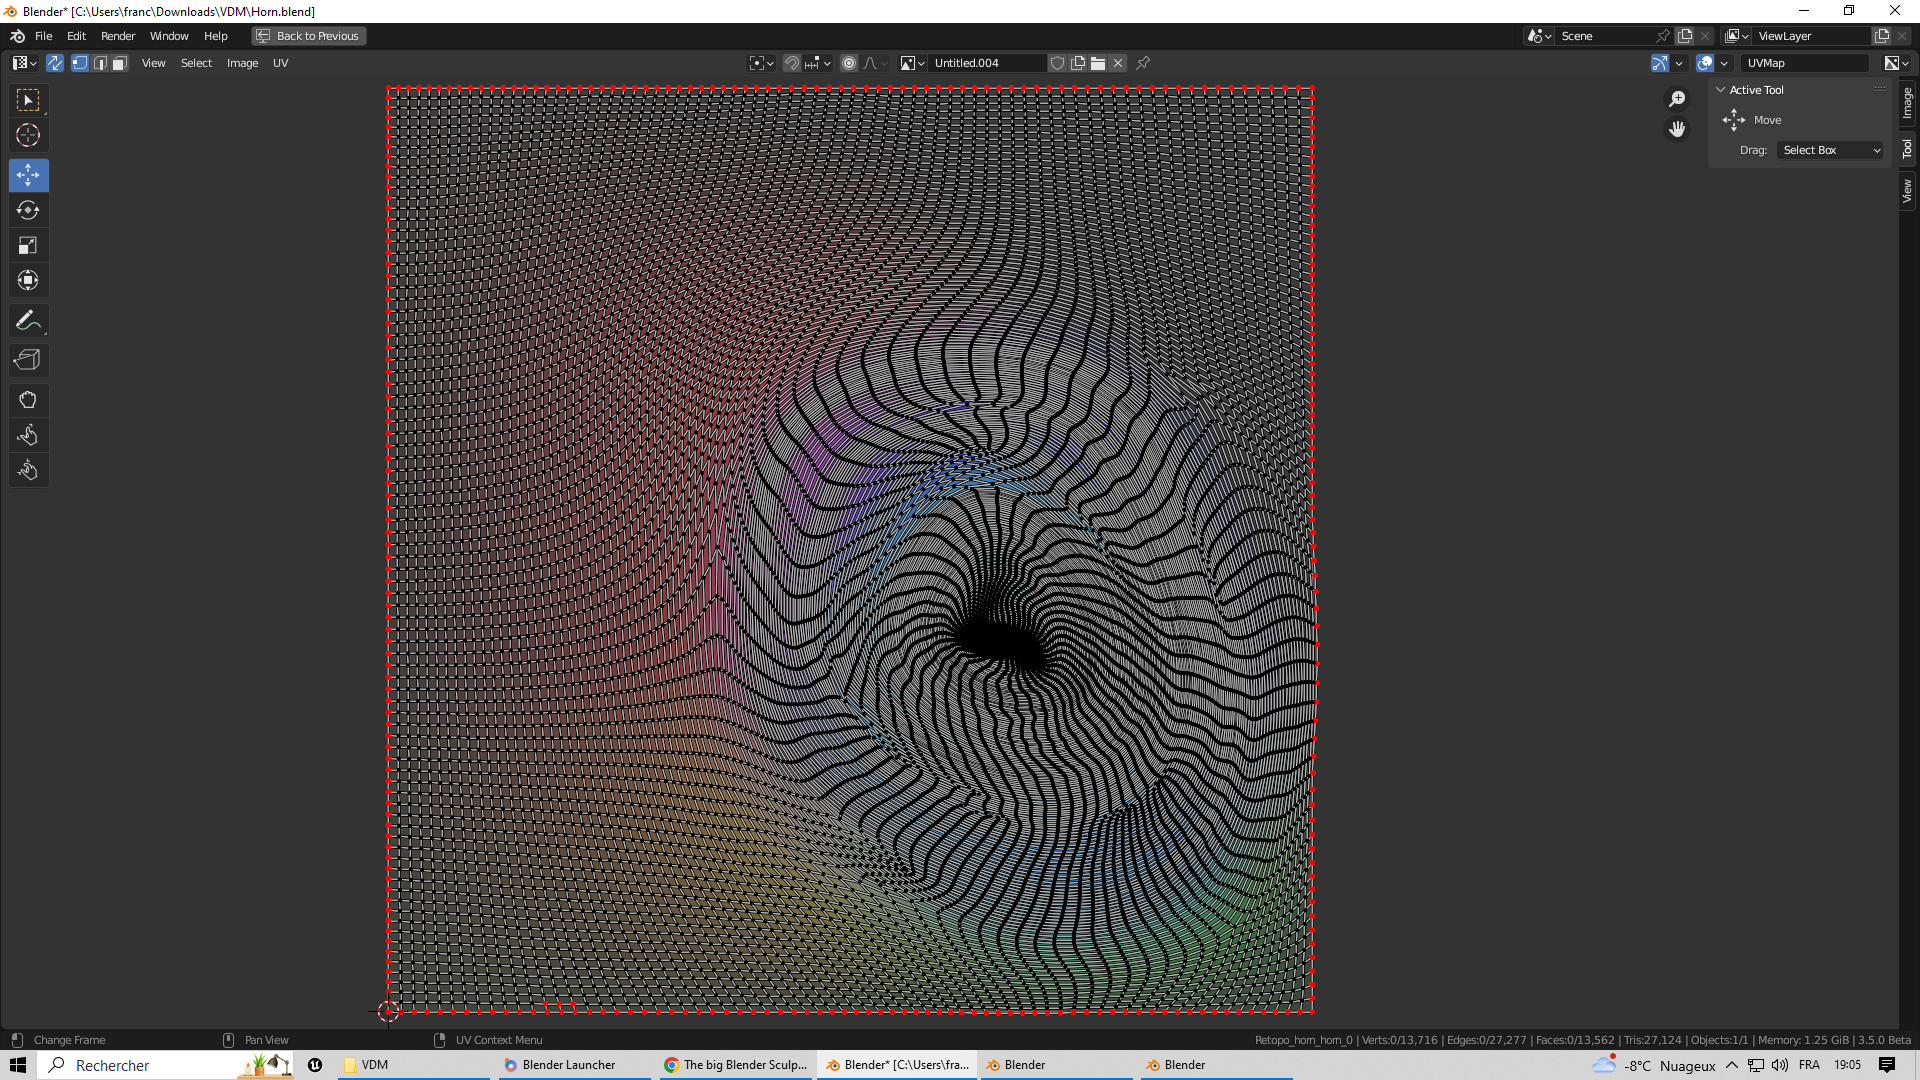
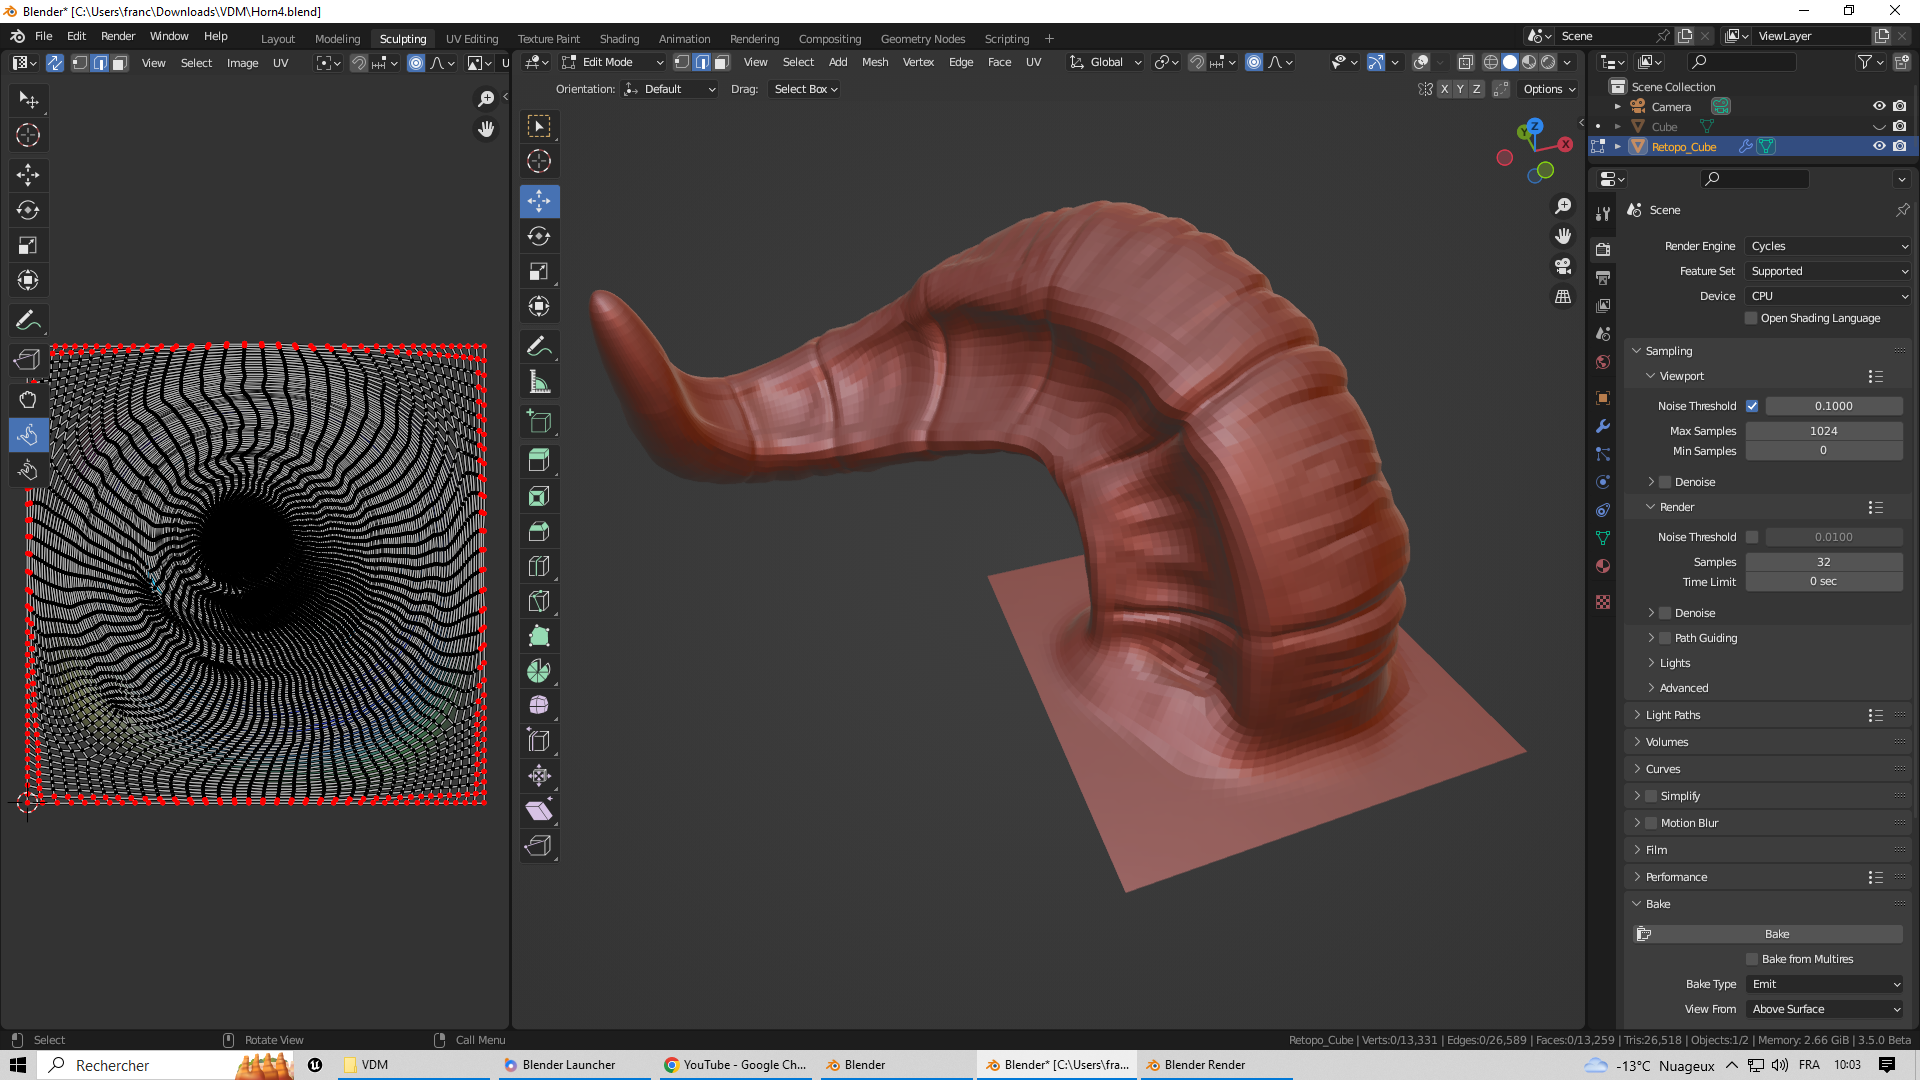
I understand what you mean; for shape like a horn, where all UVs get squashed inside a ‘‘black hole’’, it can become really hard to space those out in the UVs editor (didn’t had that problem with my ear and nose) ![]()
So with this horn at 13k, it is indeed really hard to space the UVs evenly. In the picture below, there was still some UVs squashed at the tip of the horn, hence the ‘‘low-rez’’ in that region.
I did manage to get the UVs space enough to get usable result, but it is quite time consuming and I needed to use a lot of "minimise stretch’’ and ‘‘relax’’ operation… Even then it is far from perfect.
But result (picture below) is usable (see video) :
*edit : but not so much on a curve surface…
The real ‘‘problem’’ is when the sculp contain more polygon (here 400k). A horn shape then become a ‘‘black hole’’ of UVs, where even a max zoom can’t show individuals UVs… It would be almost impossible to space those UVs out with the current tools set ![]()
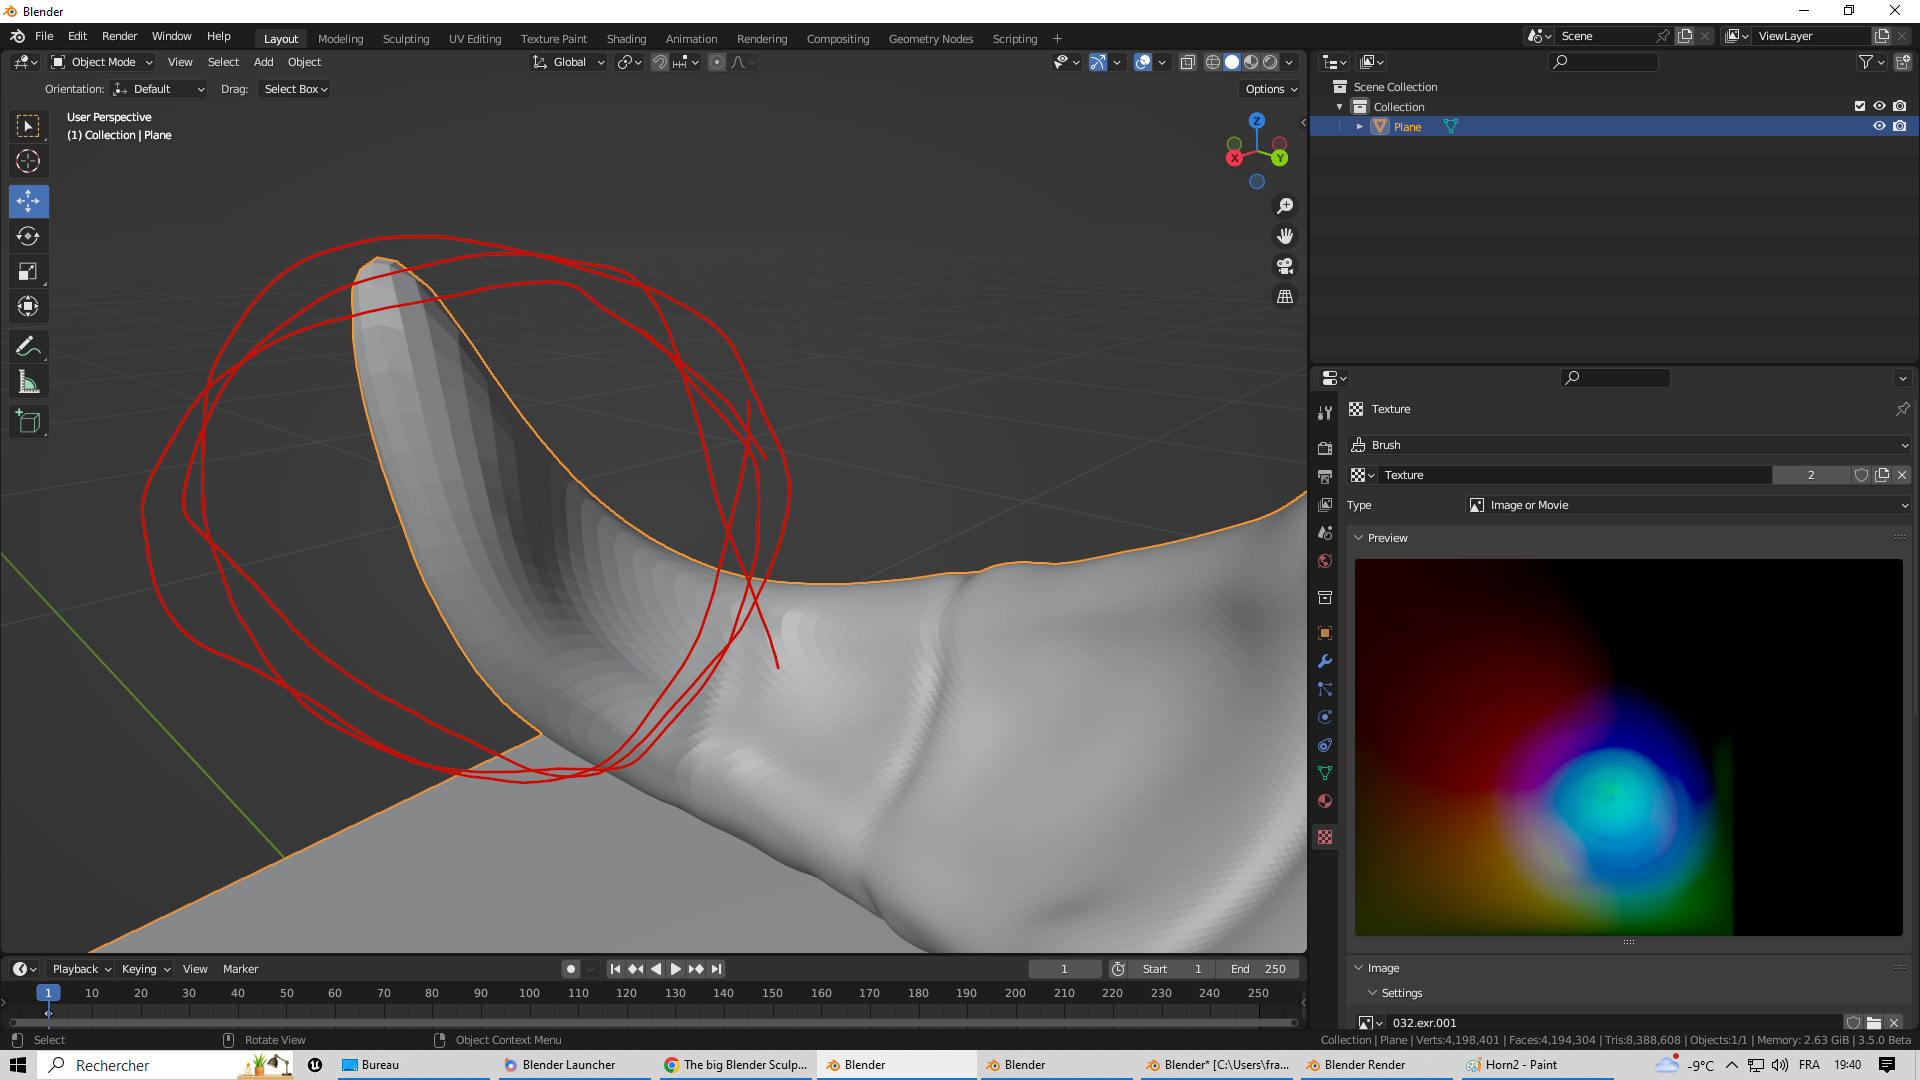
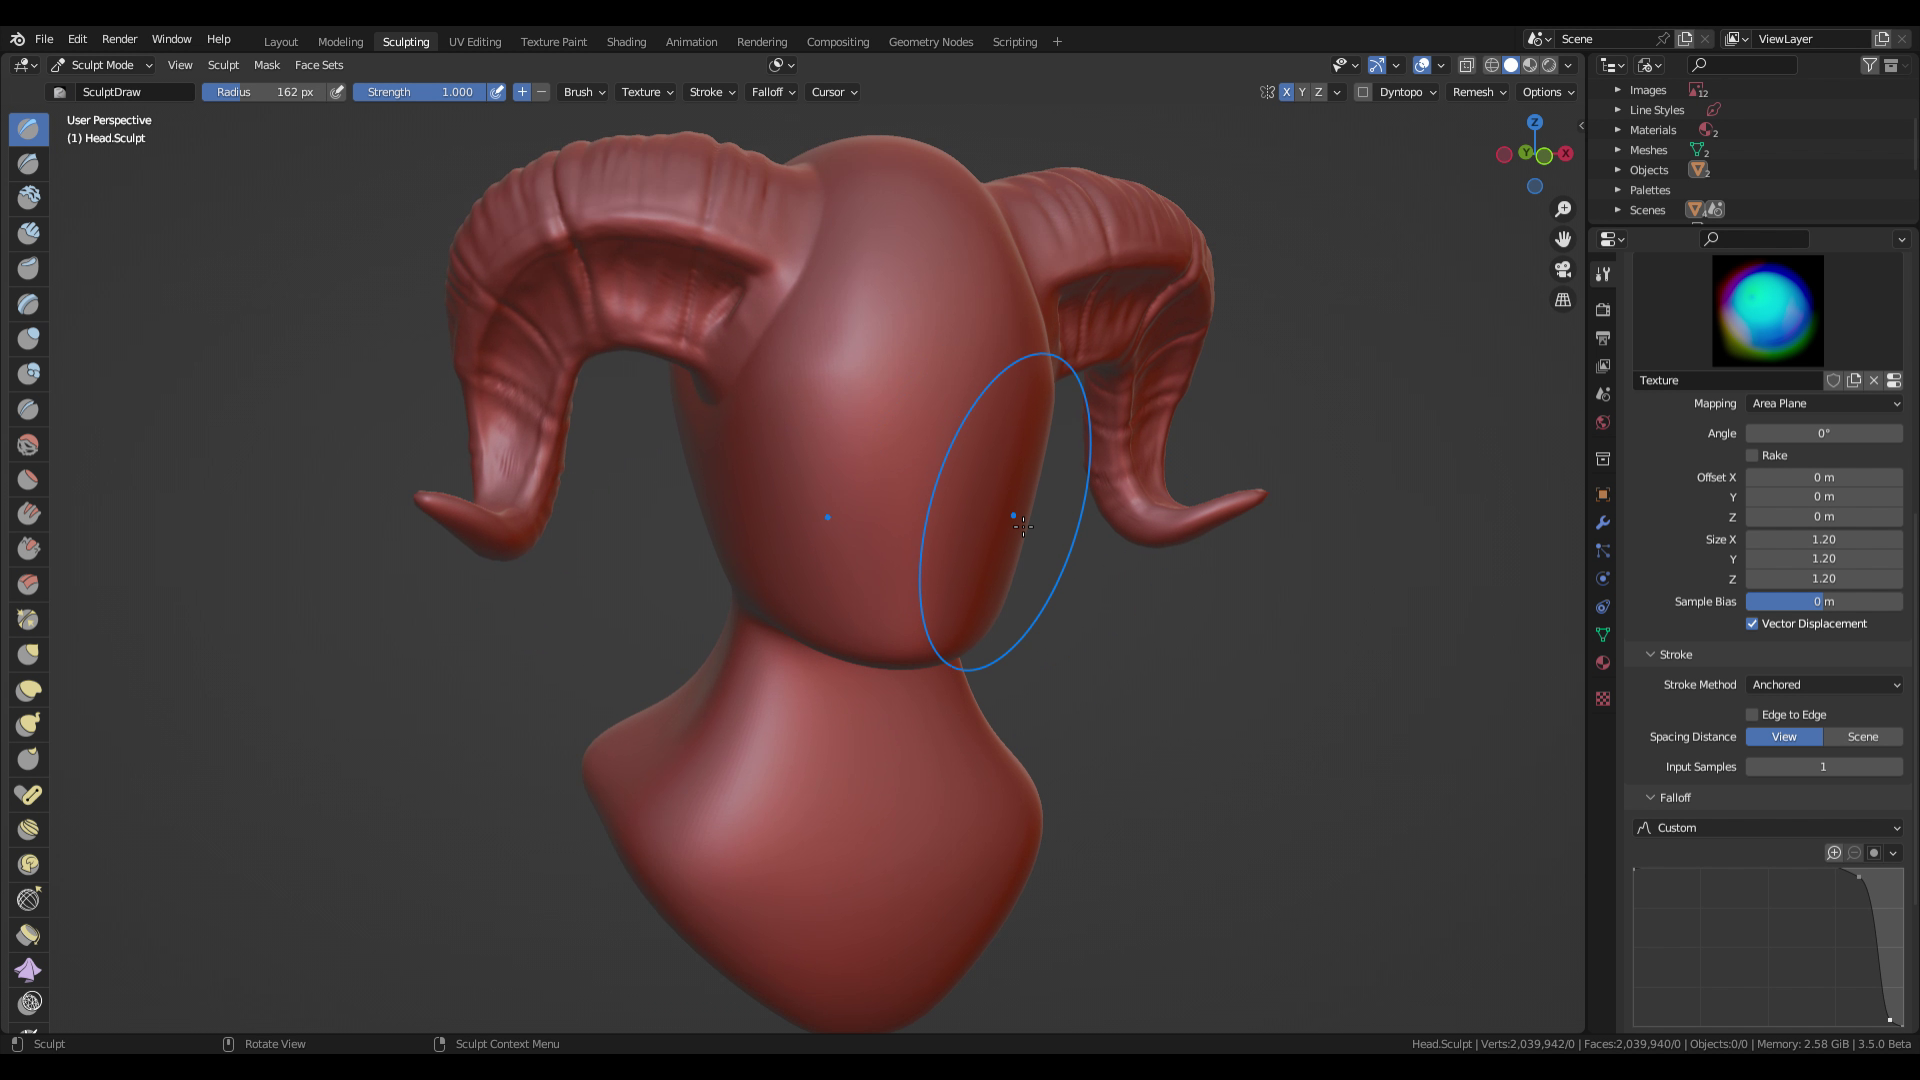
I worked more on the sculpting workflow of correcting the VDM UV map instead of Unwrapping.
With a custom geometry nodes and shader nodes setup I can compare each edge length of the flattened sculpt with the original remeshed sculpt.
This can then be piped into the shader as a heatmap. Then sculpt over it to minimize the stretching.
Once everything is at least mostly green → Create a UV map from View and bake.
The heatmap is essentially going from Gray (no difference) → Blue → Red → Violet (Clipped Range).
The range of detected distortion can be defined in the geometry nodes modifier as a single value.
This should be a better alternative to dealing with the limited performance and visualization of the UV editor. Instead do it in sculpt mode ![]()
.blend file can be downloaded here:
Nice progress!
I do think this will have much more chance of becoming popular if there’ll be a one-click solution, or at least a very easy way to create VDMs from an object. Right now the process is too technical for non-experienced Blender users.
I’m talking with some devs about it but there is no plans on the UV editing roadmap to improve the “Minimize Stretch” to the amount that this feature needs.
Quad remeshing and re projection is also tricky. No dev time and generally needs a human hand for retouches.
I’ll keep looking into it.
At least the baking is being worked on to be an official feature instead of requiring a whole shader node setup.
Question, if in order to sculpt by layers in the future, it will be necessary to do it using displacement textures (at some point I thought I read that it would be like this), the relief will be preserved when the normals of the faces are modified from flat to smooth shading?
I say this to be taken into account, I think the programs that currently have this functionality cannot modify the normal ones.
Will it though? I mean what if I have a production model with 300 UDIMs (real world example from earlier this week). Wouldn’t that slow things down by quite a bit?
Yeah the top gun maverick cg militar airplanes ![]()
![]()
![]()
I wish ![]() Just an animal in a movie. But it’s not a whole lot more than your average digi double, with 200 UDIMs. And it’s a 2k show, so not a crazy 6k, zoom right into the eye shot.
Just an animal in a movie. But it’s not a whole lot more than your average digi double, with 200 UDIMs. And it’s a 2k show, so not a crazy 6k, zoom right into the eye shot.
I mean that in some proposal that I can’t find, I understood that the Multires substitute should internally use displacement maps for the layered relief. No change yet, just wanted to point out that while Multires isn’t affected by changing the base mesh normals, an offset by displacement might be. I think MB always has smooth faces while ZB always flat.
Oh ye, I think I read that as well, was quite some time ago in the Pablo area. I never saw a proof of concept for that, so I just put it on the “throwing ideas around” shelf.
For baking, where can I find the setting that clamps the image values?
Values shouldn’t get clamped if you use OpenExr as file format, but there is an option, that clamps the values when you use the texture
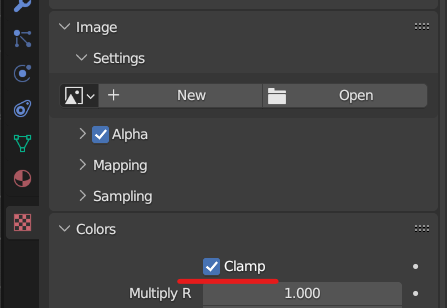
If you download the latest Blender 3.5 builds, this will be disabled by default. Previously it was enabled for every new texture data block …
Yes, the screenshot is from 3.4 ^^
I just realise the ‘‘sculpt’’ doesn’t need to be inside the plane… That can give a lot more room for the UVs
With a bit of ‘‘minimize stretch’’ / ‘‘relax’’ / ‘‘proportional scale editing’’ it can make the sculpt usable…
I think that is the best Blender can give ![]()
Worflow in 10 easy step :
*did use Quadremesher with 15k target. It seem better edge flow make ‘‘minimize stretch’’ operator react better… But I may be wrong.