RB leaves
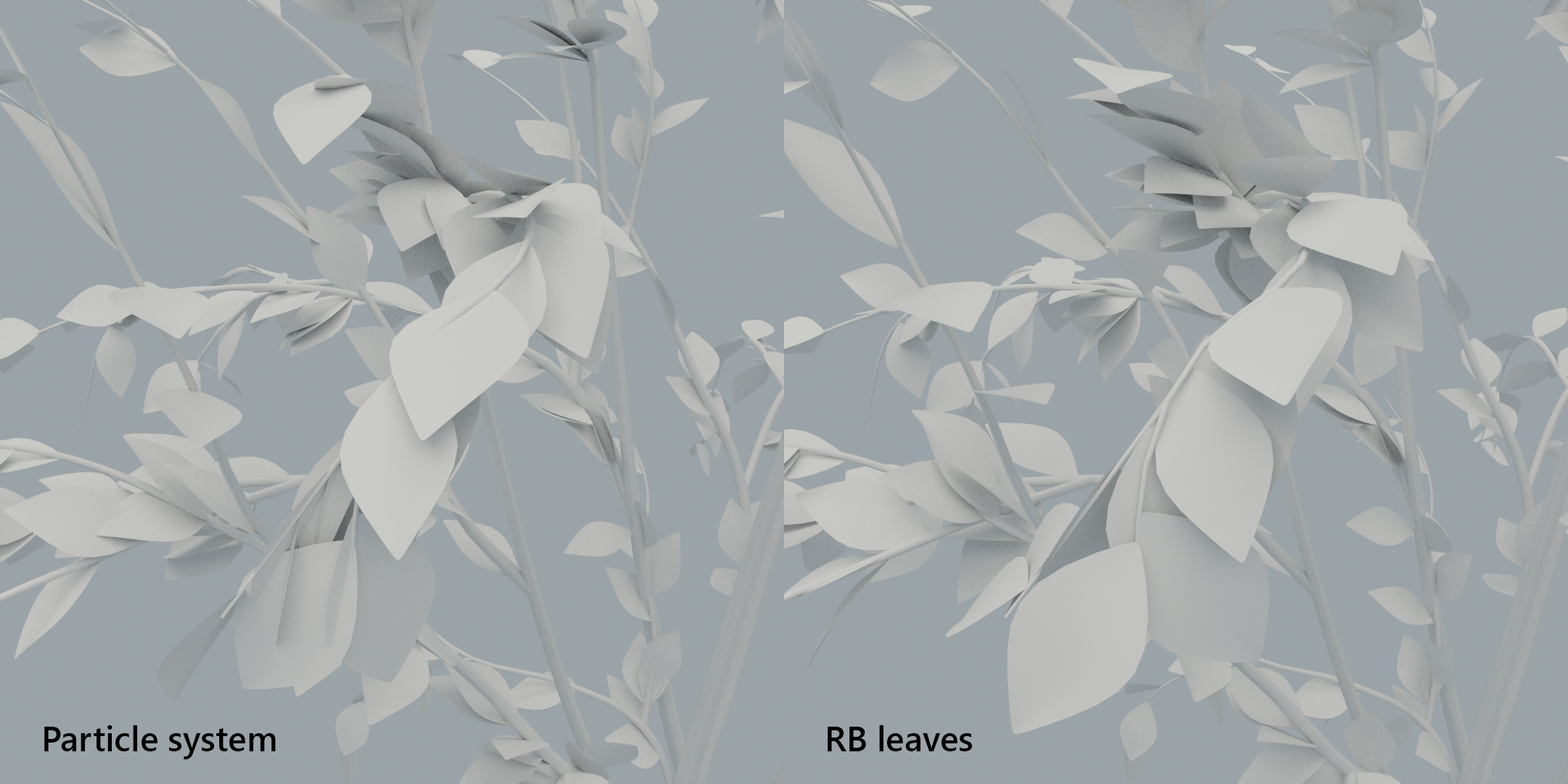
Warning: This method does not prevent intersections, but can reduce them.
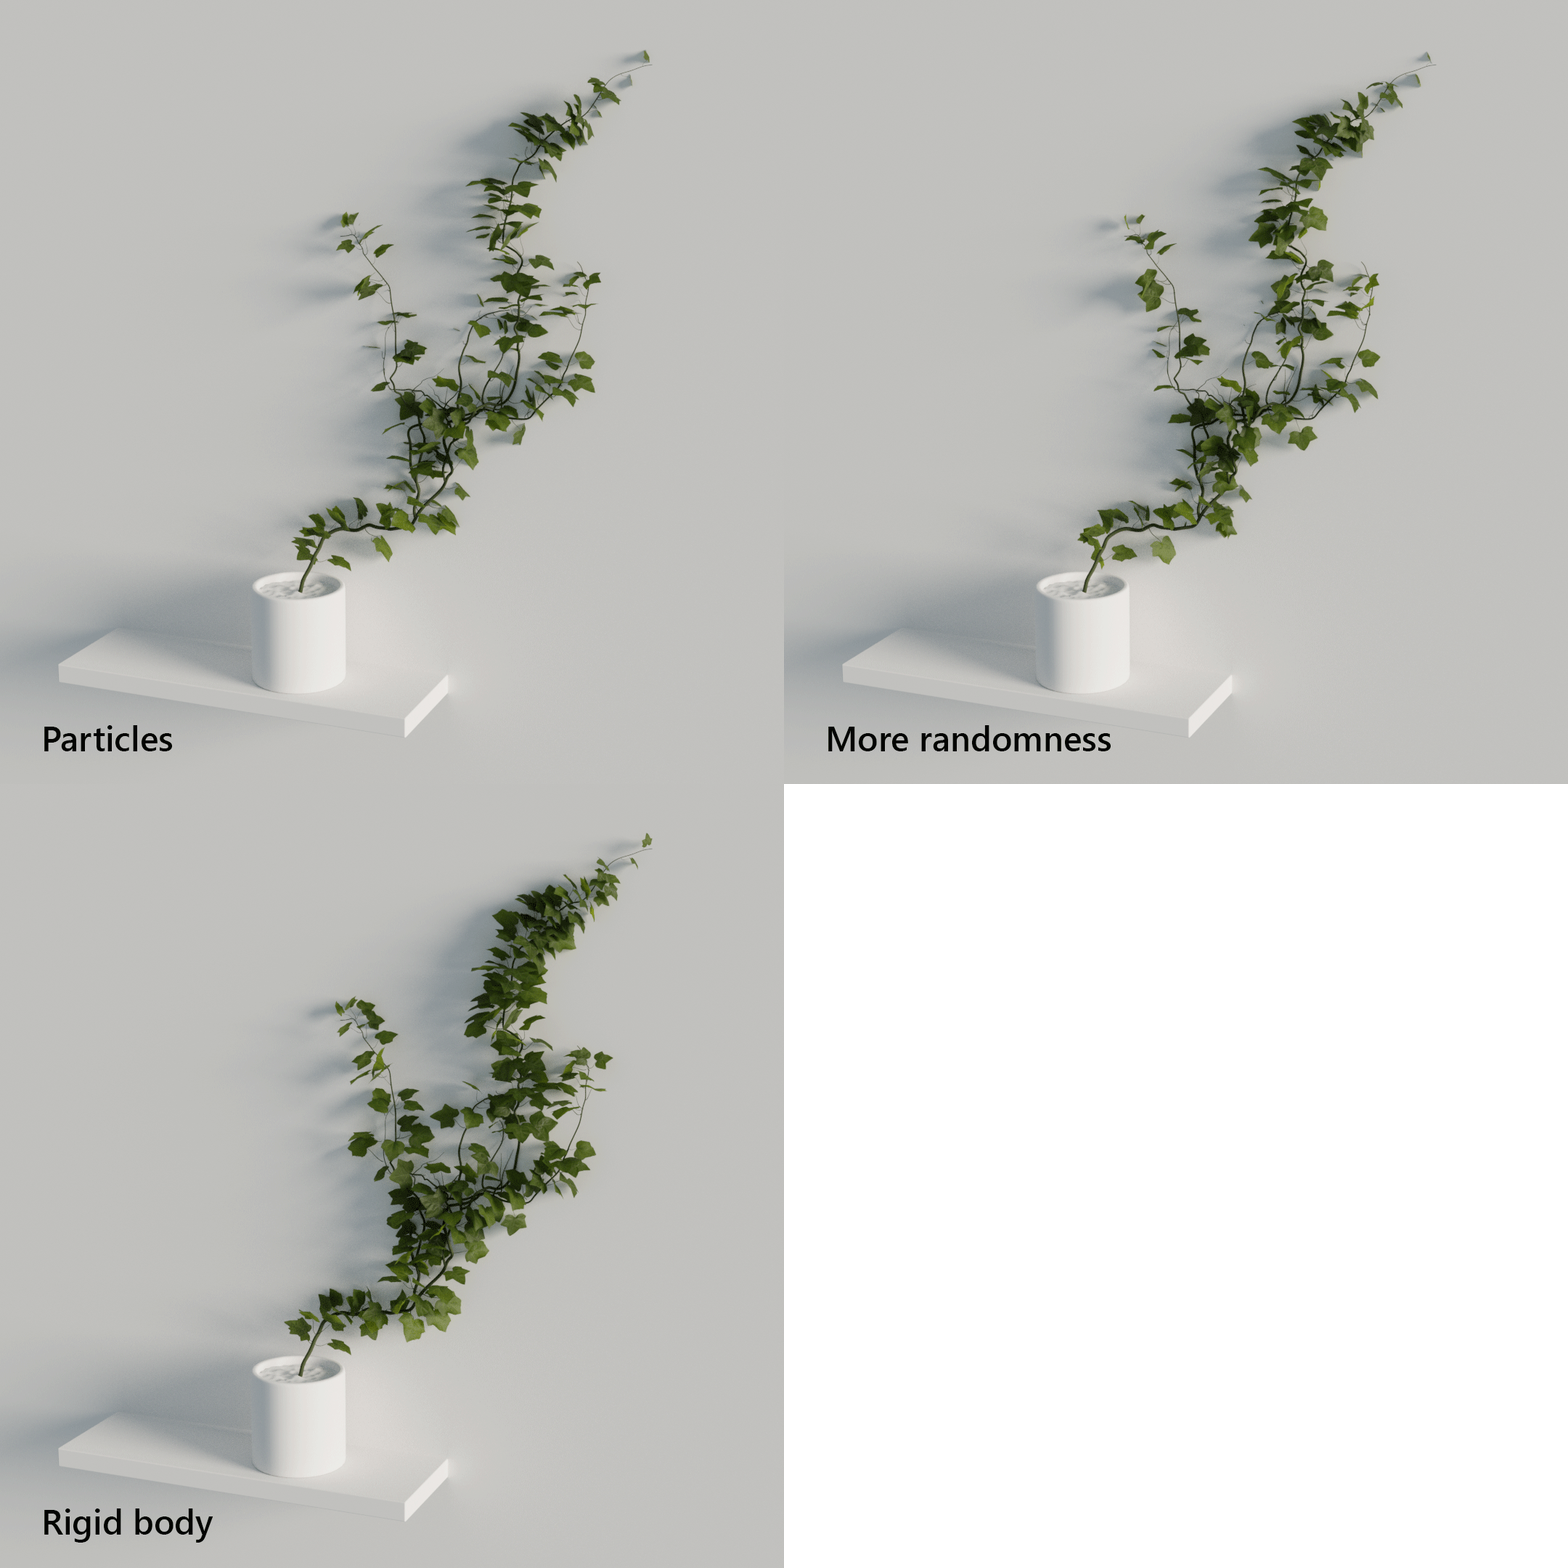
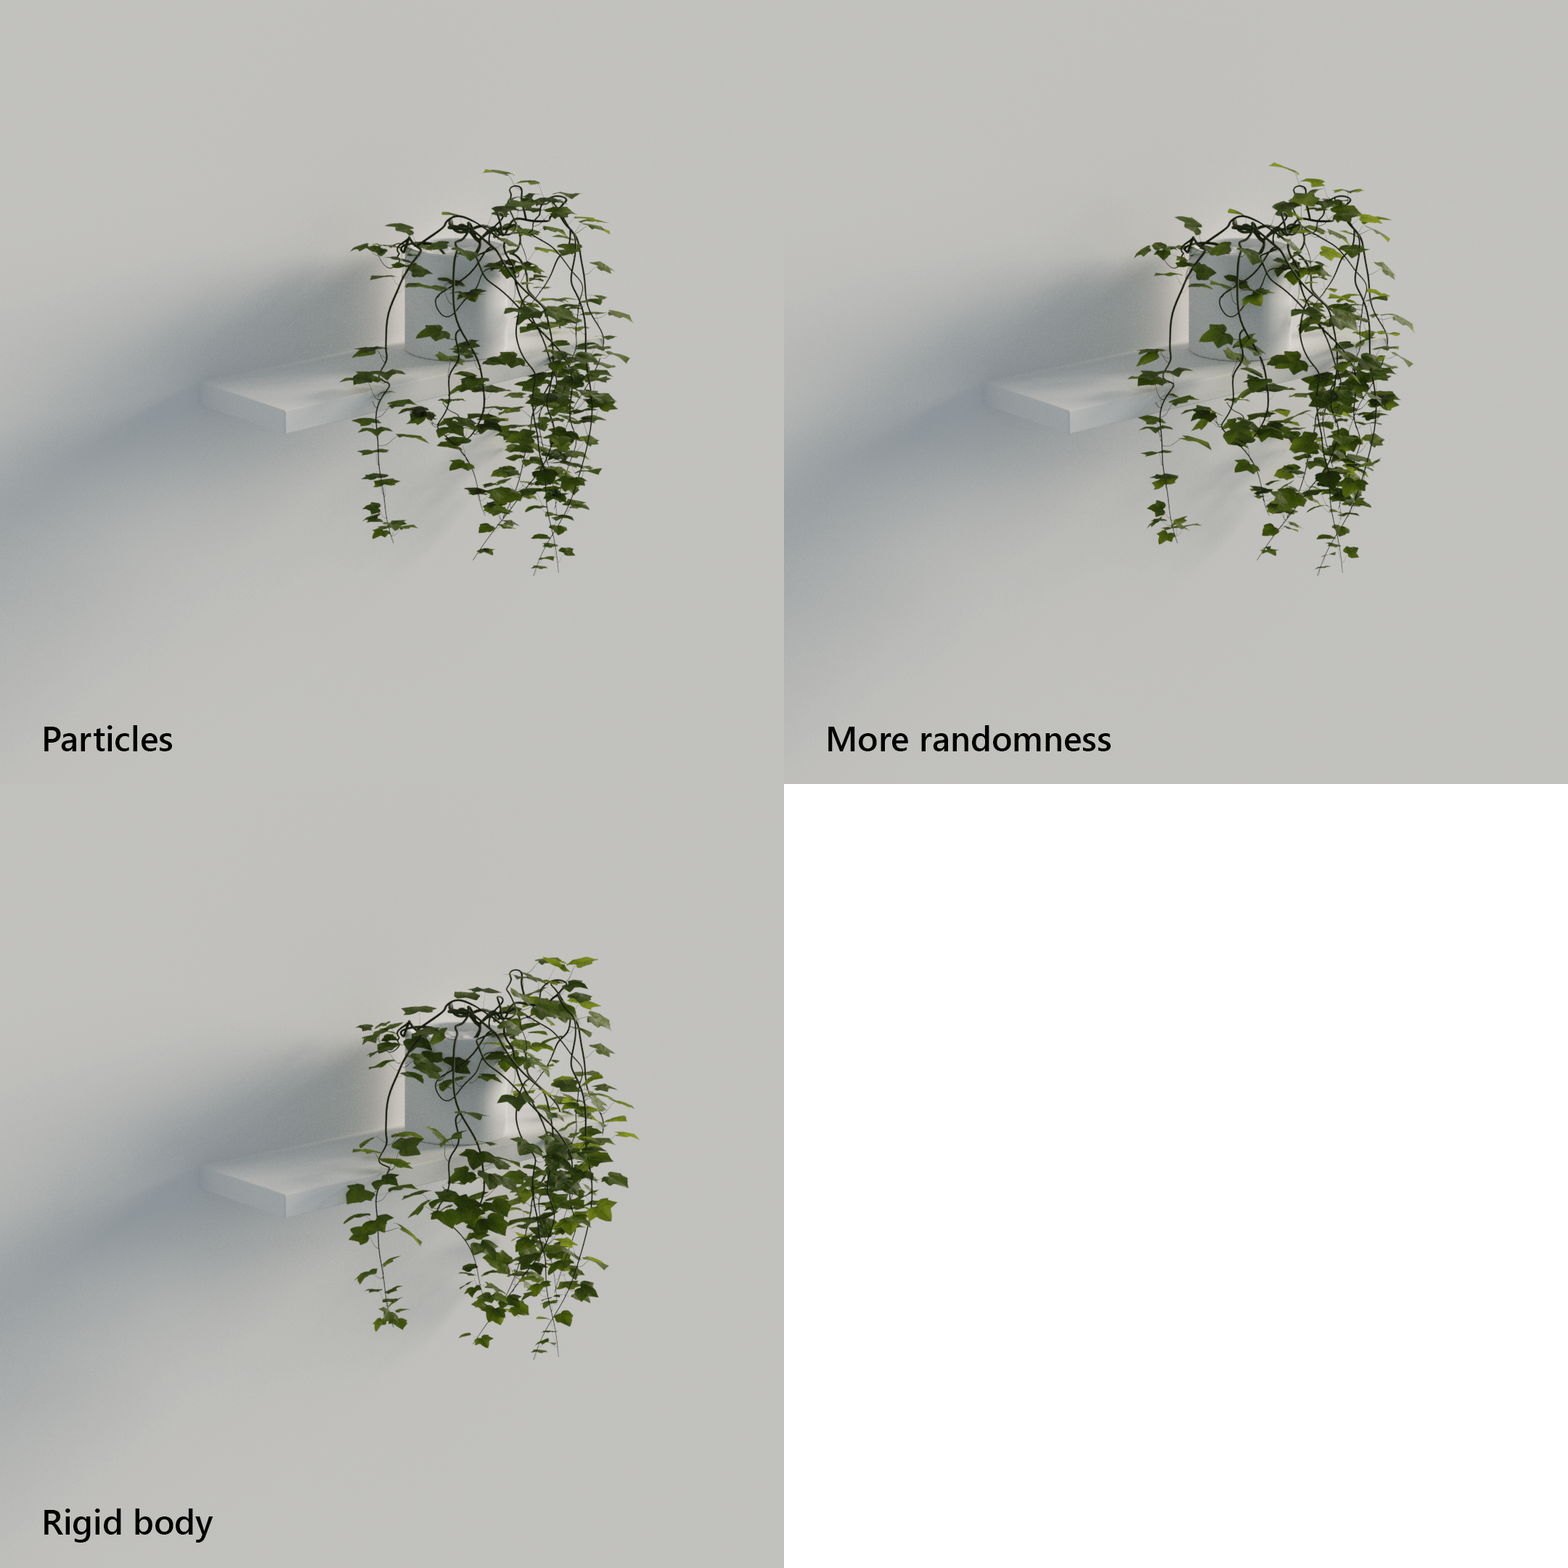
*There are the same amount of leaves. Without RB some leaves are hidden behind the wall.
Download ivies
Script
Follow along blend
Tips:
- Set suitable constraint angles
- Don’t forget to add passive RB to collision objects
- Use Mesh collision shape for concave objects (set appropriate sensitivity margin)
- Use vertex groups for particles density and length
- Particles rotation - global Z, normal, normal-tangent
Credits:
Ragdoll in Blender
Scripting for artists
IvyGen, Sapling Tree Gen addons
textures.com
Blender v2.90.2, v2.83.17
Wicker basket
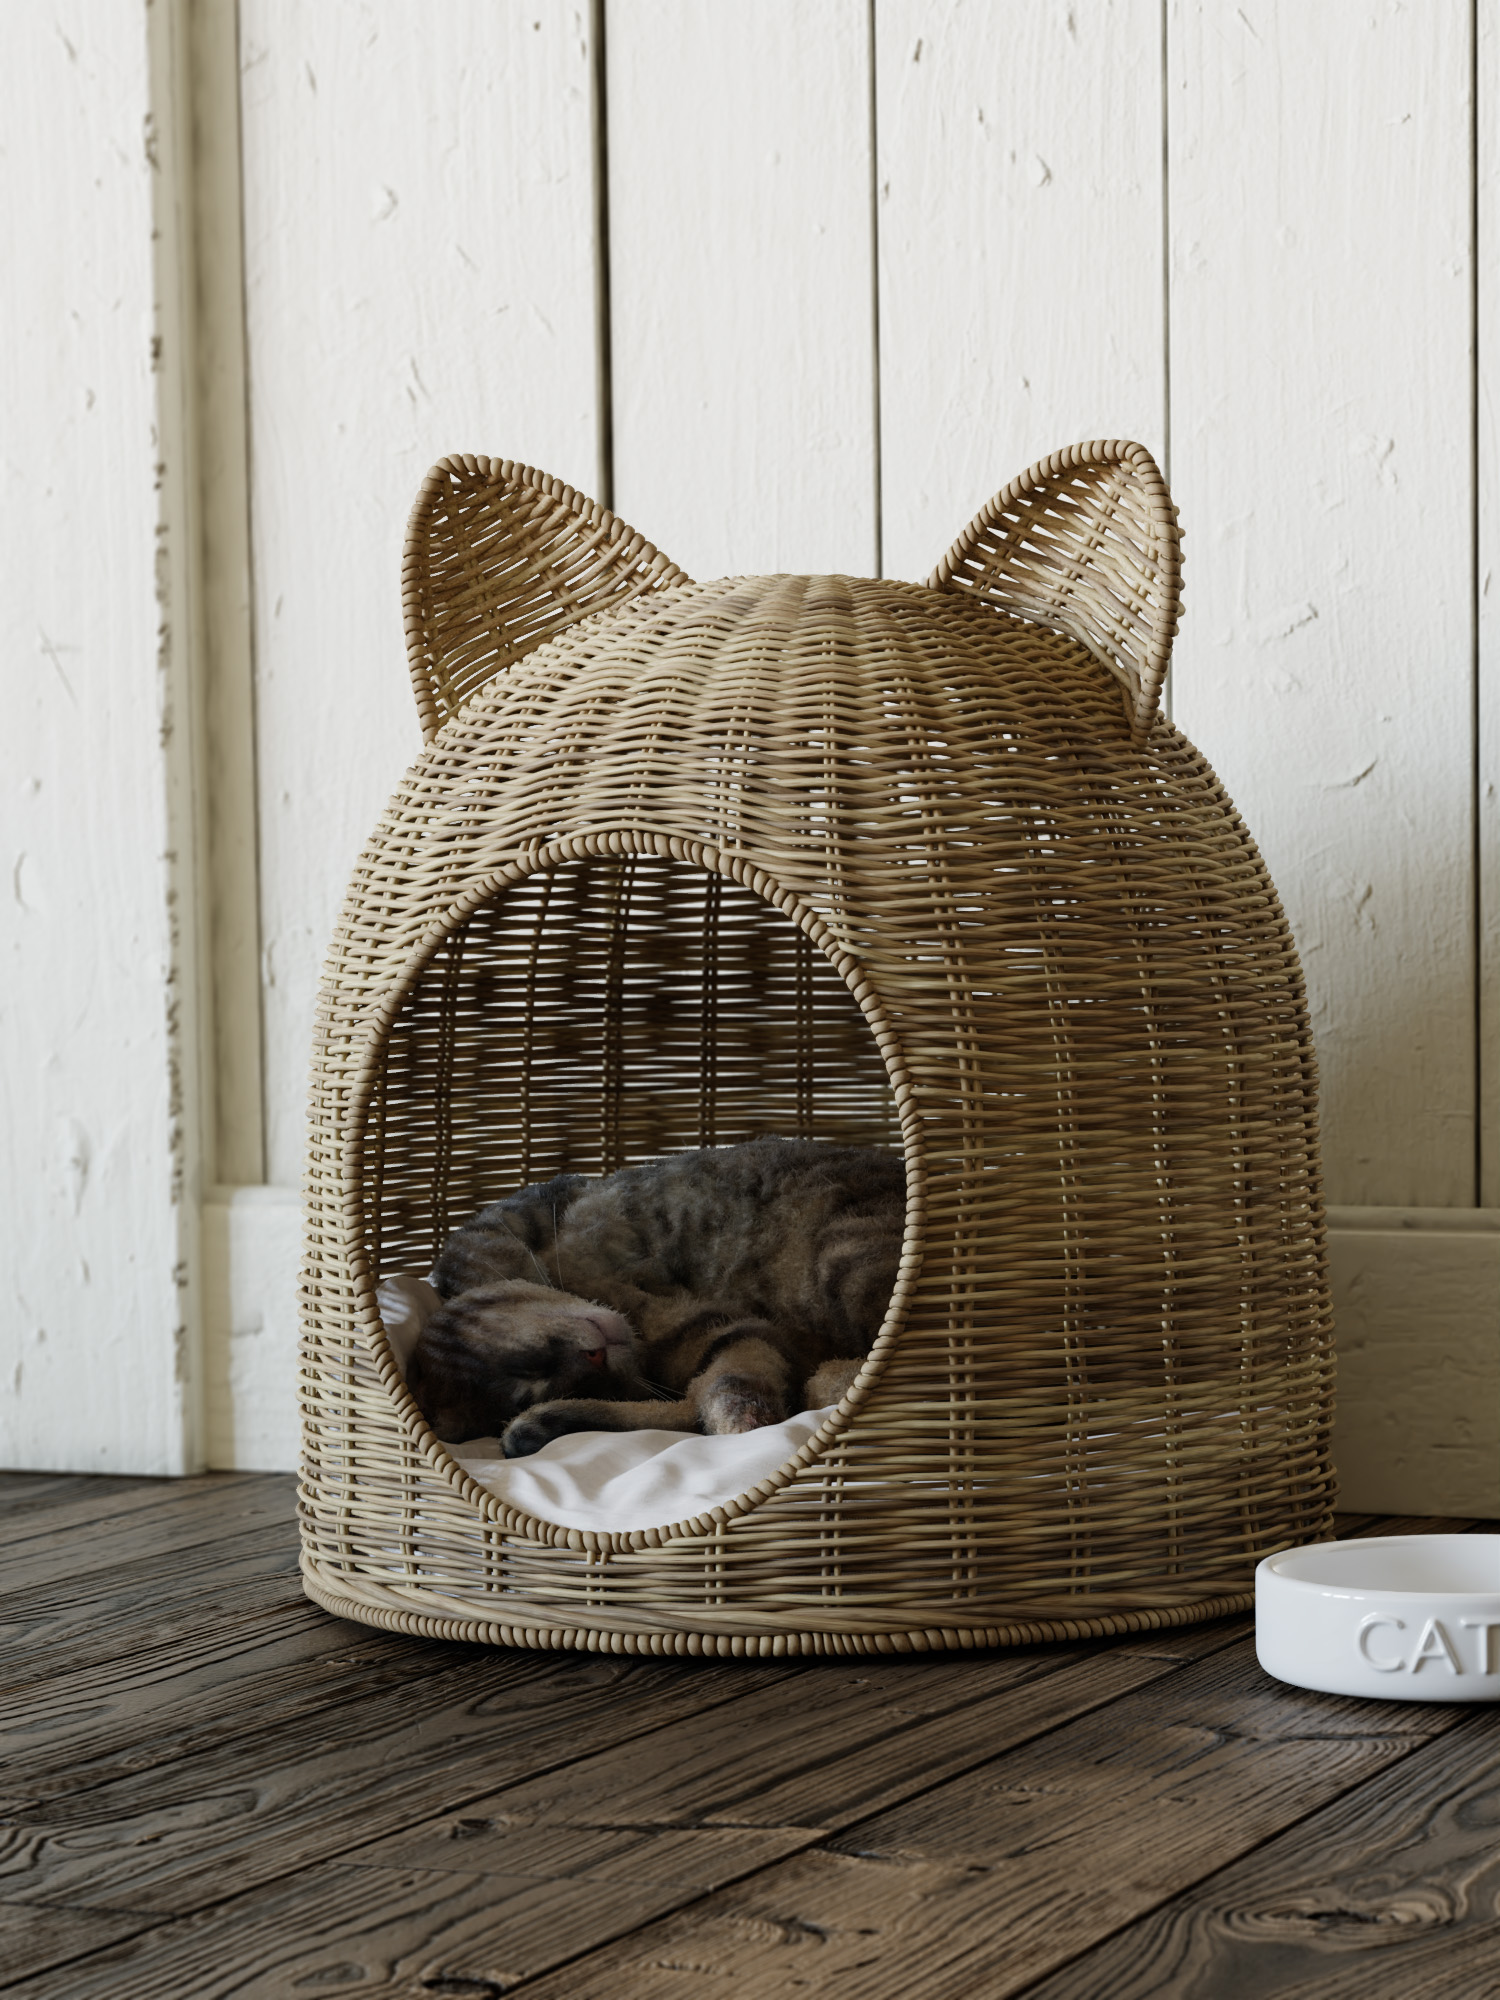
Download cat house basket
Follow along blend
Technique:
1 Prepare shape
Use mirror modifier if shape allows (check flip U/V if needed)
2 Unwrap
UV Squares addon (clear tesselation direction).
If the surface is pretty curved, use maximally simplified pattern for tesselation.
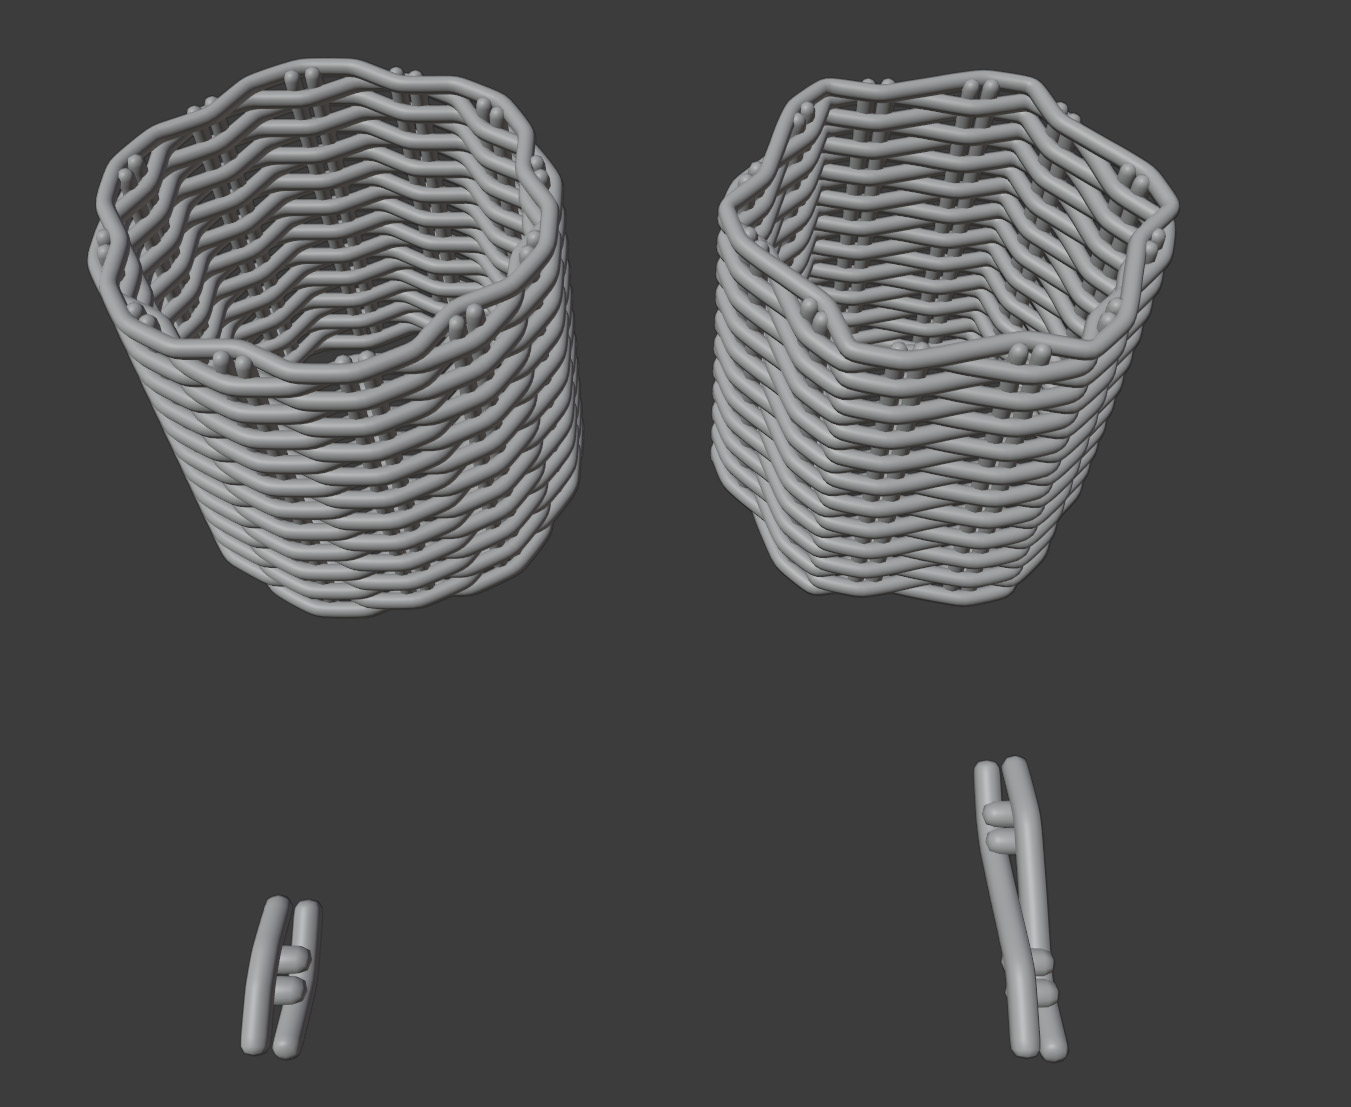
In this case, in UV map every second row is rotated by 180.
3 Tesselate
Set Active UV for rotation, check use modifiers for the shape if needed.
4 Edit tesselation
Select all and merge by distance
If planning to use skin modifier - skin root mark and set mean radius x, y, skin modifier with smooth shading, subdivision modifier
5 Finish/fix tesselation manually
6 Add randomness
Mesh deform object - make sure all the tesselation mesh is included, add shape keys (add triangulate modifier if mesh deform effect is not visible)
Randomize radius
Skin modifier vs curve:
UV textures are available for curves; for mesh with skin modifier - if applied.
With mesh it is pretty useful to slide vertices when modeling.
Surface deform modifier can be used for mesh, for curve - only mesh deform.
(when using curve - close tips)
Credits:
Reference - Lovely Kitten Cat House by Rivièra Maison
Sleeping cat
Addons - Tissue, UV Squares, LoopTools.
Tissue addon for wicker basket
Curves for weave
Surface deform for final shaping
Blender 2.90.0 Alpha, 2.83.1
While making macrame I’ve stumbled upon texture stretching/squeezing problem when converting curves to mesh. Cleaning up manually takes just too much time.
So here’s my current solution (stretching/squeezing is still there, but way less noticeable):
- Select a face, U->Reset
- Select linked Ctrl+L, Follow active quads - Length average
- Fix UV proportions - find length of the adjacent edges of initial selected face. Rescale UV island accordingly (knowing that face was reset to 1x1)
- Repeat for all islands…
Here’s the script, that makes this in one click. It is not optimized and pretty messy, but it gets the job done.
And yeah, having texture on macrame isn’t really useful. But, well… scripting is fun🙂
Huge thanks to @helluvamesh. His post is in core of this method.


Geometry Nodes Puzzle
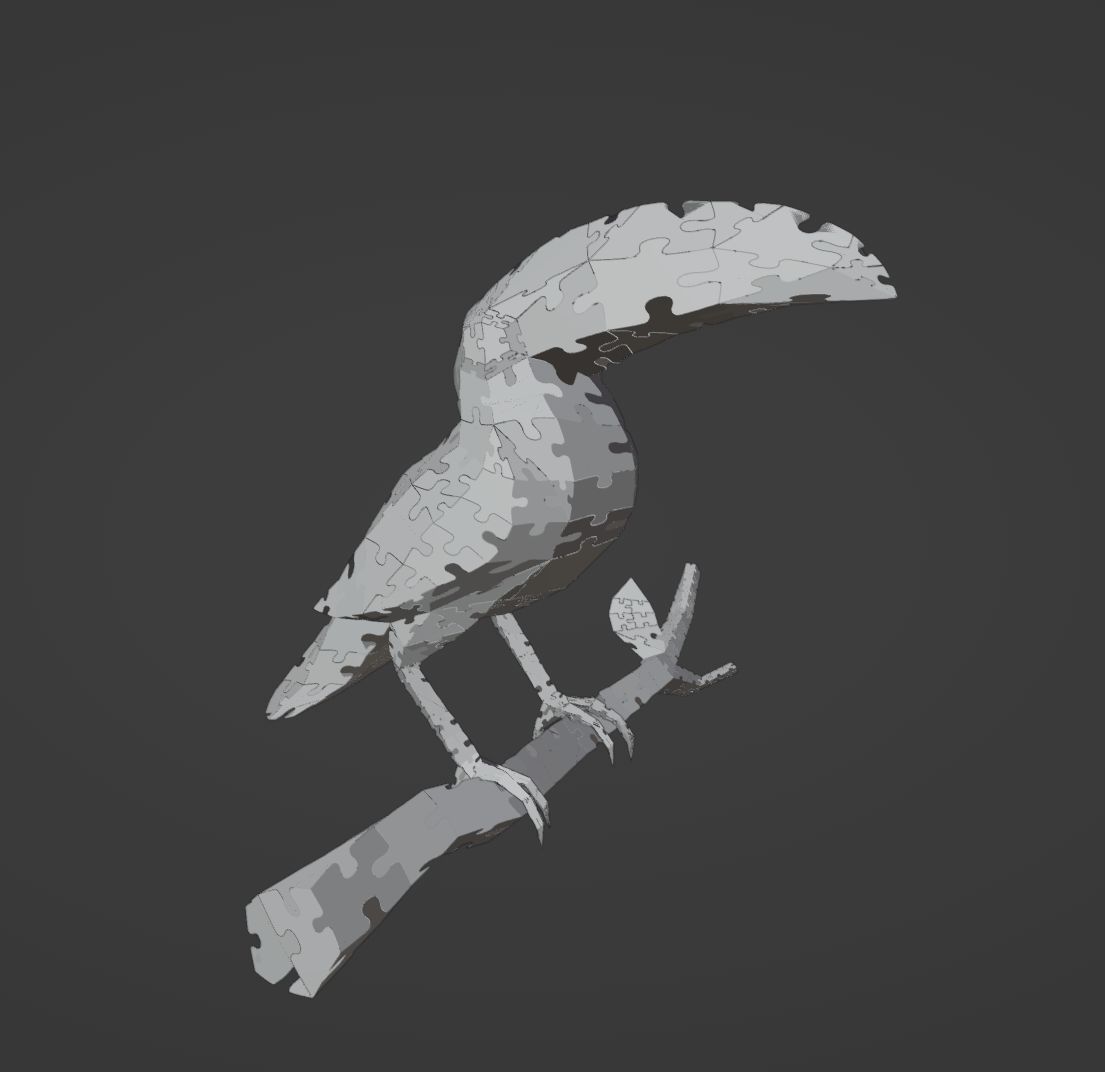
Video
GN_puzzle_v2.blend (1.4 MB)
Still can’t figure out how to make faces in GN.
Current geometry doesn’t look good and requires too much of manual clean up. But overall effect is pretty pleasing.
Inspired by this post.
“Low-poly Toucan” (https://skfb.ly/ZwDI) by Christie McCown.
Do you plan to push it further, some texture aaaaaand little animation. This can be very interesting.
PS. how many pieces have this puzzle 
For now I’m waiting for more nodes or some knowledge on how faces can be done.
I wanted to bake texture on it, but current ngons aren’t good for this and cleaning up takes too much time. 638 pieces  It would also be cool to print this kind of stuff.
Yah… Imagine real 3D puzzle with ‘just’ 638 pieces. Hah, this can be printed and cut in real world ( no idea how this can cost ). But will be interesting to assemble this, for sure.
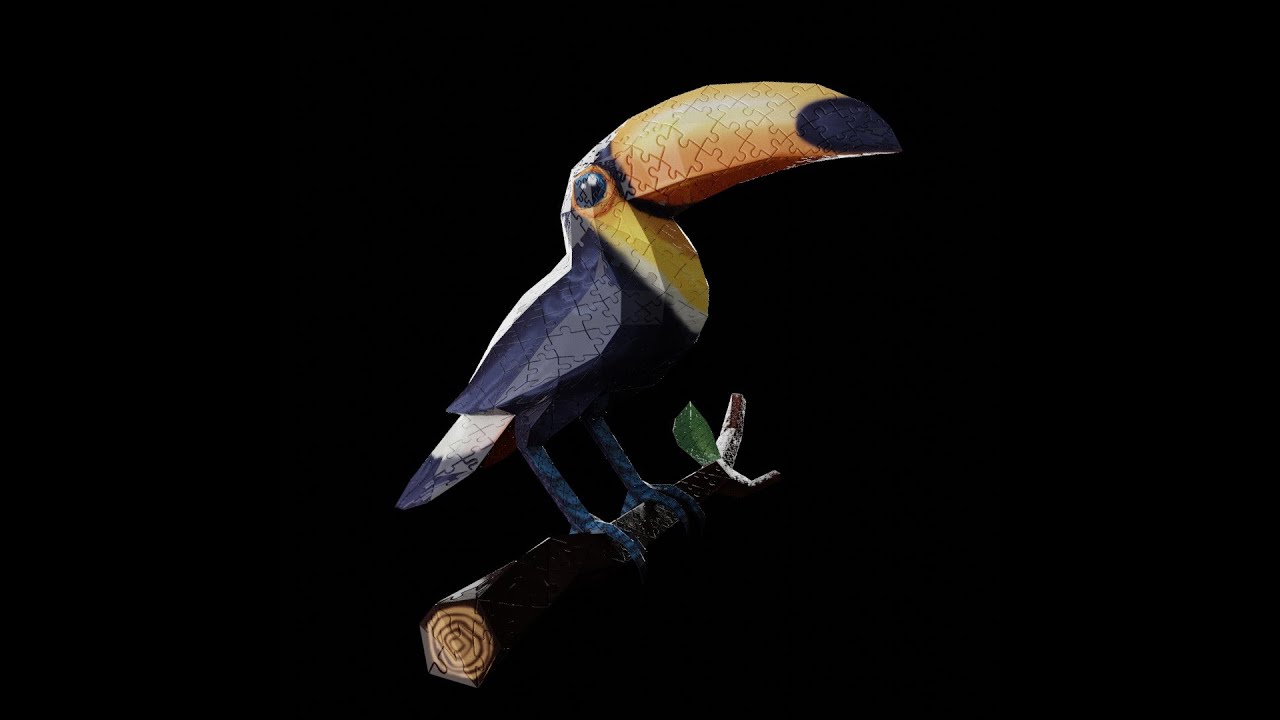
After seing this 3D puzzle I’ve decided to give it another try.
Still not automatic, but it was worth it.
Ha, ha… this is it. 
I’m a simple man, I see cats. I like.
These are some grate tuts man. 
Somewhere among pinned macrame images I have this pretty umbrella.
I was reminded of it a year ago and started planning how to approach modeling it, but having no free time was unable to pursue it further.
This model is based on Todo Bien design.
Starting from crocheting a smaller version to visualize knots.

Spirals were made with GN and connected in faces became base for tessellation.
I used Tesselate Mesh by @higgsas which is the best tessellation tool I’ve used. It allows to set different component per face. Components can be rotated, flipped, scaled and mirrored. The only thing I regret is not utilizing its merge function. So I made vertex groups for vertices that needs to be connected and merged them one by one.
Animation is made with Surface Deform + Cloth for main part and Soft Body for threads.
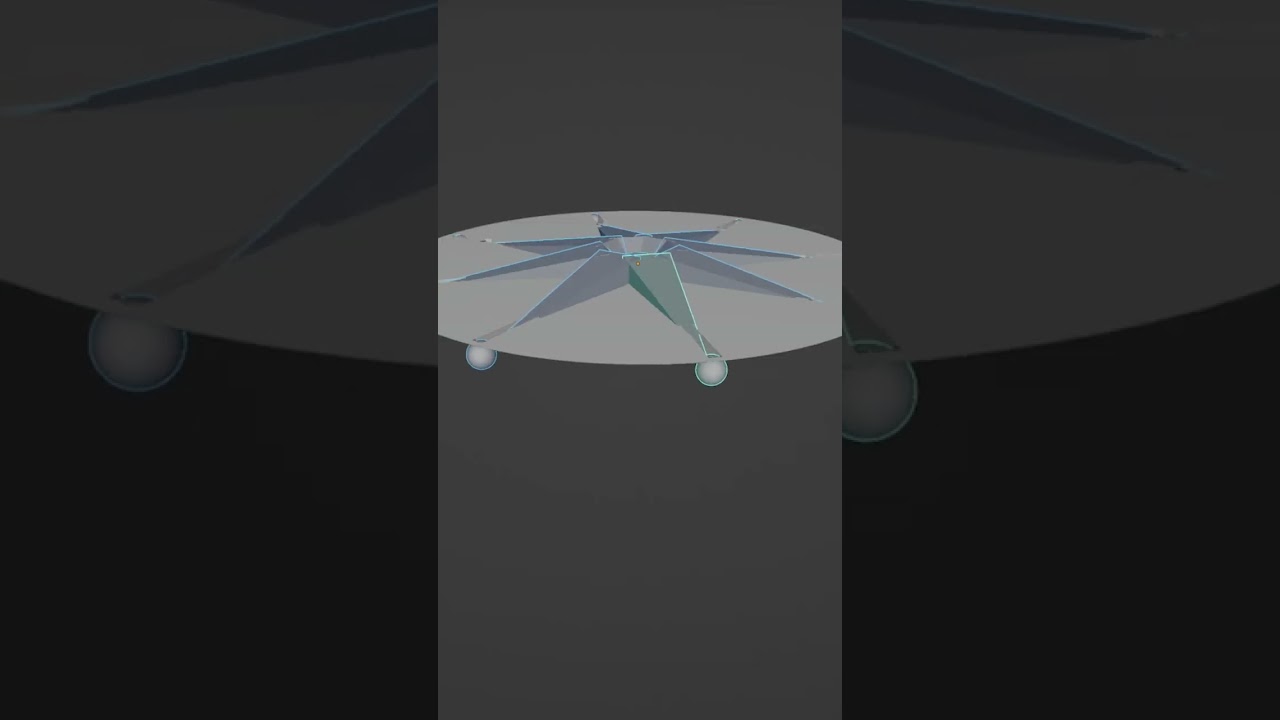
I animated palm from 3D Shaker (Surface Deform + Cloth > mdd > Cloth).
Waves are combination of Flip Fluids with GN waves by Cartesian Caramel.
I used wall by makeitmovemedia from Sketchfab, lounger by jhon maycon and stool by Ricardo Soares from BlenderKit.
HDRI from Poly Haven.
Music by tubbers and turbostream from freesound.
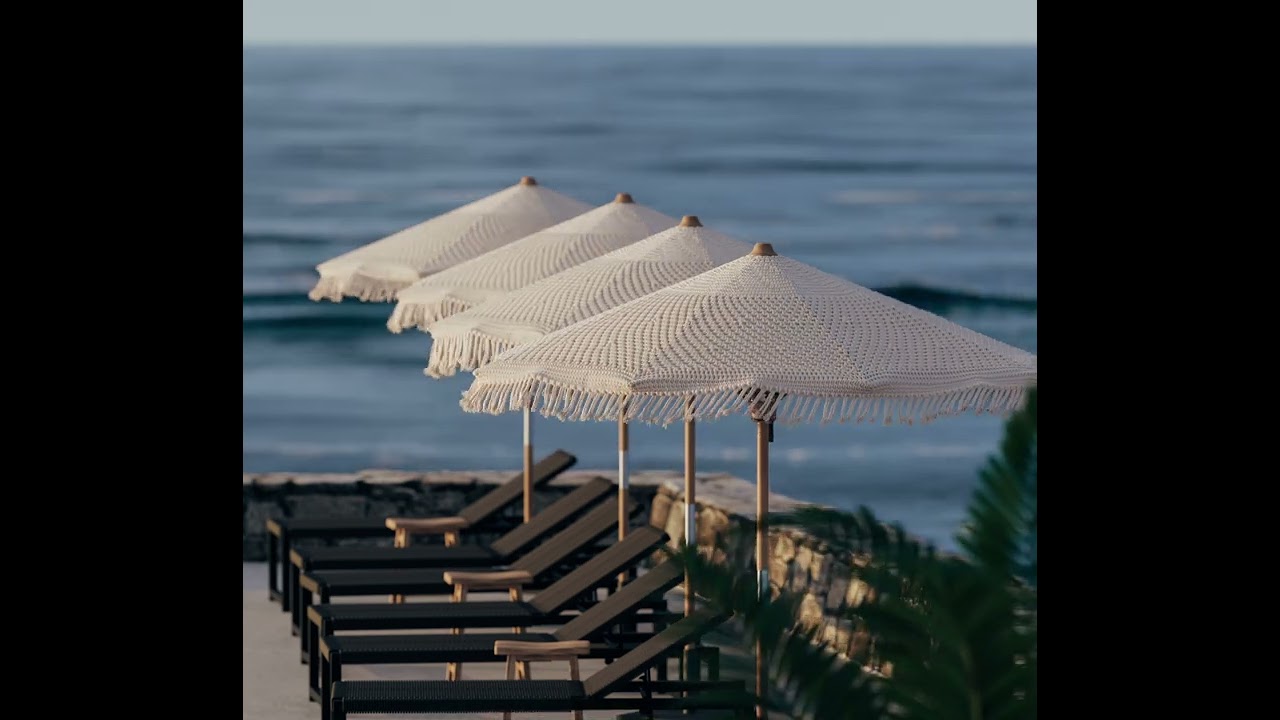
This model is intended to be a part of bigger project I hope I’ll be able to finish someday.
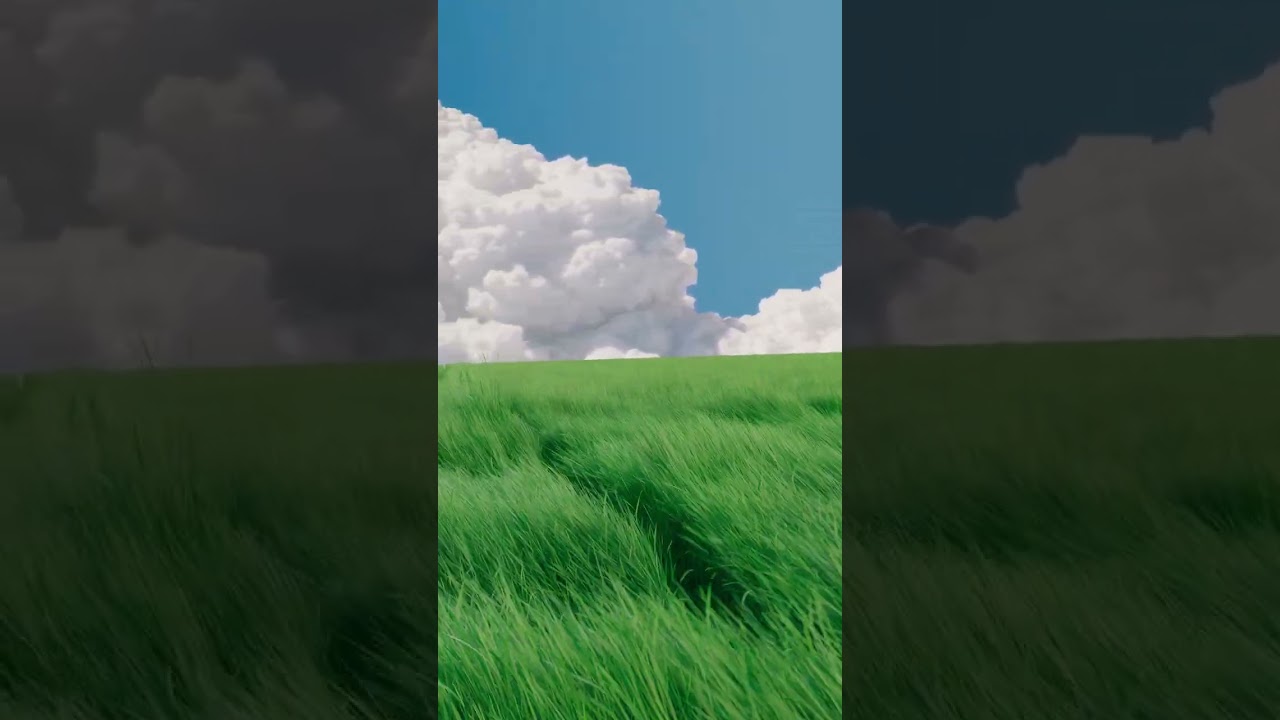
Trying to lighten animation for INS Grass addon.
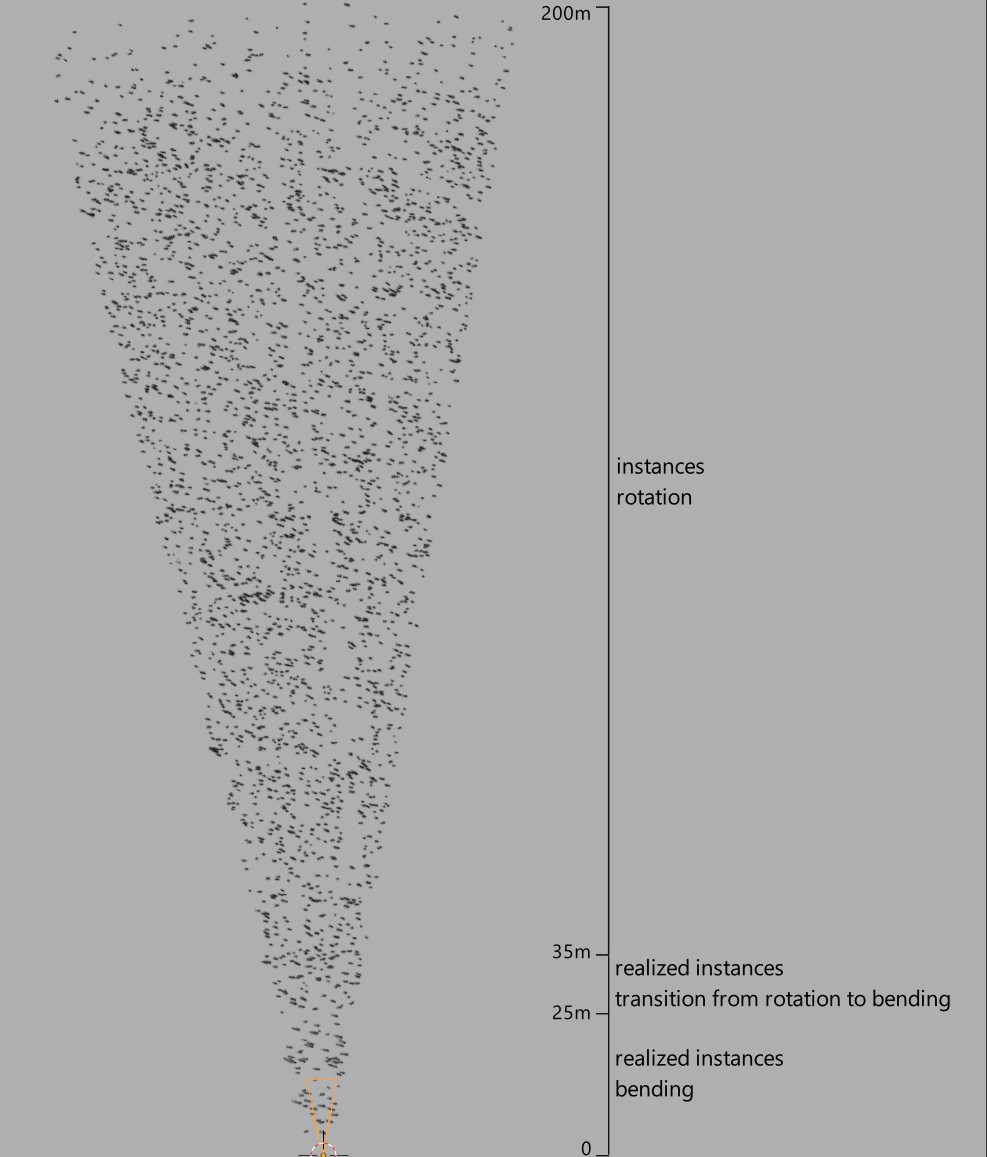
Foreground consists of realized instances with bending animated.
Background has instances with rotation animated.
To avoid snapping between two states there is transition distance to blend between bending and rotation.
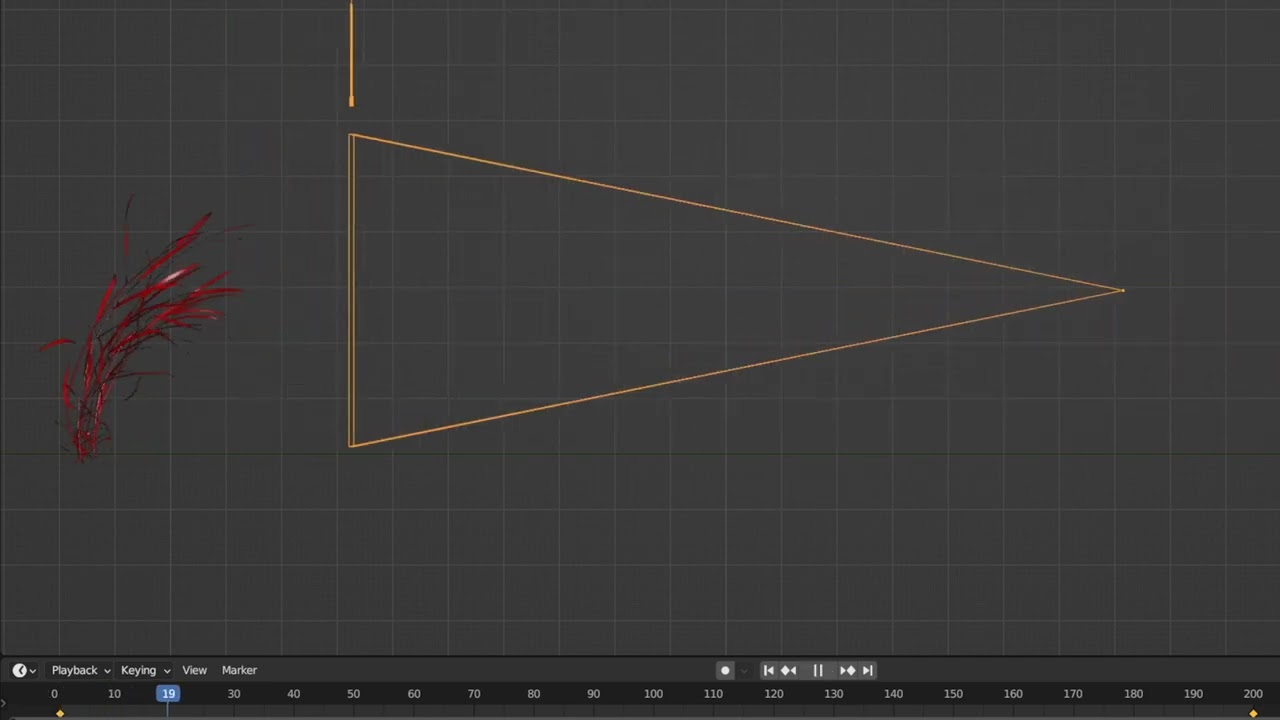
Grass is mix of Tall grass and modified Miscanthus Sinensis Zebrinus by Marcin Malcherek (part of INS Grass + Ornamental Grass Pack)
Cloud from Walt Disney Animation Studios, cloud material by Samuel Krug VFX
HDRI from Poly Haven
Sound by dobroide from freesound
Reference
Amazing work here! Keep it coming! 

I desided to test grass animation using latest INS Grass addition - barley.
Stems are animated using ragdoll technique. Based on generated splines high poly objects are deformed with GN-based system (similar to lattice). Soft body is used for leaves animation (which gave me the least bad result compared to cloth and ragdoll).
Hand is from MB Lab character with Meshroom photoscanned texture.
Camera uses hexanon lens - modified 80 mm lens by Jack Toth using Zircron45 tutorial.

Fixing bugs, improving performance…
I find progress visualization mesmerizing.
Batch file runs a python script on blend files - opens Blender, takes and saves screenshots of Geometry node area.
If you are not really good, then being cheap is your advantage. (sozap)

I’ve been working on a roof generator project for 4 months. Could it be done quicker - definitely, but I believe I’ve done my best at the time and I learned a lot thanks to it.
Here are some things I found helpful:
- Start node group name with . if you don’t want it to be shown in group list.
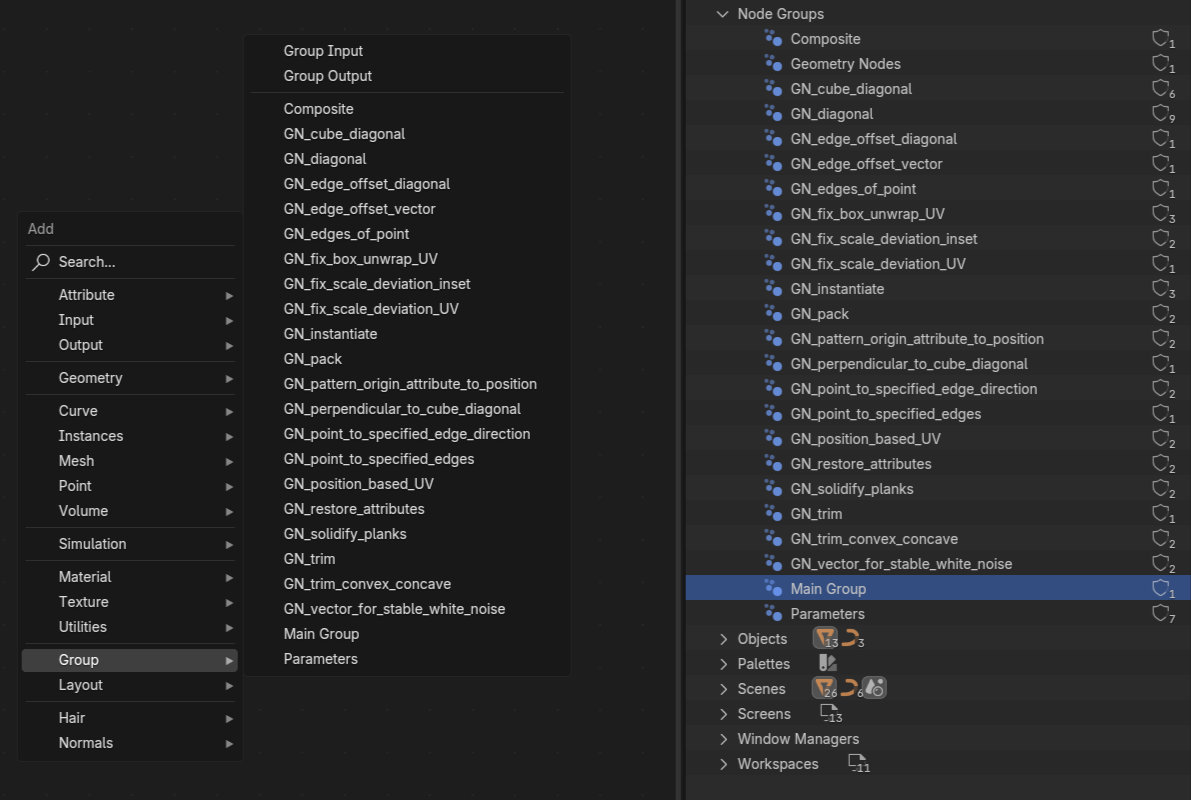

- Custom node color will help to navigate faster. I use custom colors for Group Input, Group Output, parameters, for nodes that have some arbitrary values, nodes that require attention and tests.
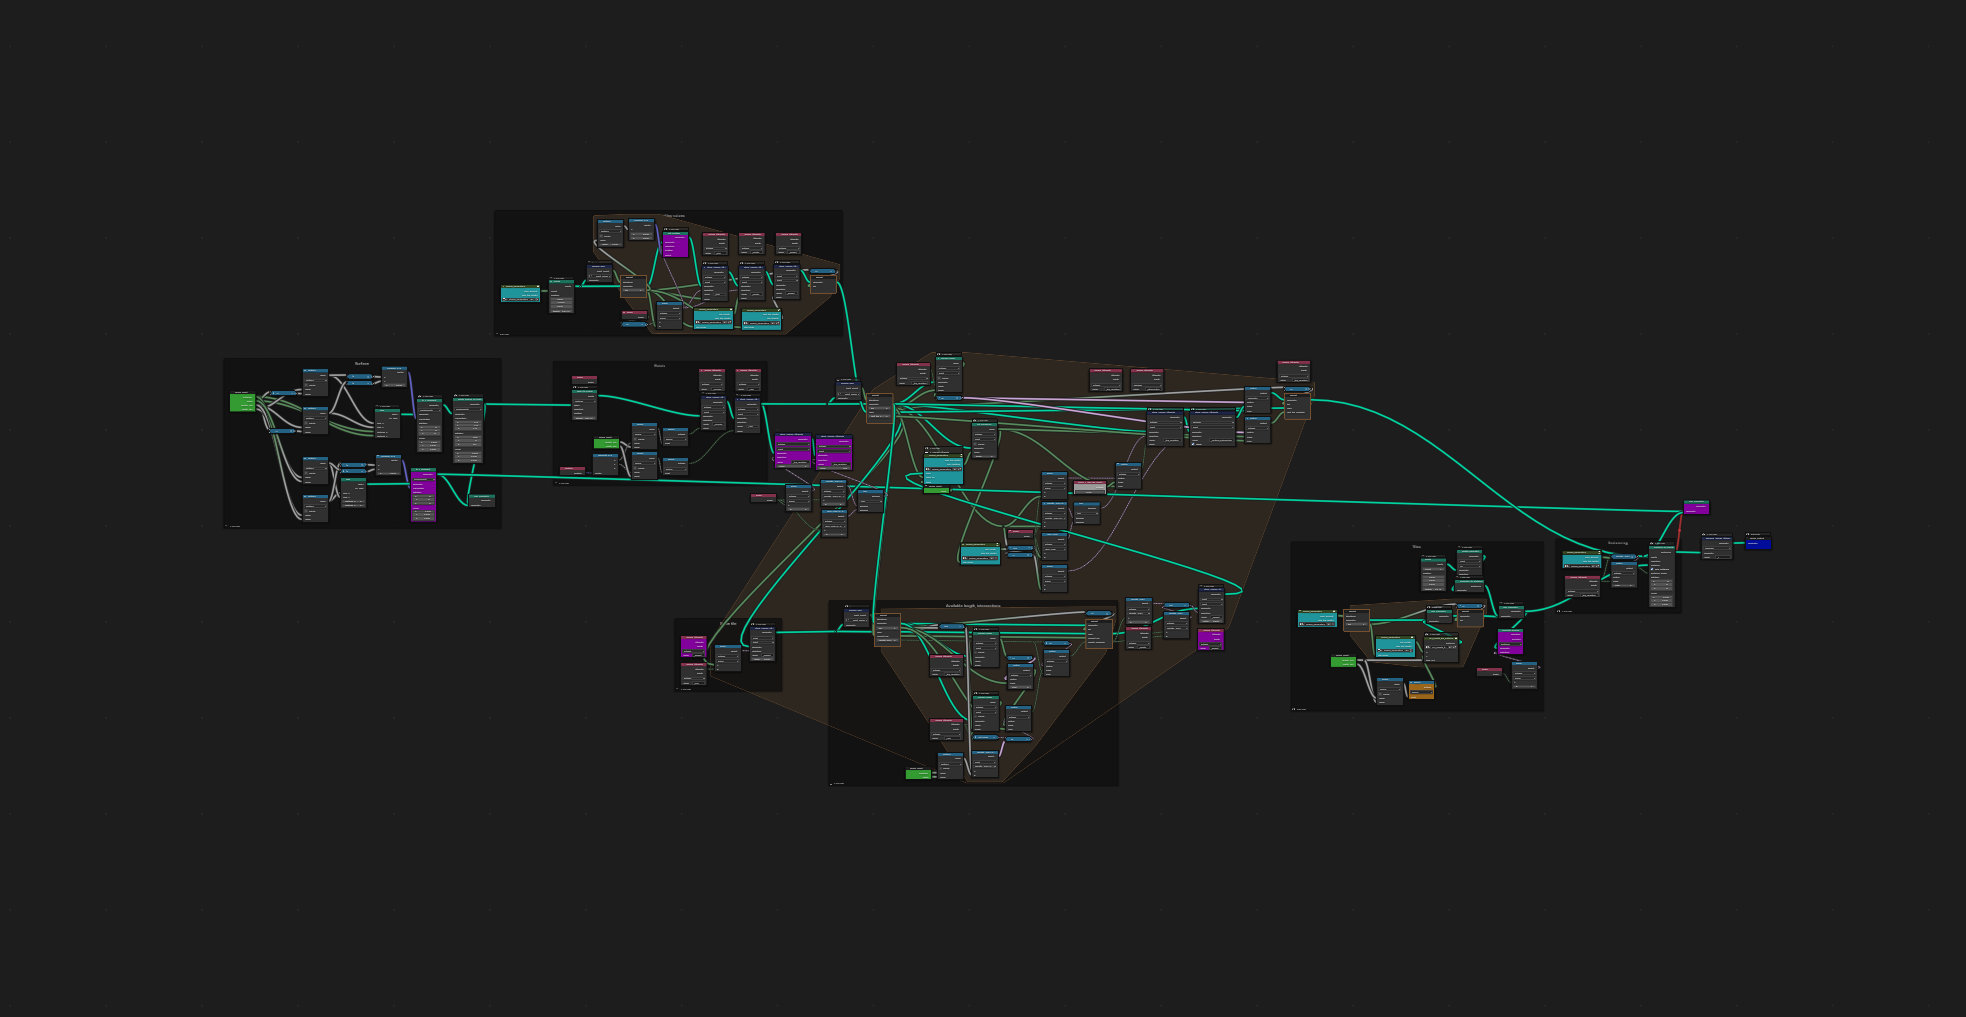
- Use _ at the beginning of attribute name if it won’t be needed in final geometry then Remove Named Attribute>Wildcard with _* to delete all intermediate attributes at once (something else can be used instead of _)

- Capture Attribute helps to iterate faster, Store Named Attribute keeps node tree clean.
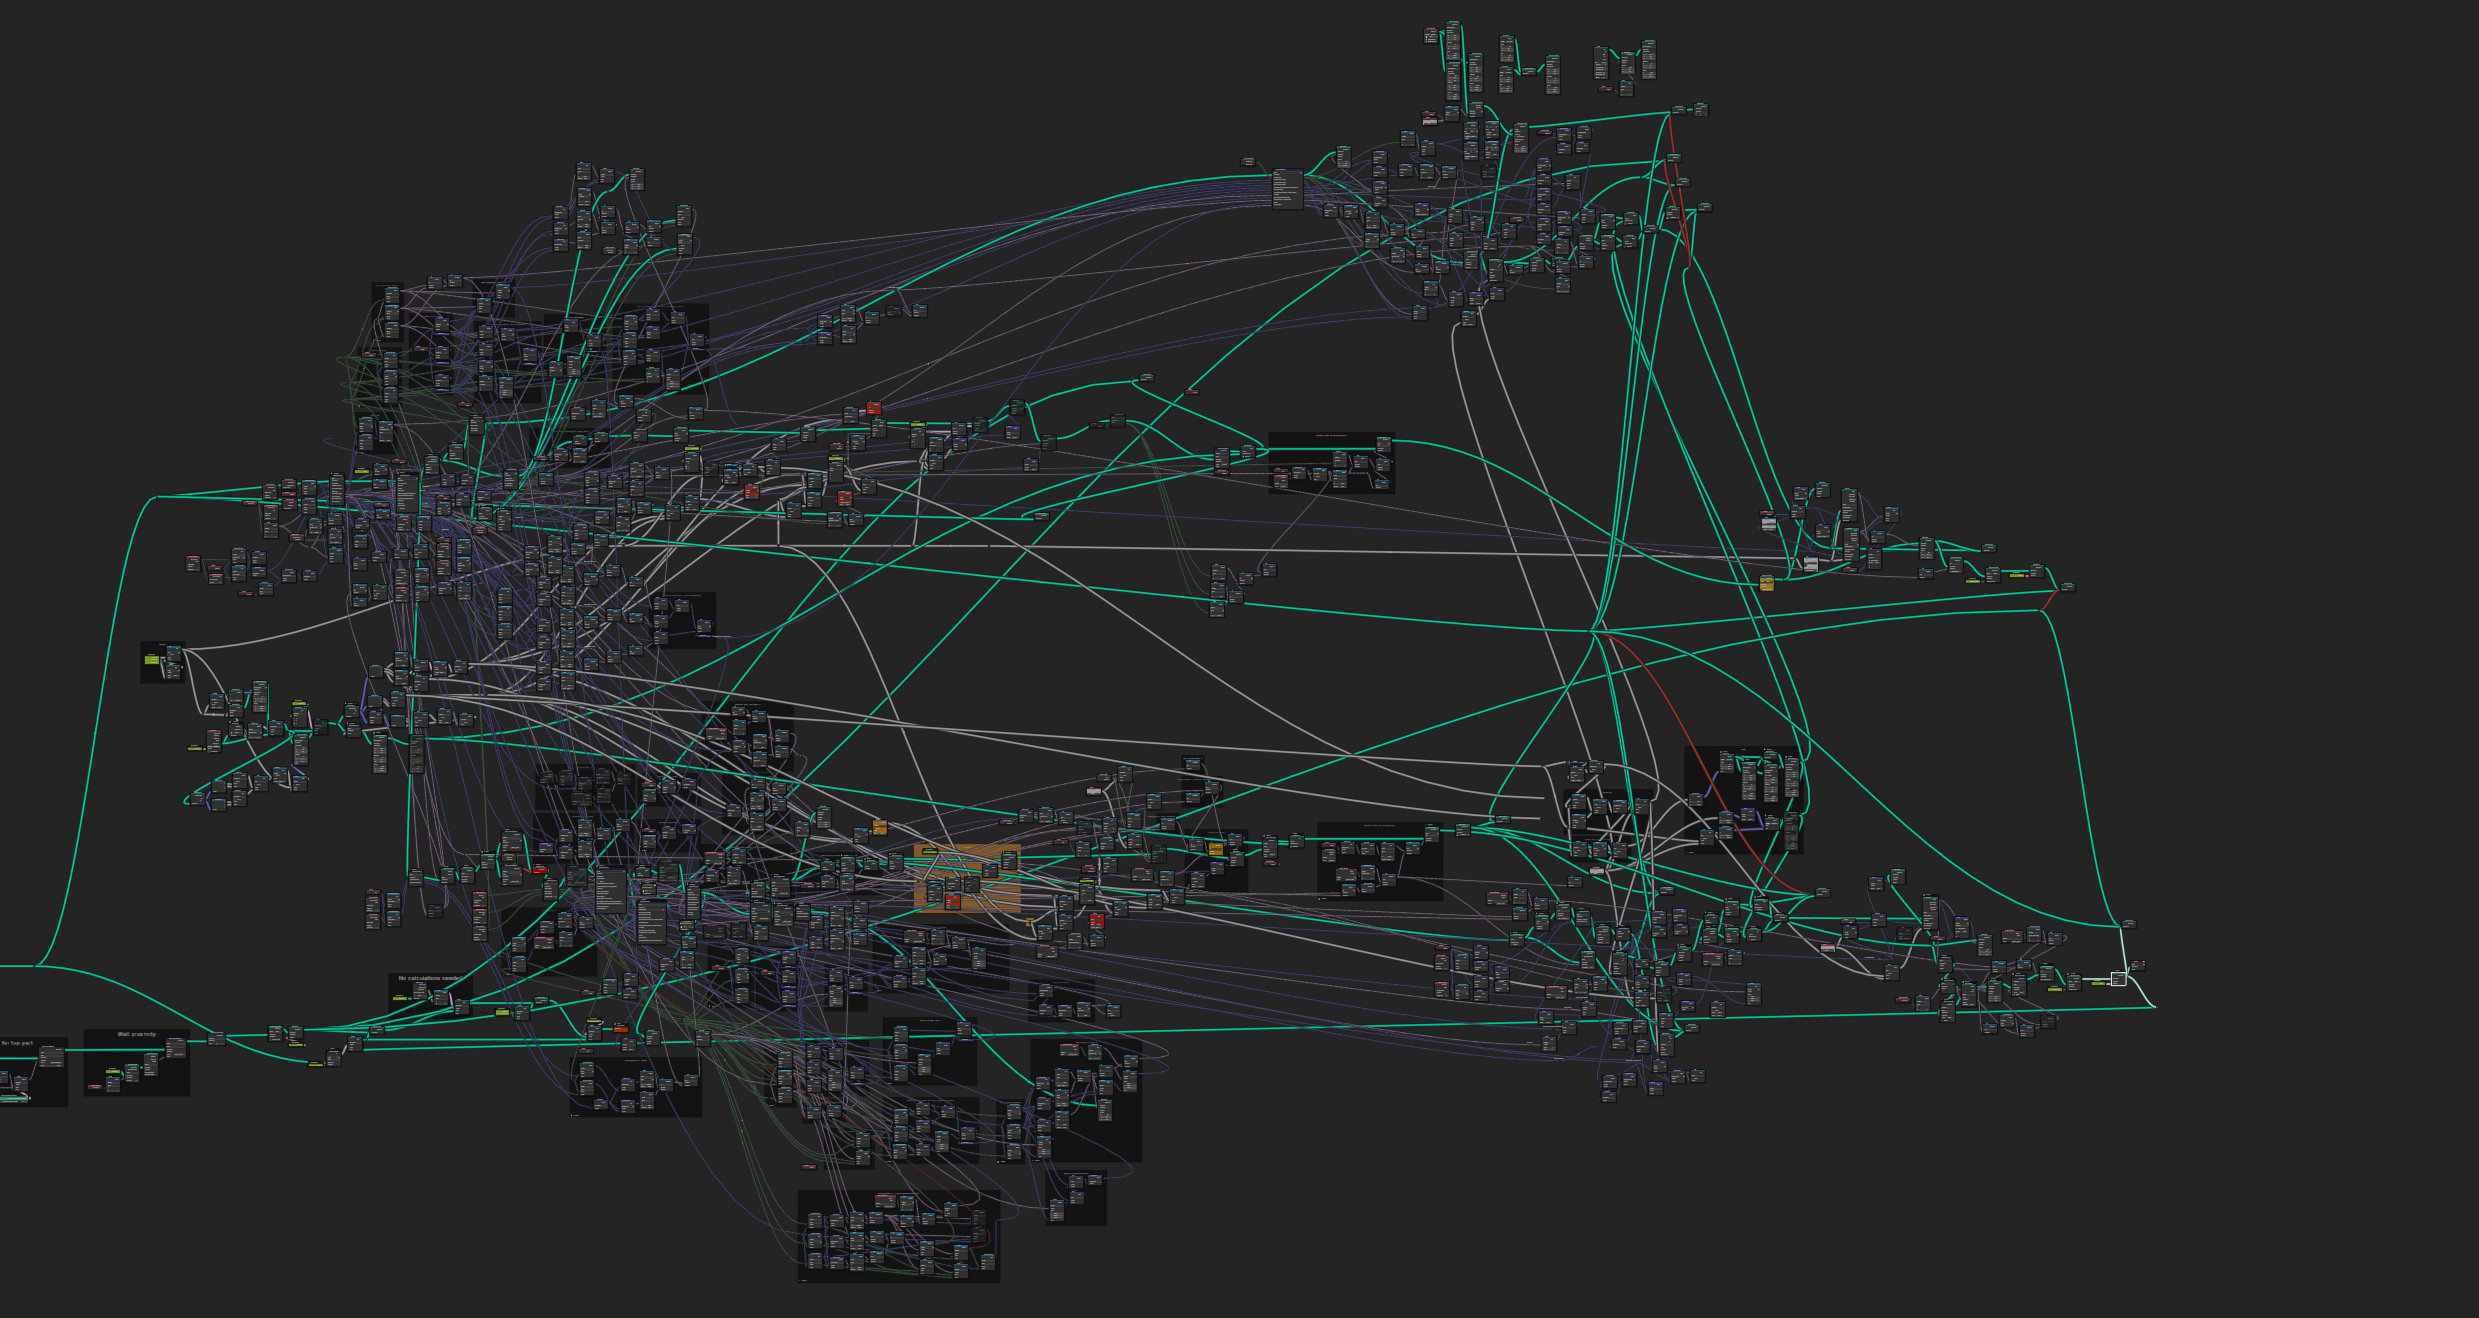

- Use Python
Summary
Find all Group Inputs with specific input:
node_group_name = "Tiles_roof_generator"
input_name = "Use UV"
node_tree = bpy.data.node_groups[node_group_name]
container_node = []
i = 0
for node in node_tree.nodes:
	if node.name.startswith("Group Input"):
		for output in node.outputs:
			if output.is_linked and output.name == input_name:
				print(i)
				i = i + 1
				container_node.append(node)

container_node[0].select = True
Rename attribute in Store Named Attribute and all Named Attribute nodes:
node_group_name = "Tiles_roof_generator"
name = "_random_scale"
new_name = "_random_scale_x"
node_tree = bpy.data.node_groups[node_group_name]
i = 0
for node in node_tree.nodes:
	if node.name.startswith("Named Attribute"):
		if node.inputs[0].default_value == name:
			print(i)
			i = i + 1
			node.inputs[0].default_value = new_name
	if node.name.startswith("Store Named Attribute"):
		if node.inputs[2].default_value == name:
			print(i)
			i = i + 1
			node.inputs[2].default_value = new_name
Change Repeat Zone inspection index while having some other node active:
node_group_name = "Tiles_roof_generator"
repeat_zone_node_name = "Repeat Output"
bpy.data.node_groups[node_group_name].nodes[repeat_zone_node_name].inspection_index = 11
-
Learn and use matrices - will save you the headache of manipulating vectors manually (I can’t thank stray enough for recommending this book)
-
Rotation tips from Book of Rotation by Andrea Ciani
-
Combine Transform/Transform Geometry applies Scale first then Rotation and lastly Translation.
-
Trim Curve interpolates attributes (in some cases Set Position can be used to trim curve and preserve attributes)
-
UV Unwrap node implicitly performs a pack islands operation (no need to use Pack UV Islands node). Better yet make UV yourself - more precision and faster to calculate.
-
Beware of Float To Integer (sometimes Floor(3.0)=2.0 or Ceil(2.0)=3.0)
-
Try not to overcomplicate things
Summary
This image by dinghuart is a perfect depiction of how I felt at moments during this project
That’s great @eelh !! First those nodetree timelapse are truly amazing and those tips and tricks are super cool either !
This reminds me that I wanted to start a thread about general node tree management so we can share organisational tricks as it’s so helpful in bigger projects !
That looks very promising, can’t wait to see the whole system, and making clean border is pretty painful indeed !
Hum, indeed it’s typical geometry node body language !
I don’t see why that sentence from me is quoted here but at least thanks to that I could stumble upon your sketchbook , it’s definitely worth looking !
Keep up the good work !
That would be awesome! 
I should’ve been more clear - you can restore instance attributes, other domains can be way harder or even impossible.
And Fill holes options I have is not 100% there yet.
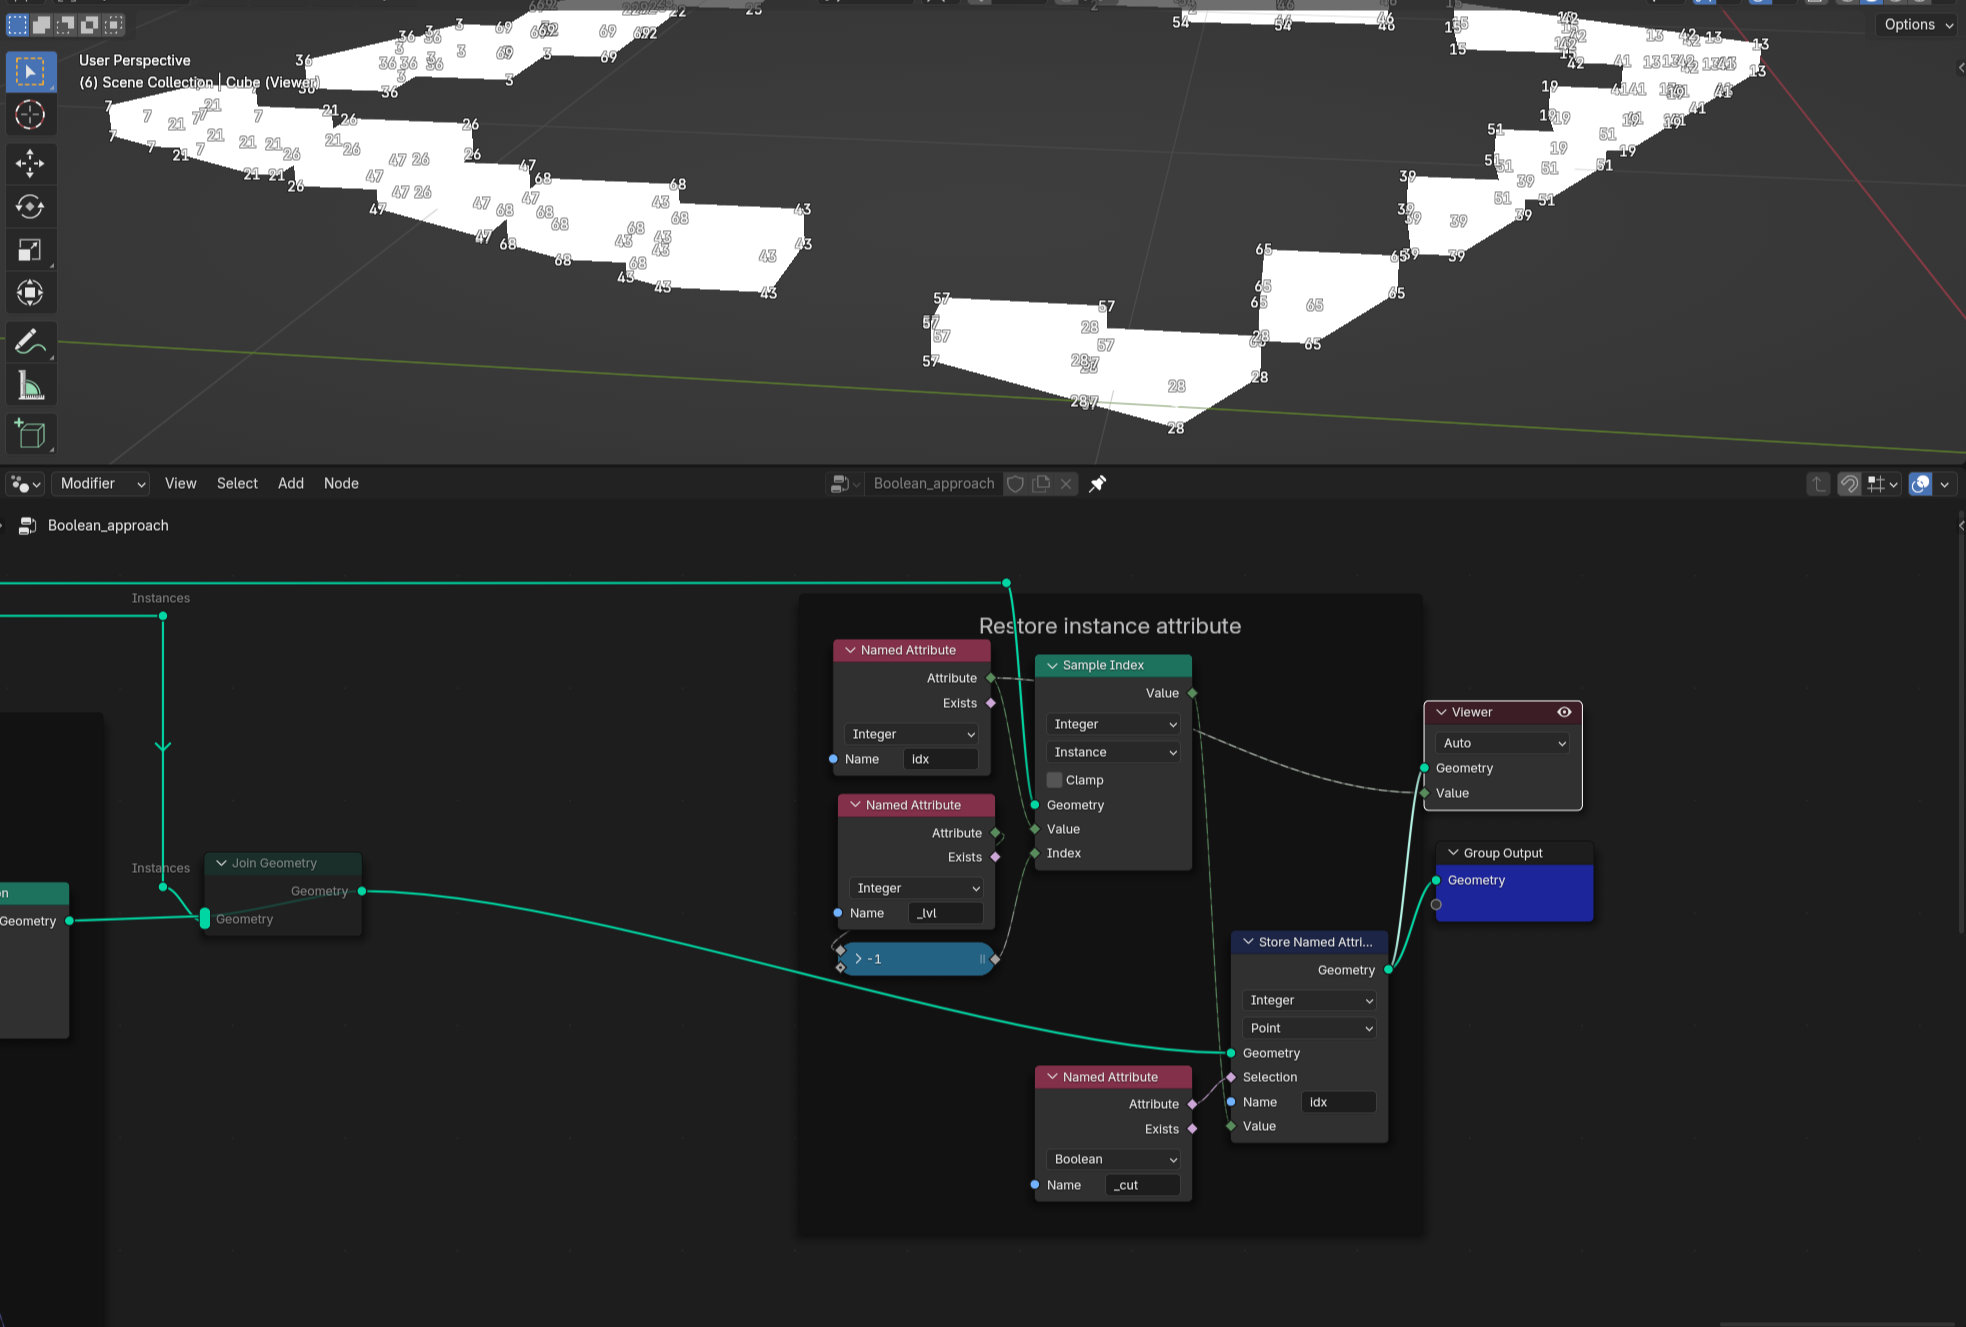
Here’s the gist of it:
File
Summary
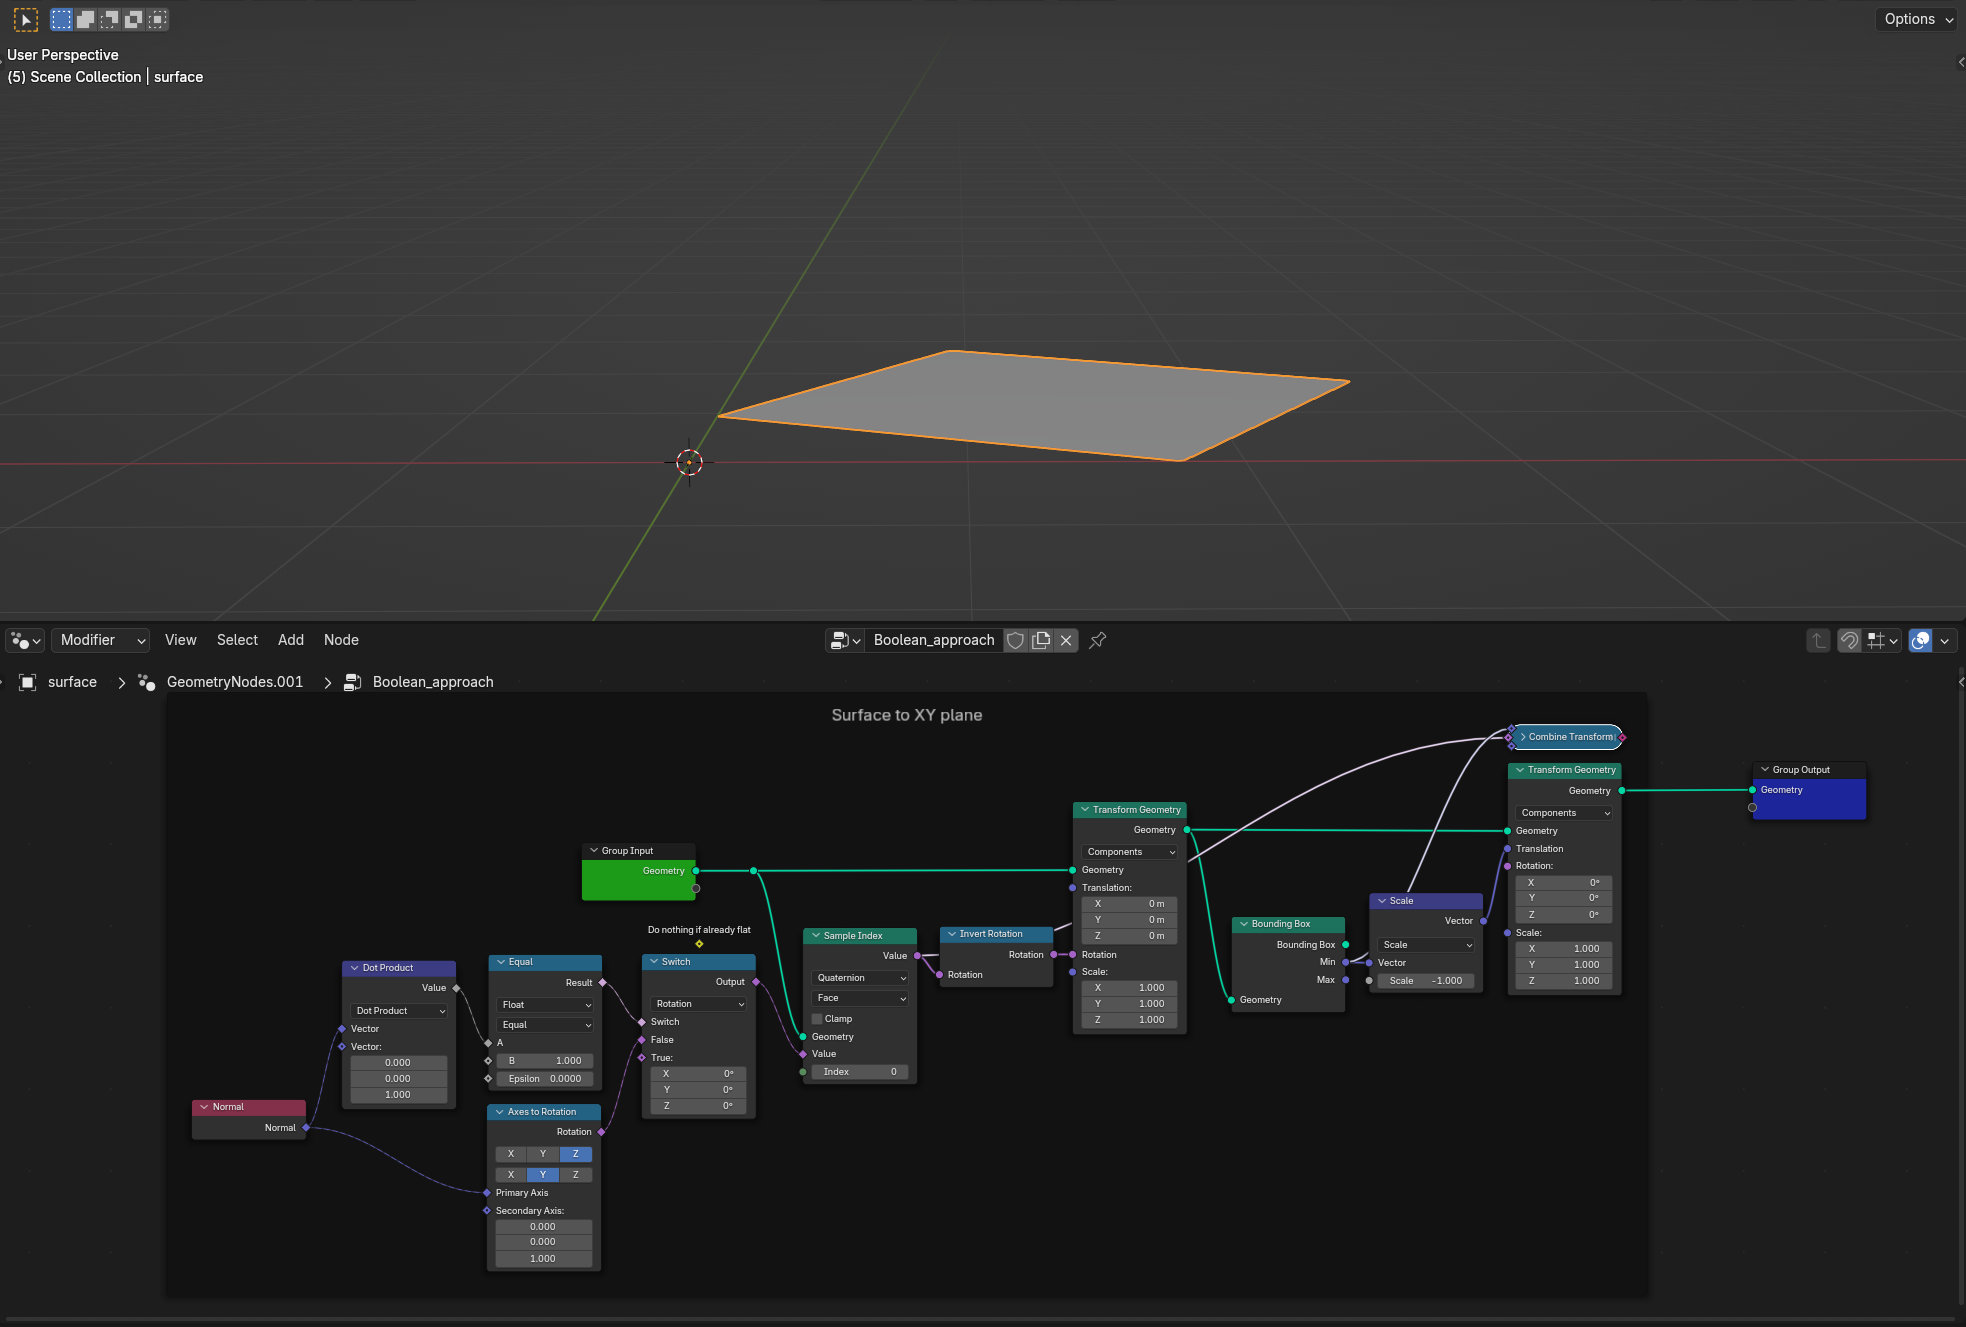
The prerequisite is having distribution surface on XY plane.

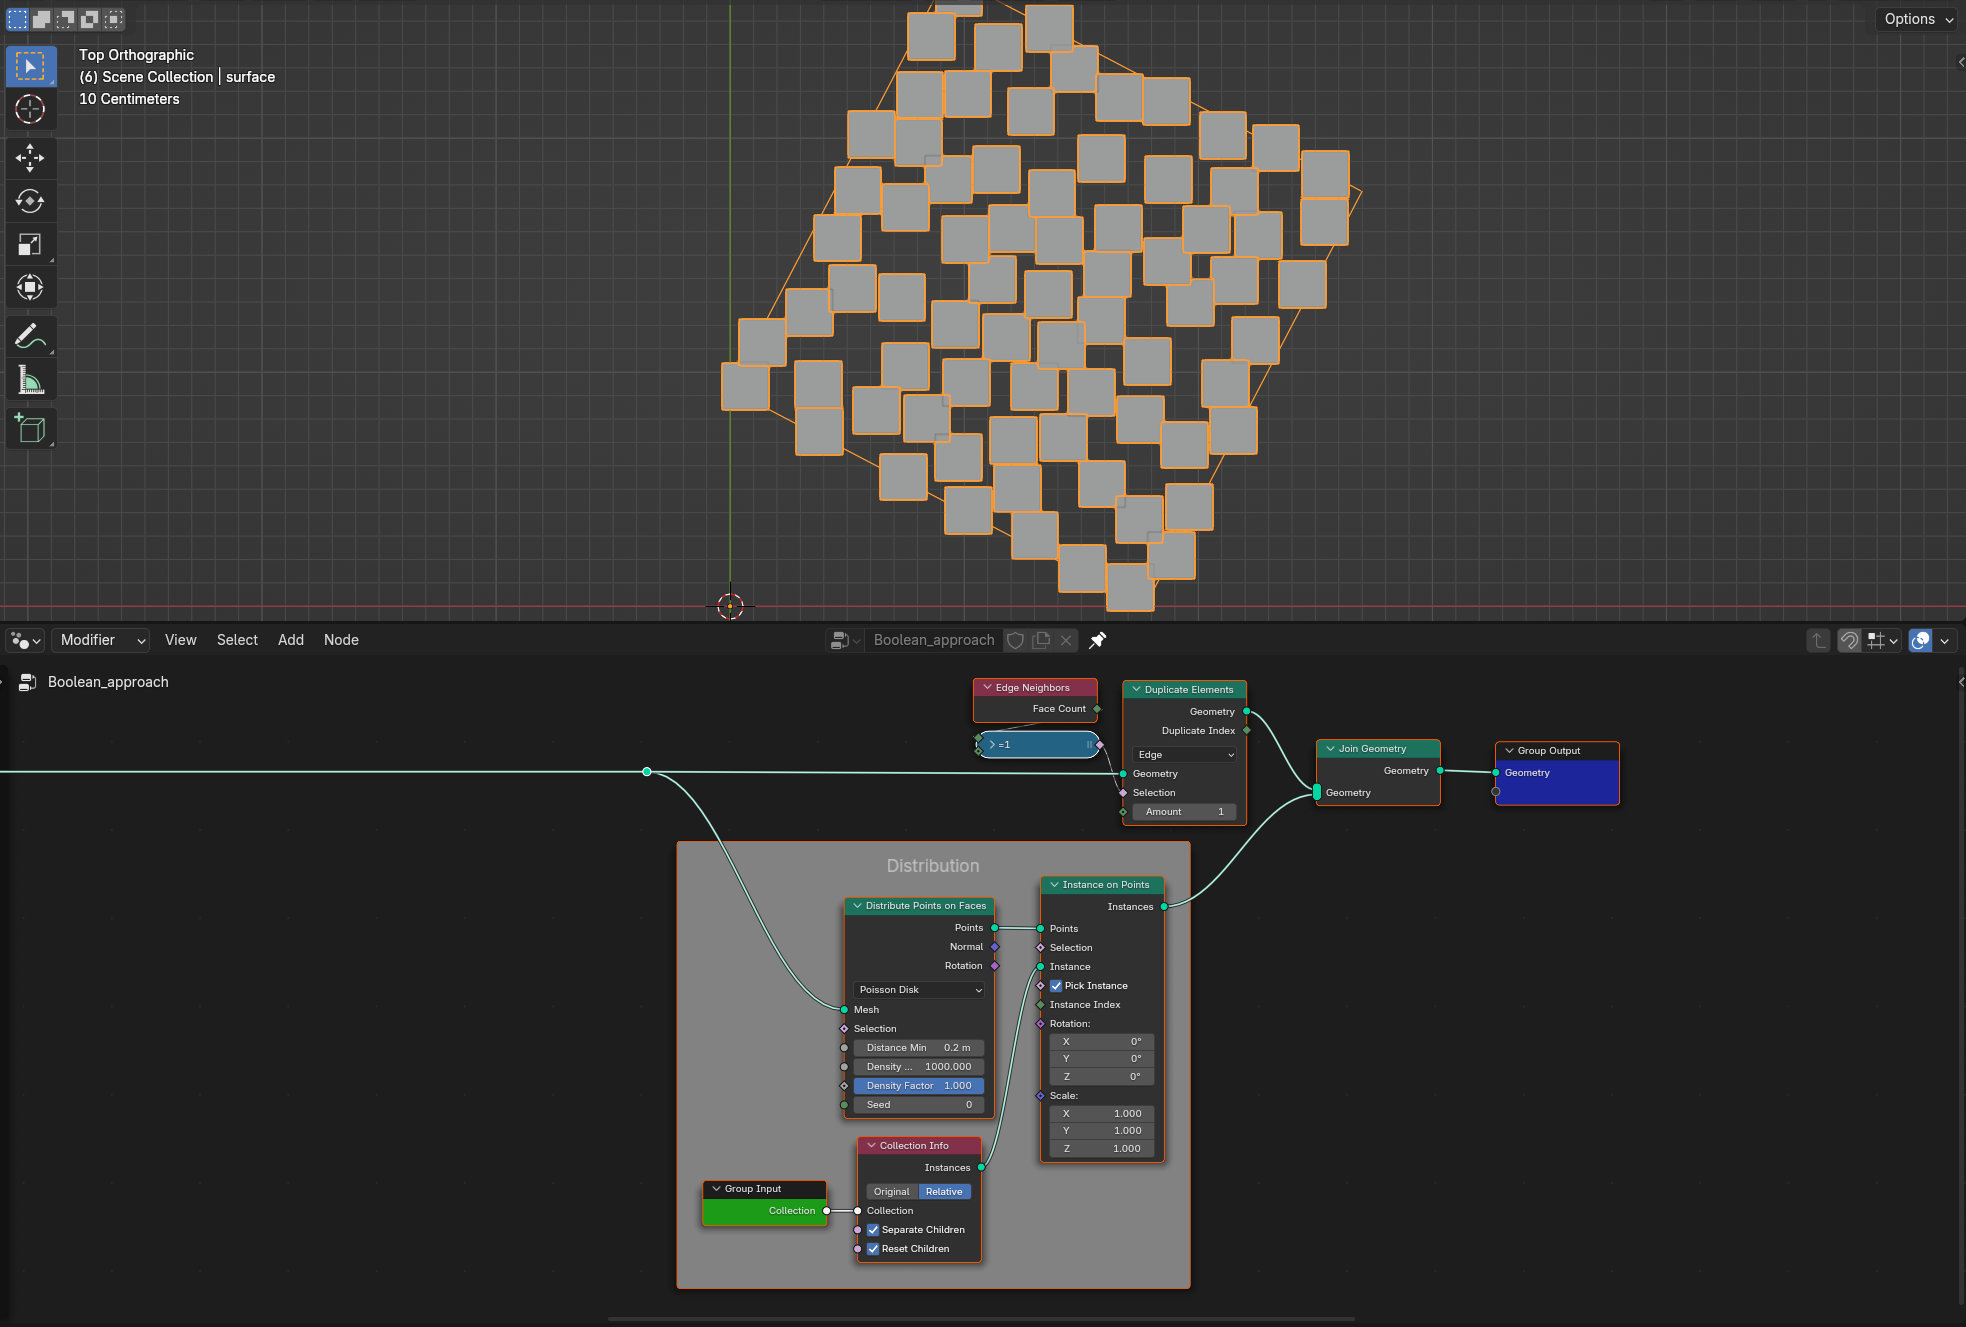
Distribute instances.

Separate instances close to surface border for boolean operation.

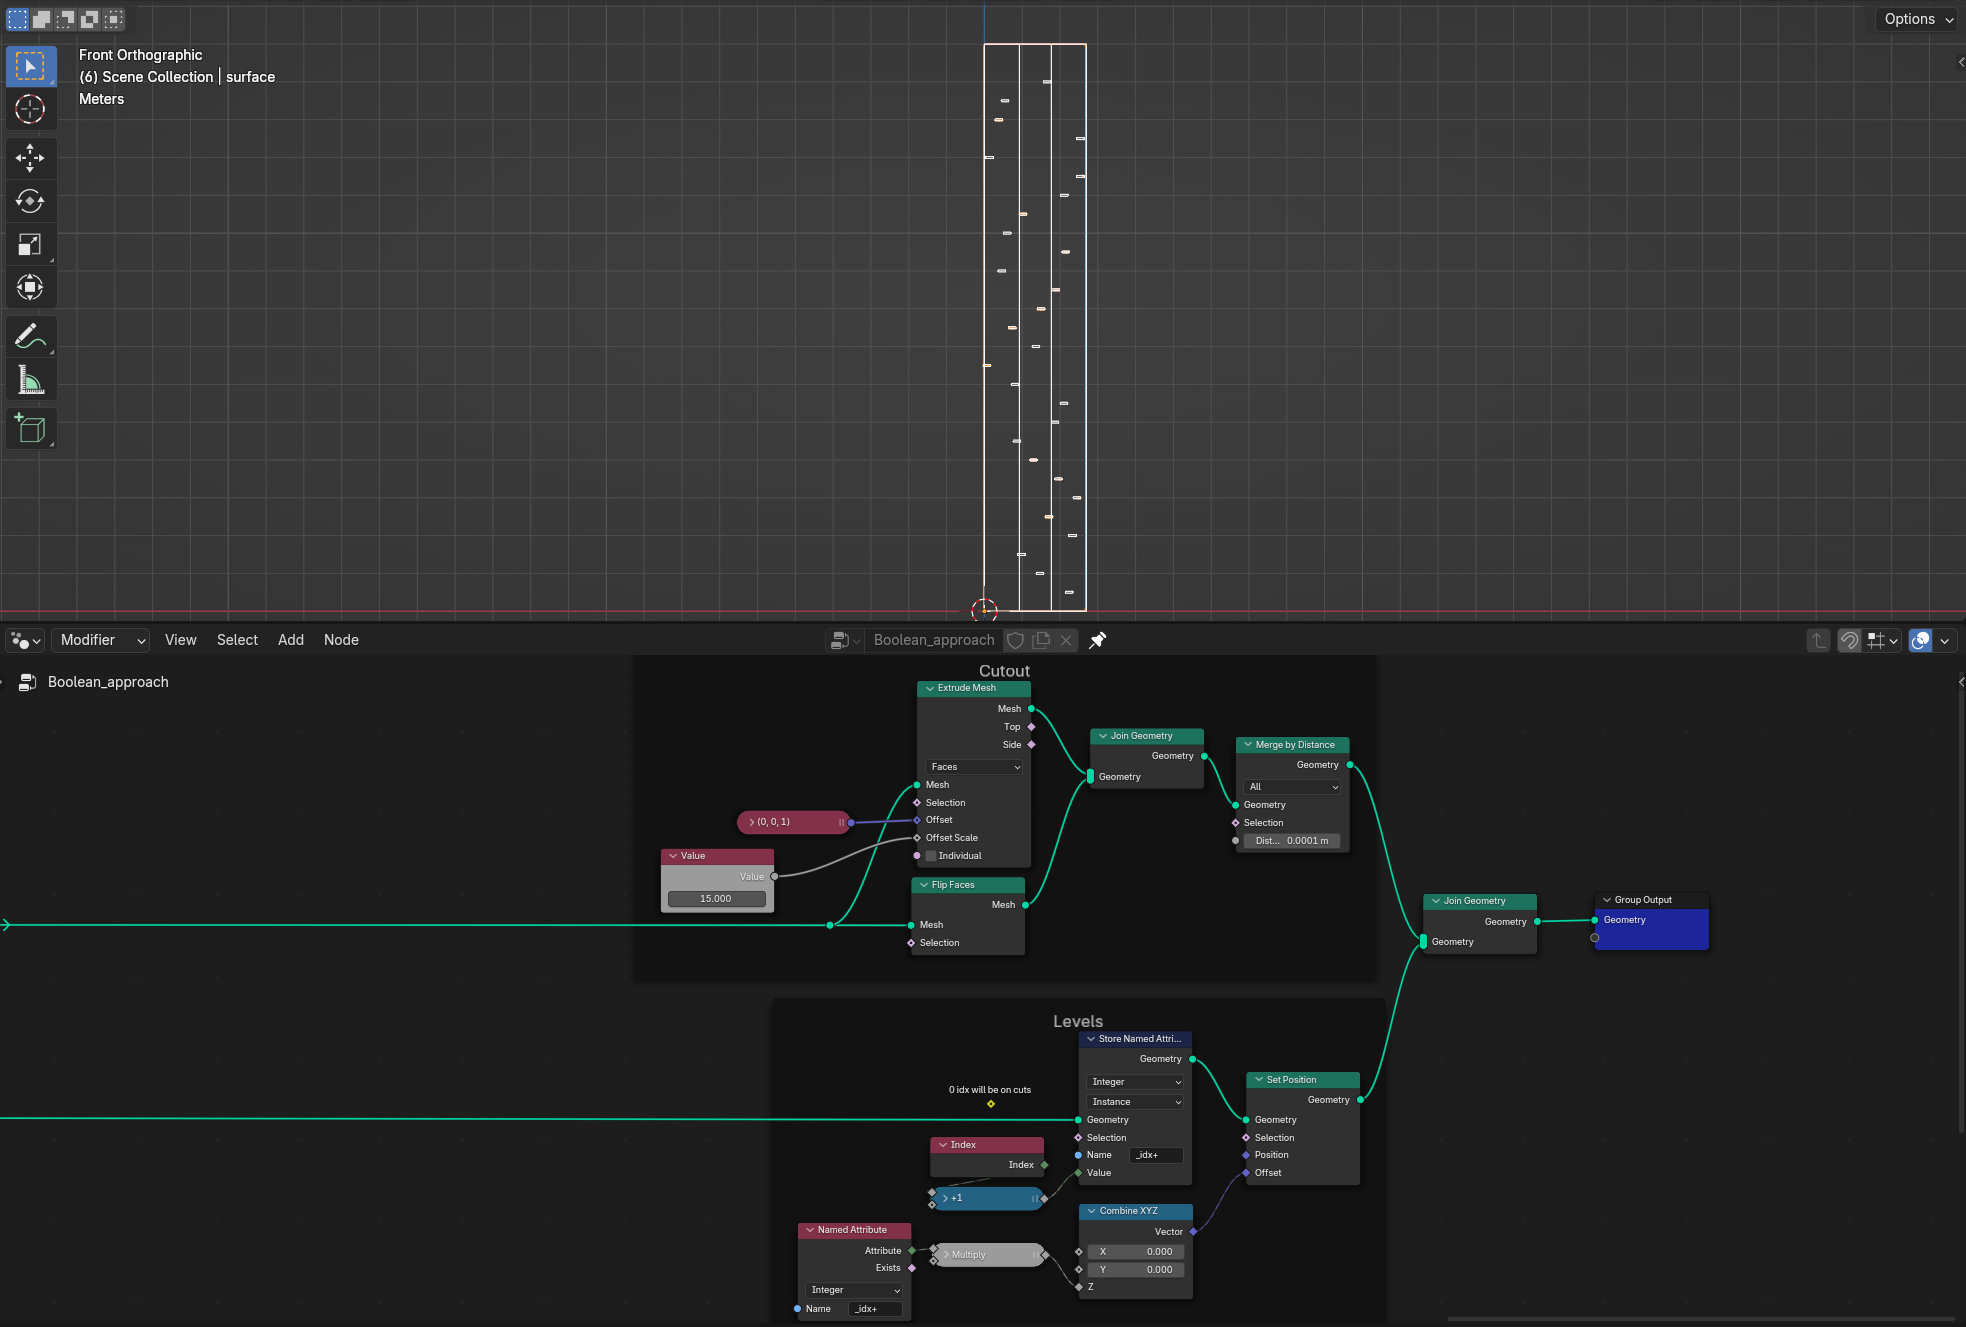
You can make levels arbitrary height, but if there are a lot of instances and cutout object is too tall Blender will start produce artifacts.
So I make it the maximum height of instances.

Take into account that instances geometry might be below origin (-Z) - Min.
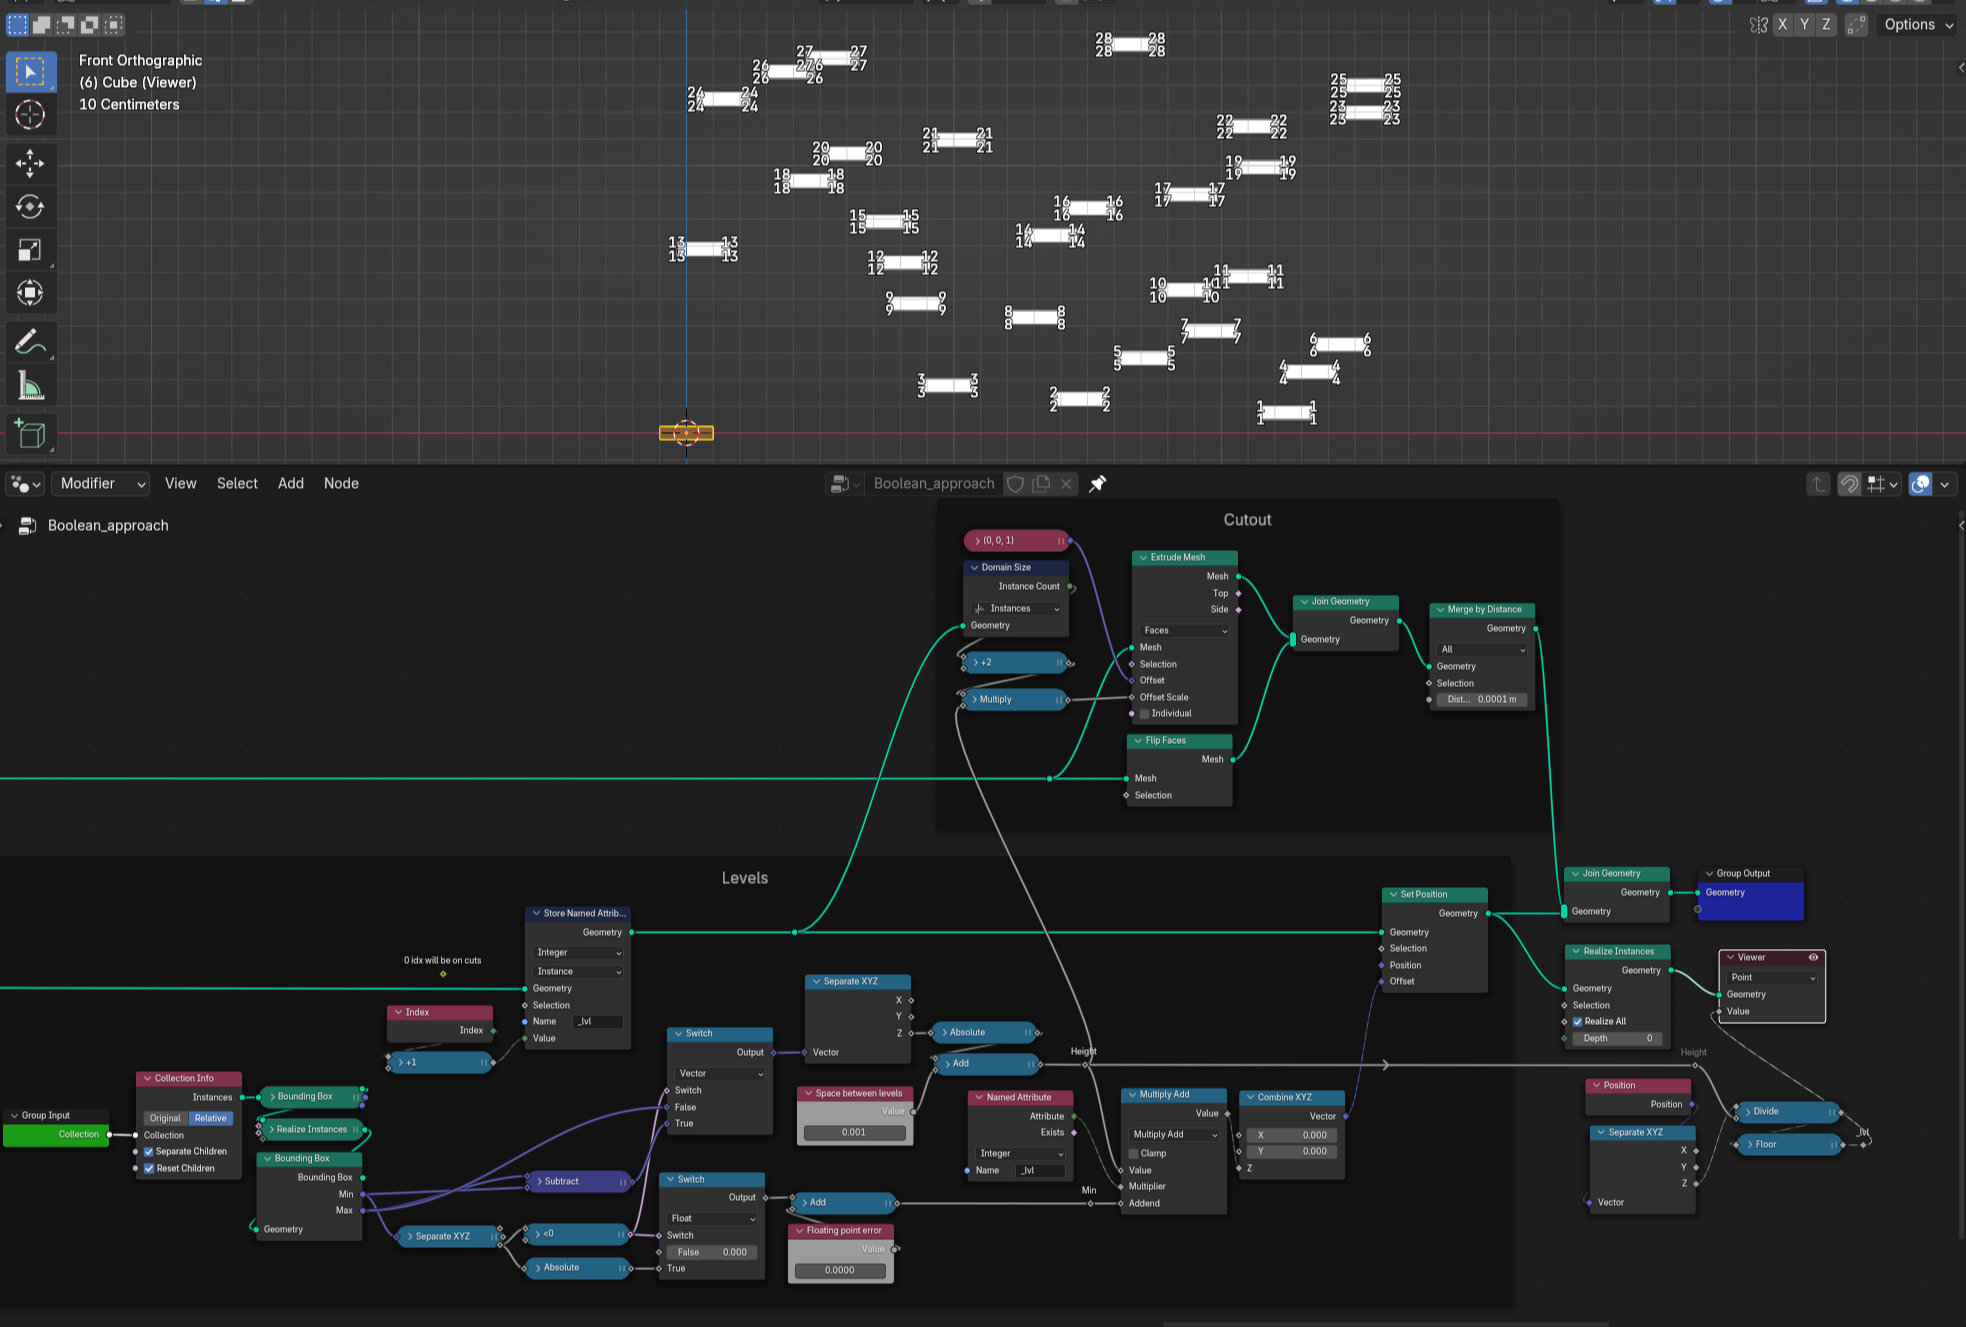
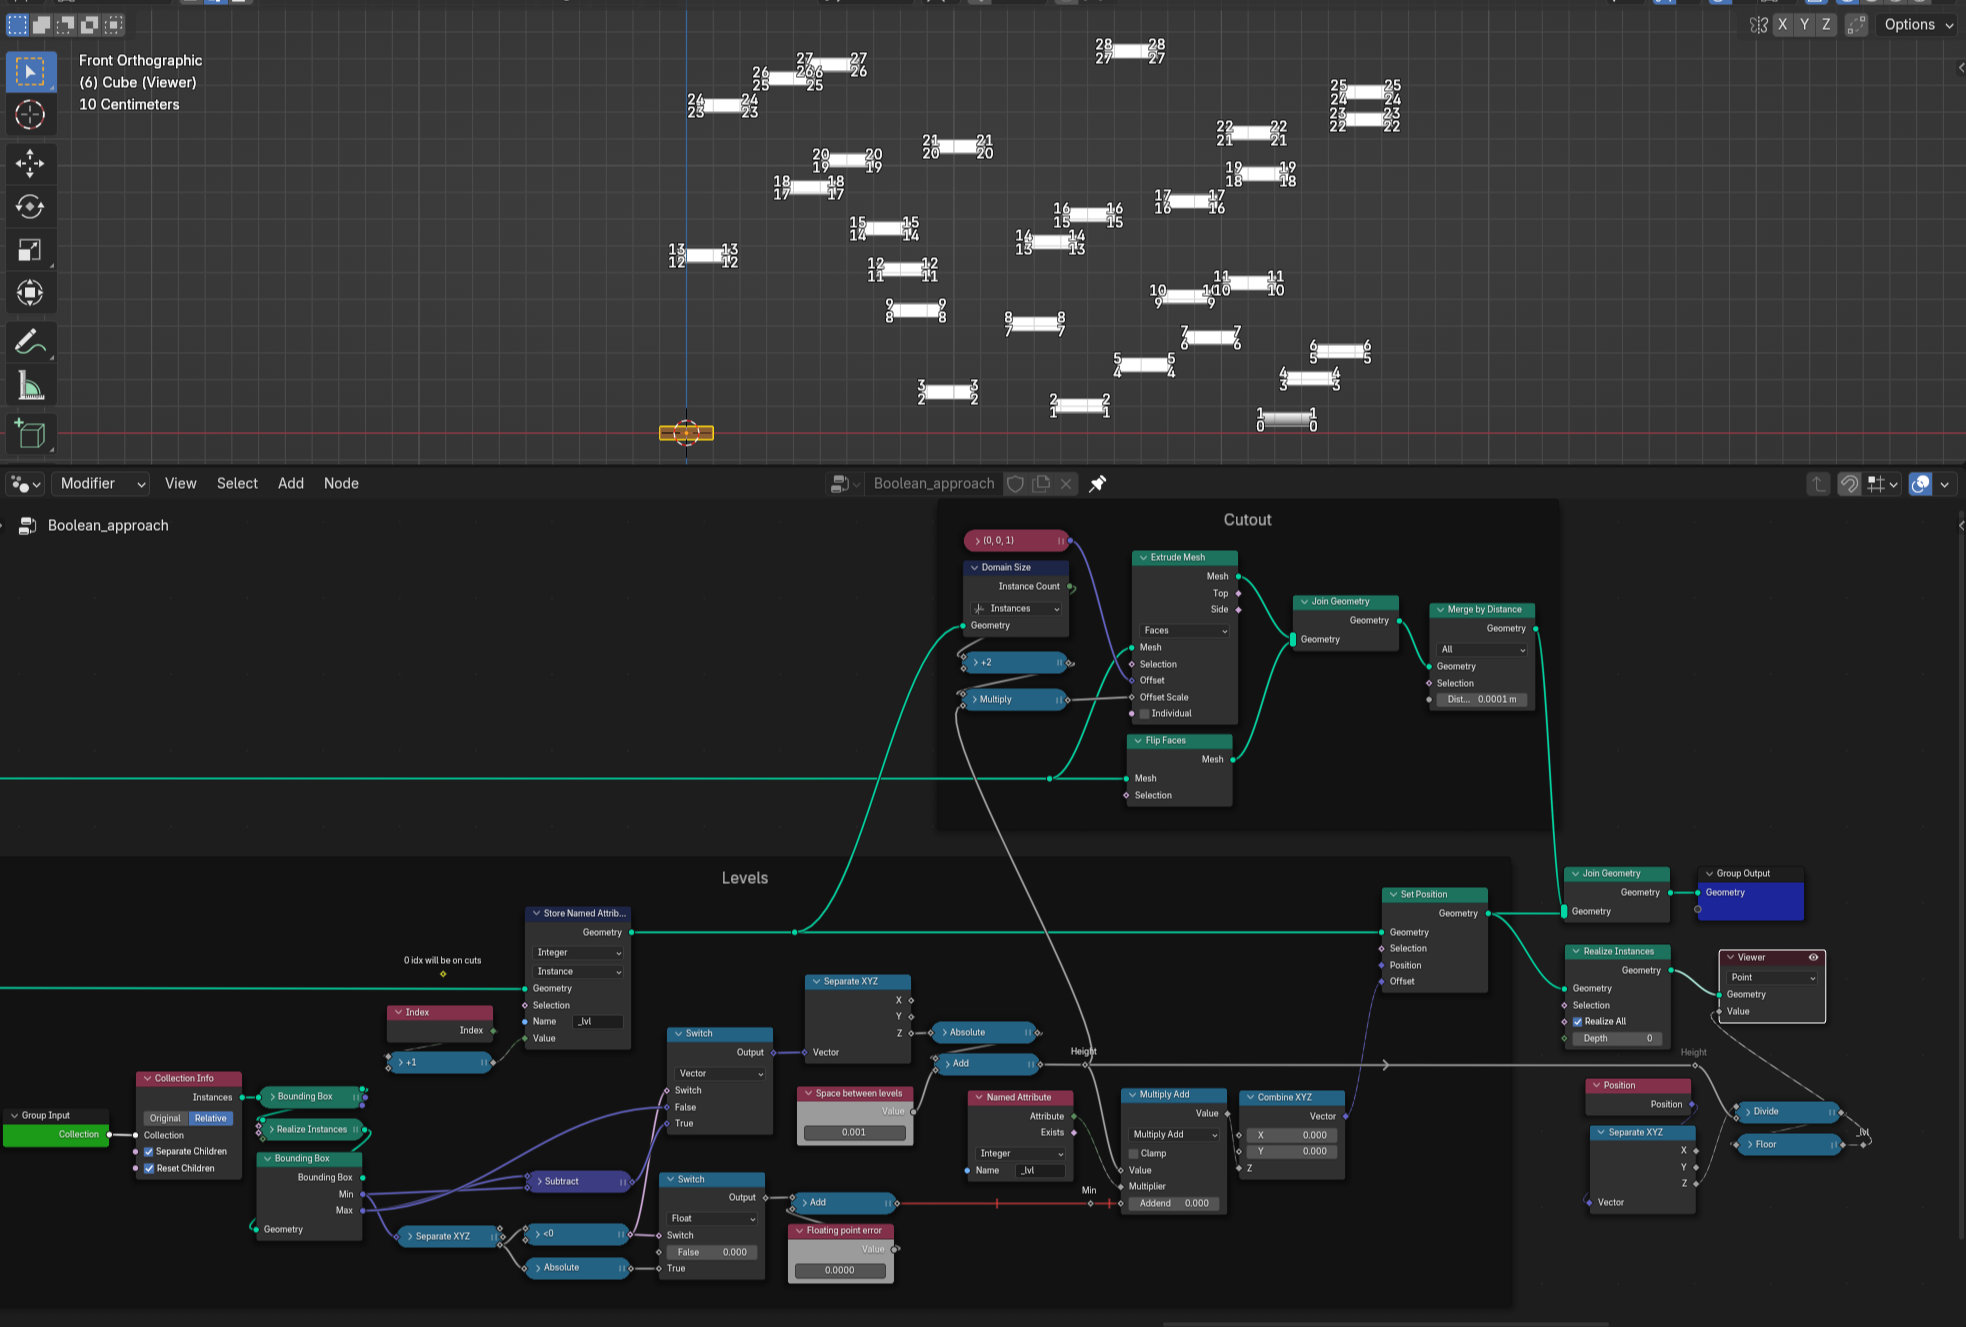
In case instances have random transforms extremes can be included to Bounding Box calculations to adjust level height accordingly (not included).
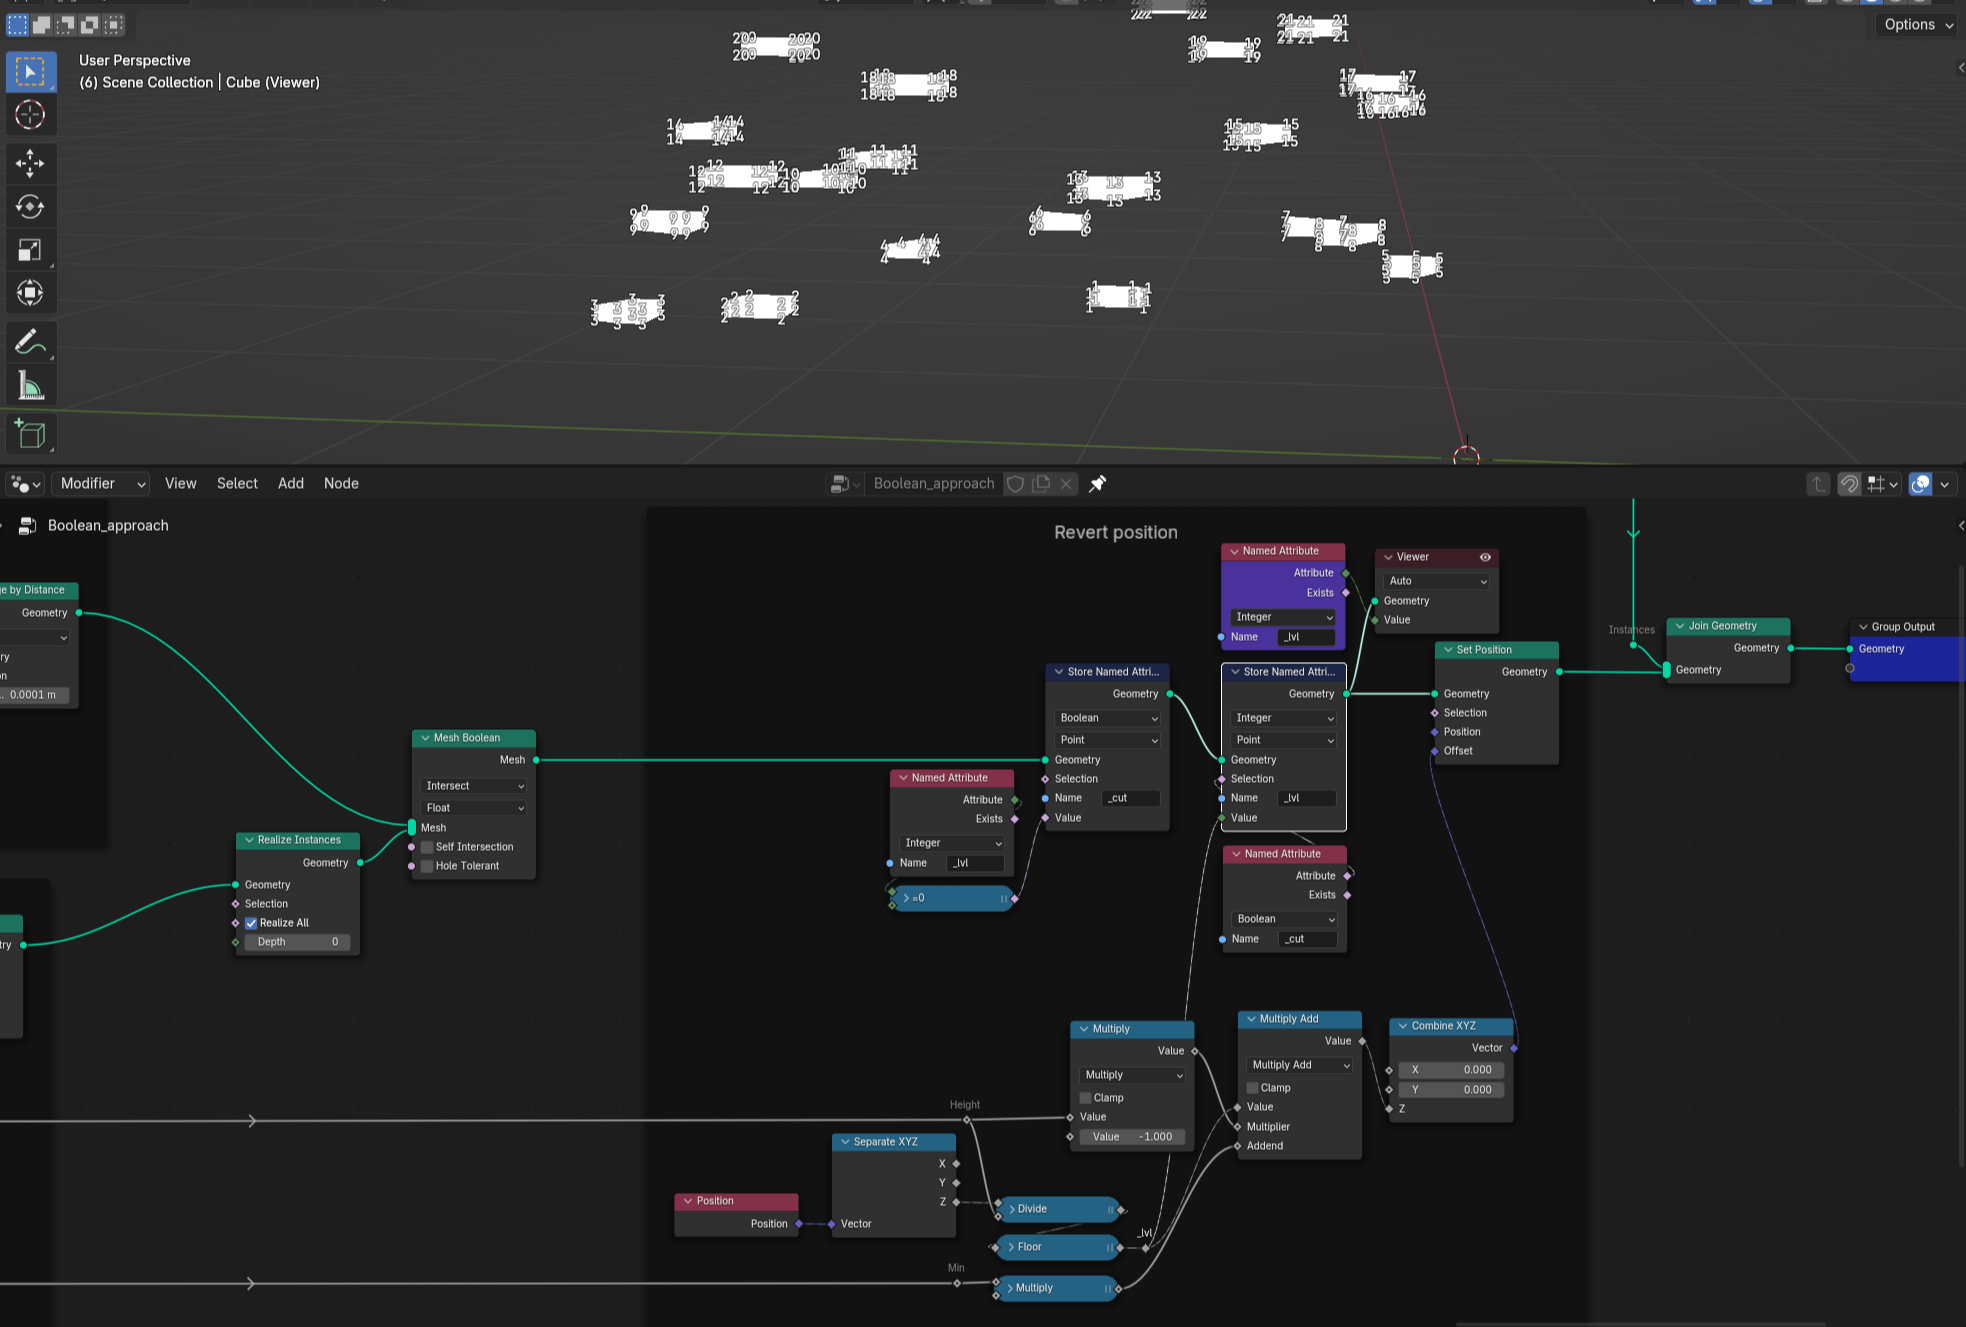
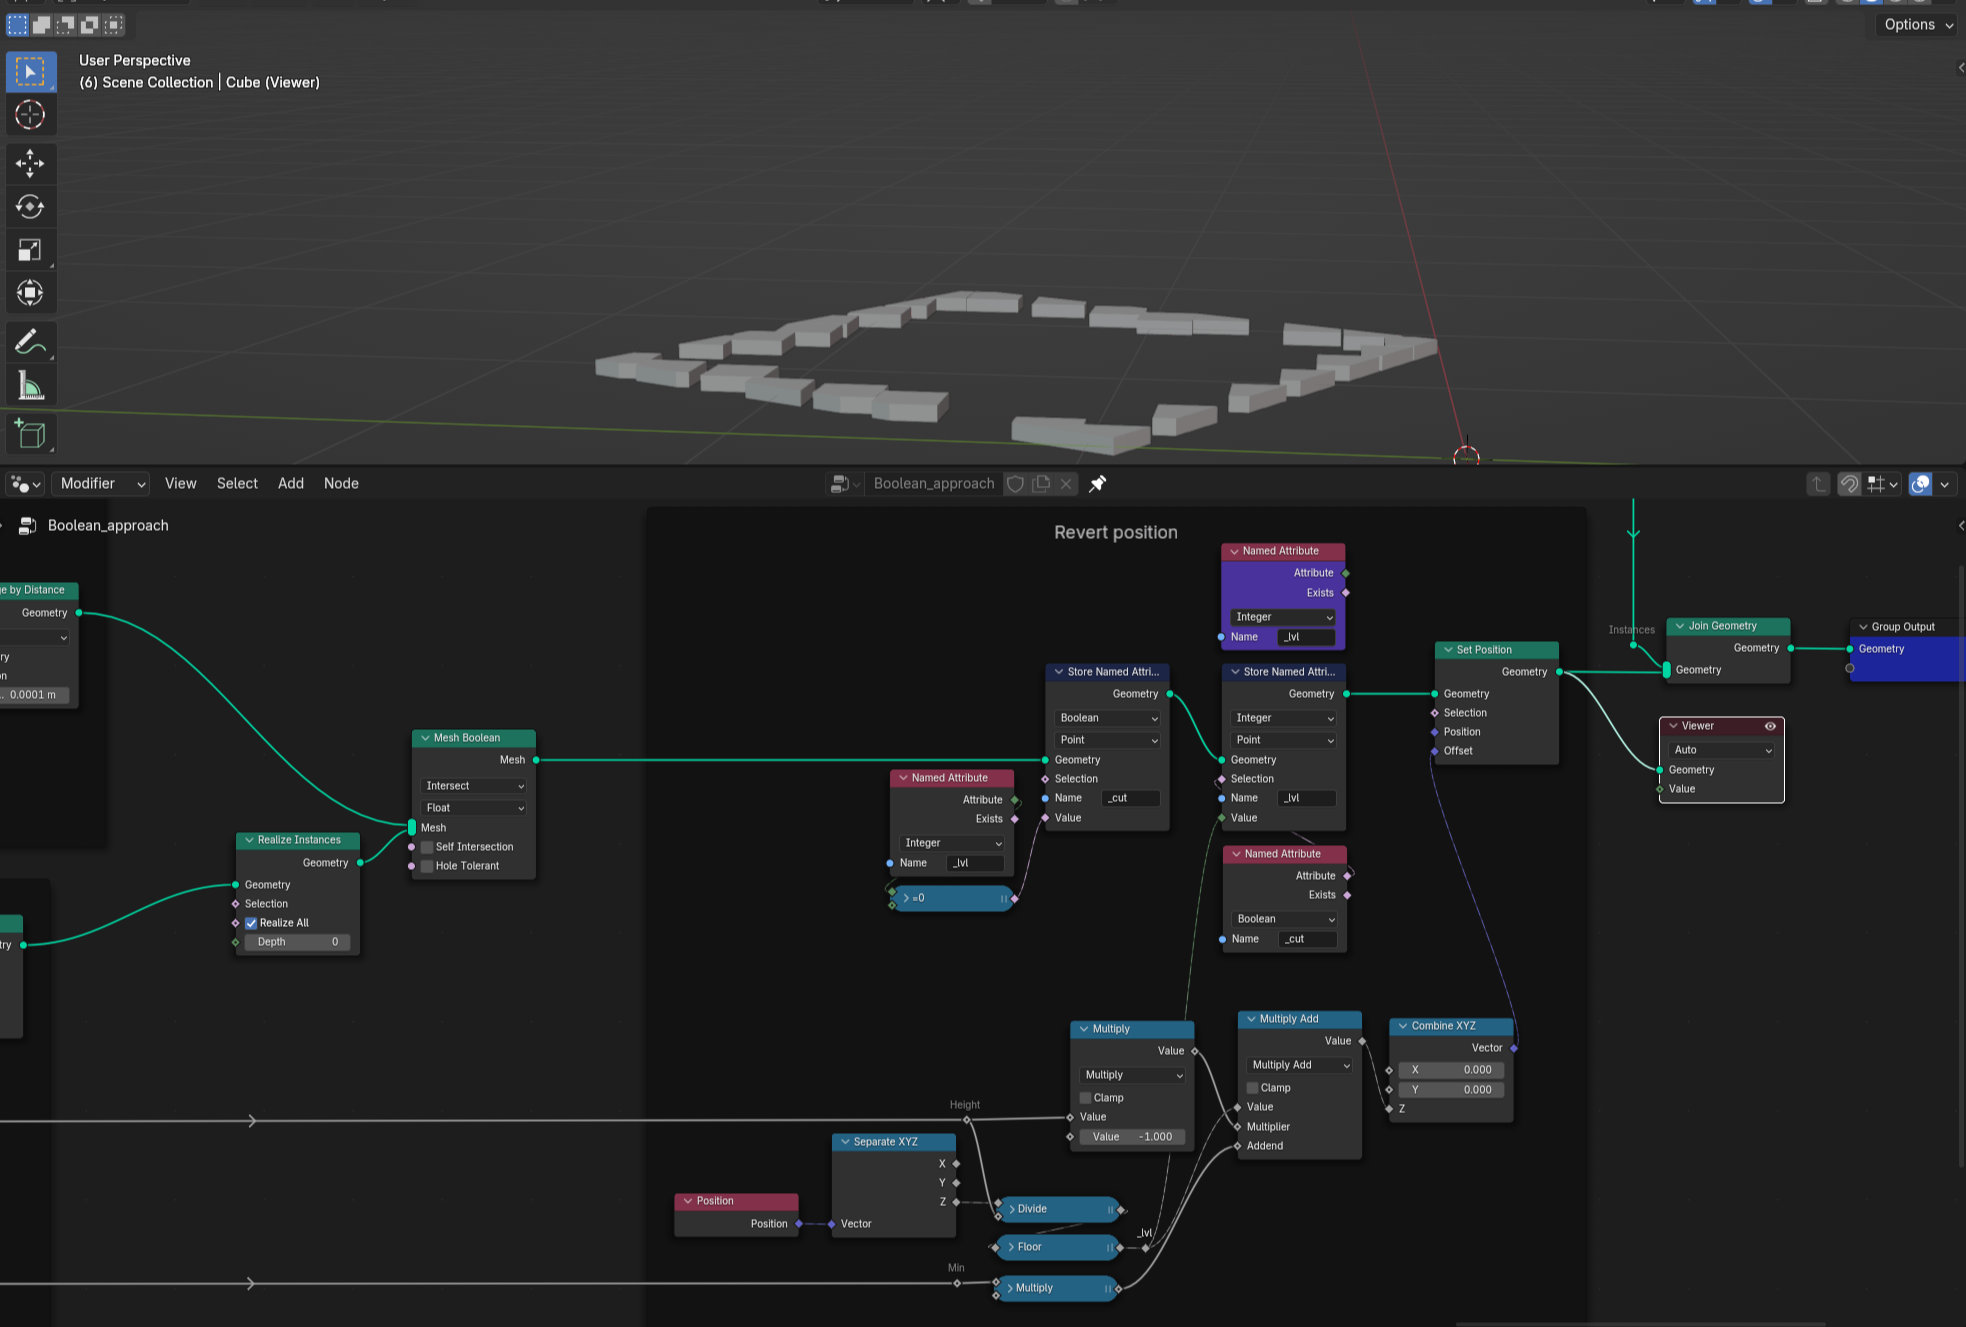
Cut surfaces loose their attributes.

Given each instance occupies unique level you can restore this level from position.

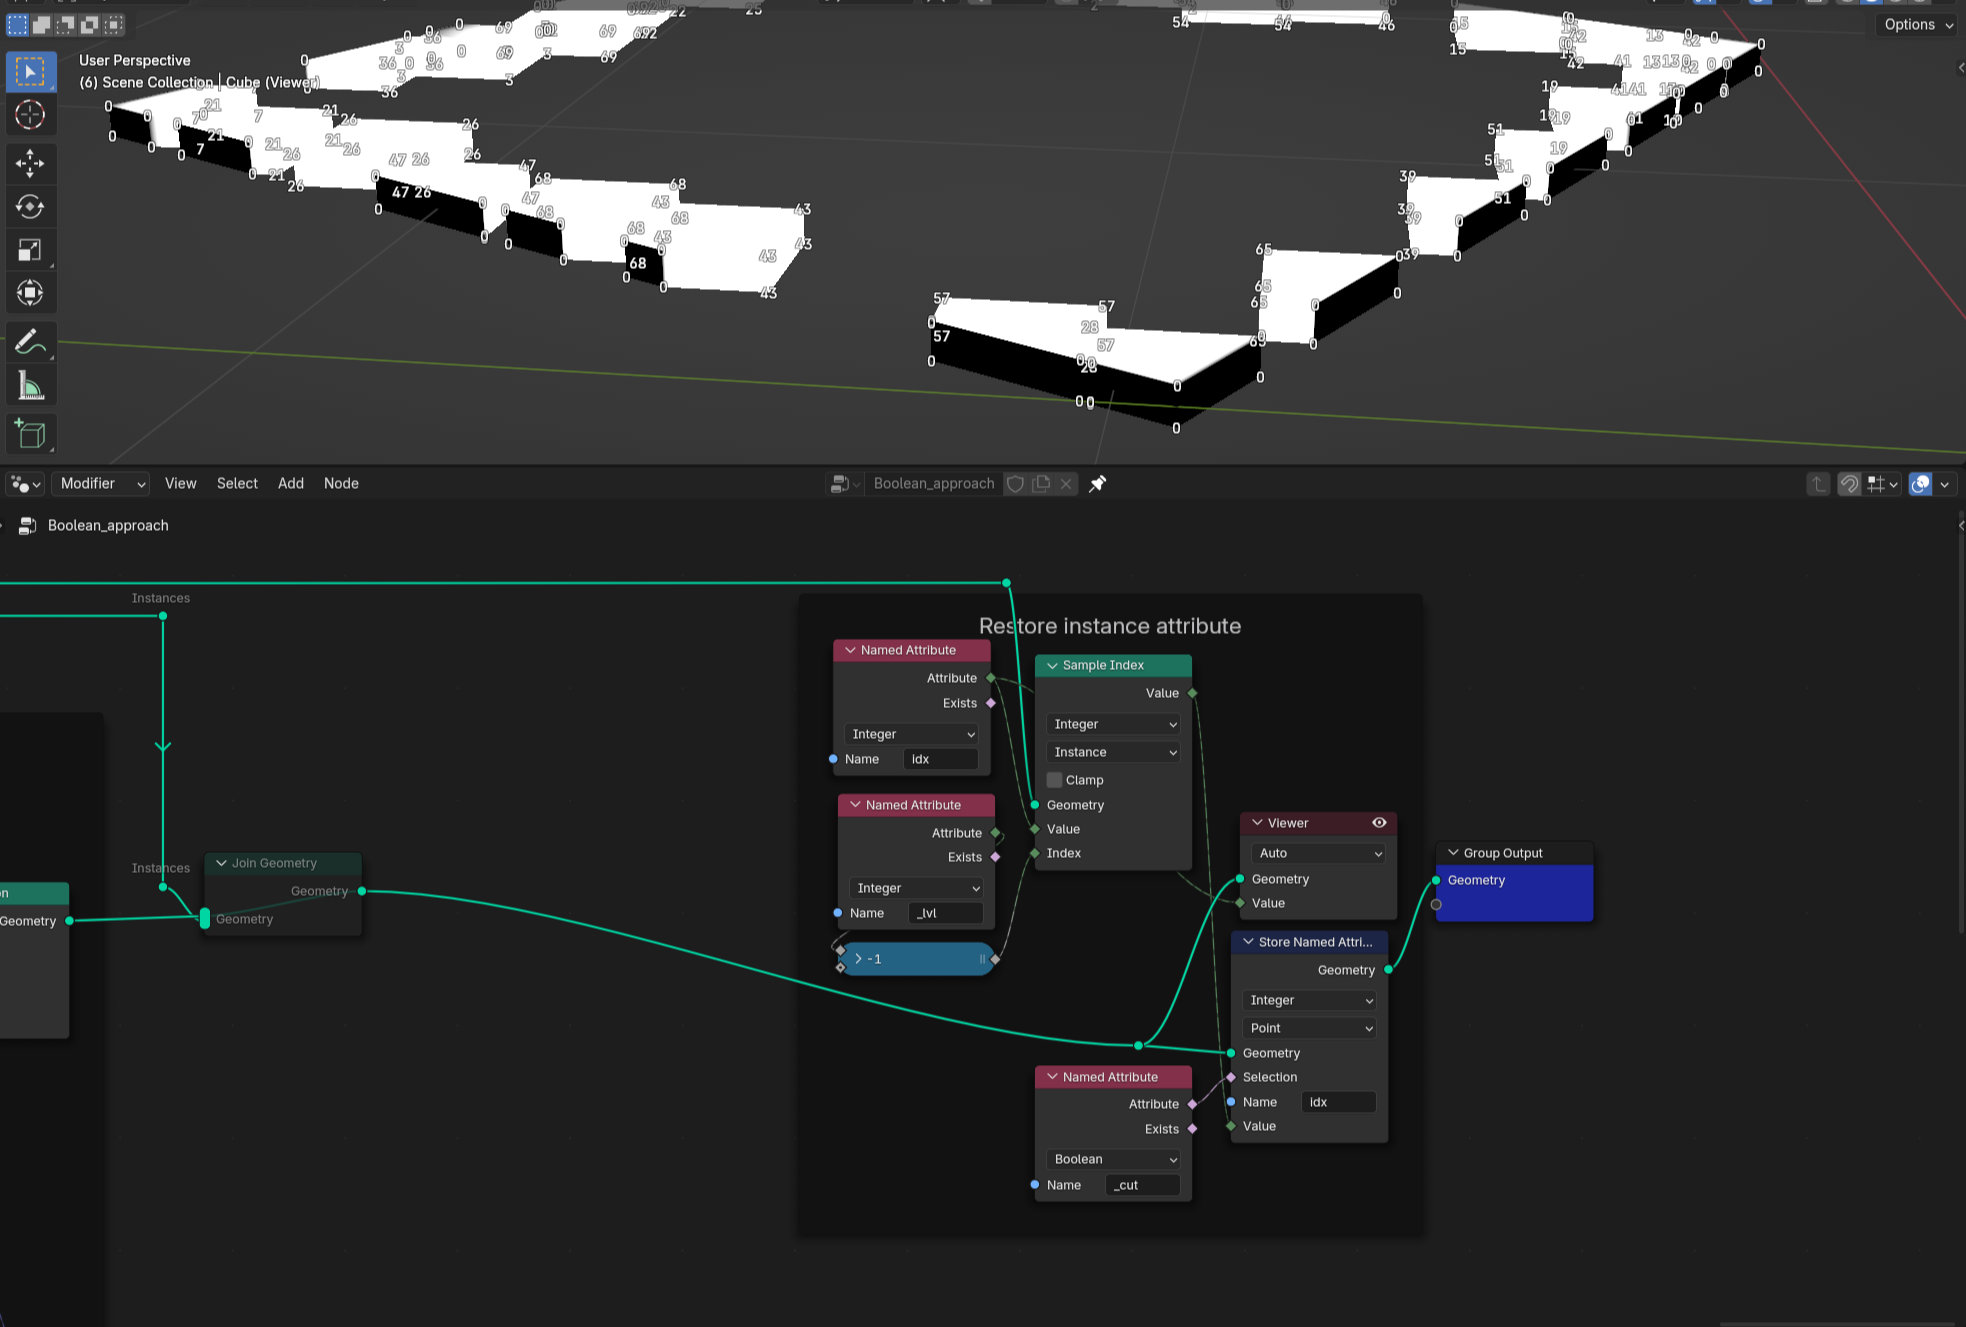
And because levels were created from instance index (+1) you can restore instance attributes.

It’s just how I approach searching for a job at the moment. I don’t consider myself good, thus this quote stuck with me.
Okk ! Pretty clever !! Well done !
Well I think you are quite talented already ! You have a good artistic eye and great technical/problem solving skills too.
Being good is one thing but the most important is being useful to a project/company, which is a bit different from how good we are on the scale of all artists in the world  .
.
What kind of job are you looking for ? From your portfolio the most dominant thing is interior visualization, are you searching in this field ?
I also think that some of your works are a bit misleading like the ‘wiker’ ones. Because they are visually super clean we might think that’s enough and miss the technical side of it which is as awesome if not even more !
In some way being good in various areas doesn’t make things easier when building a portfolio !