The Lightmapper v0.3

The Lightmapper v0.3

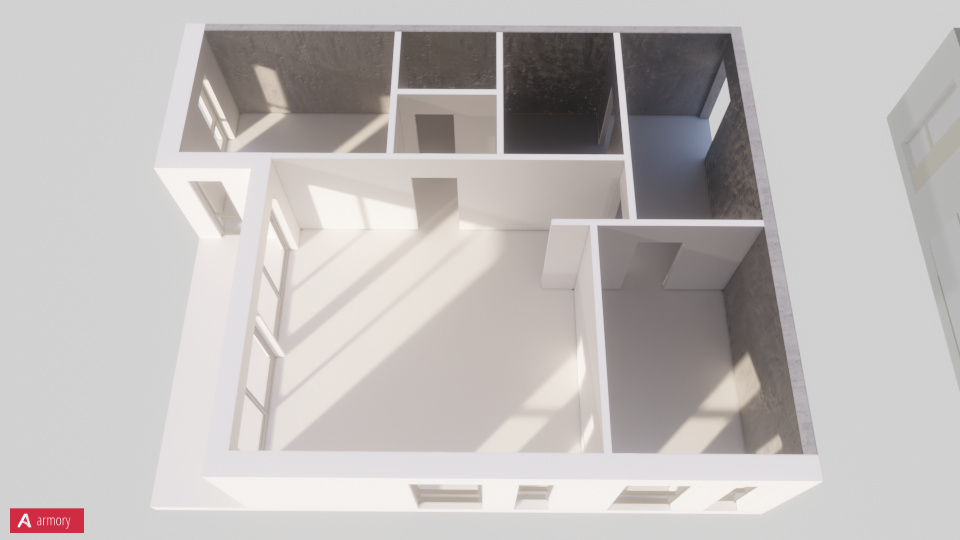
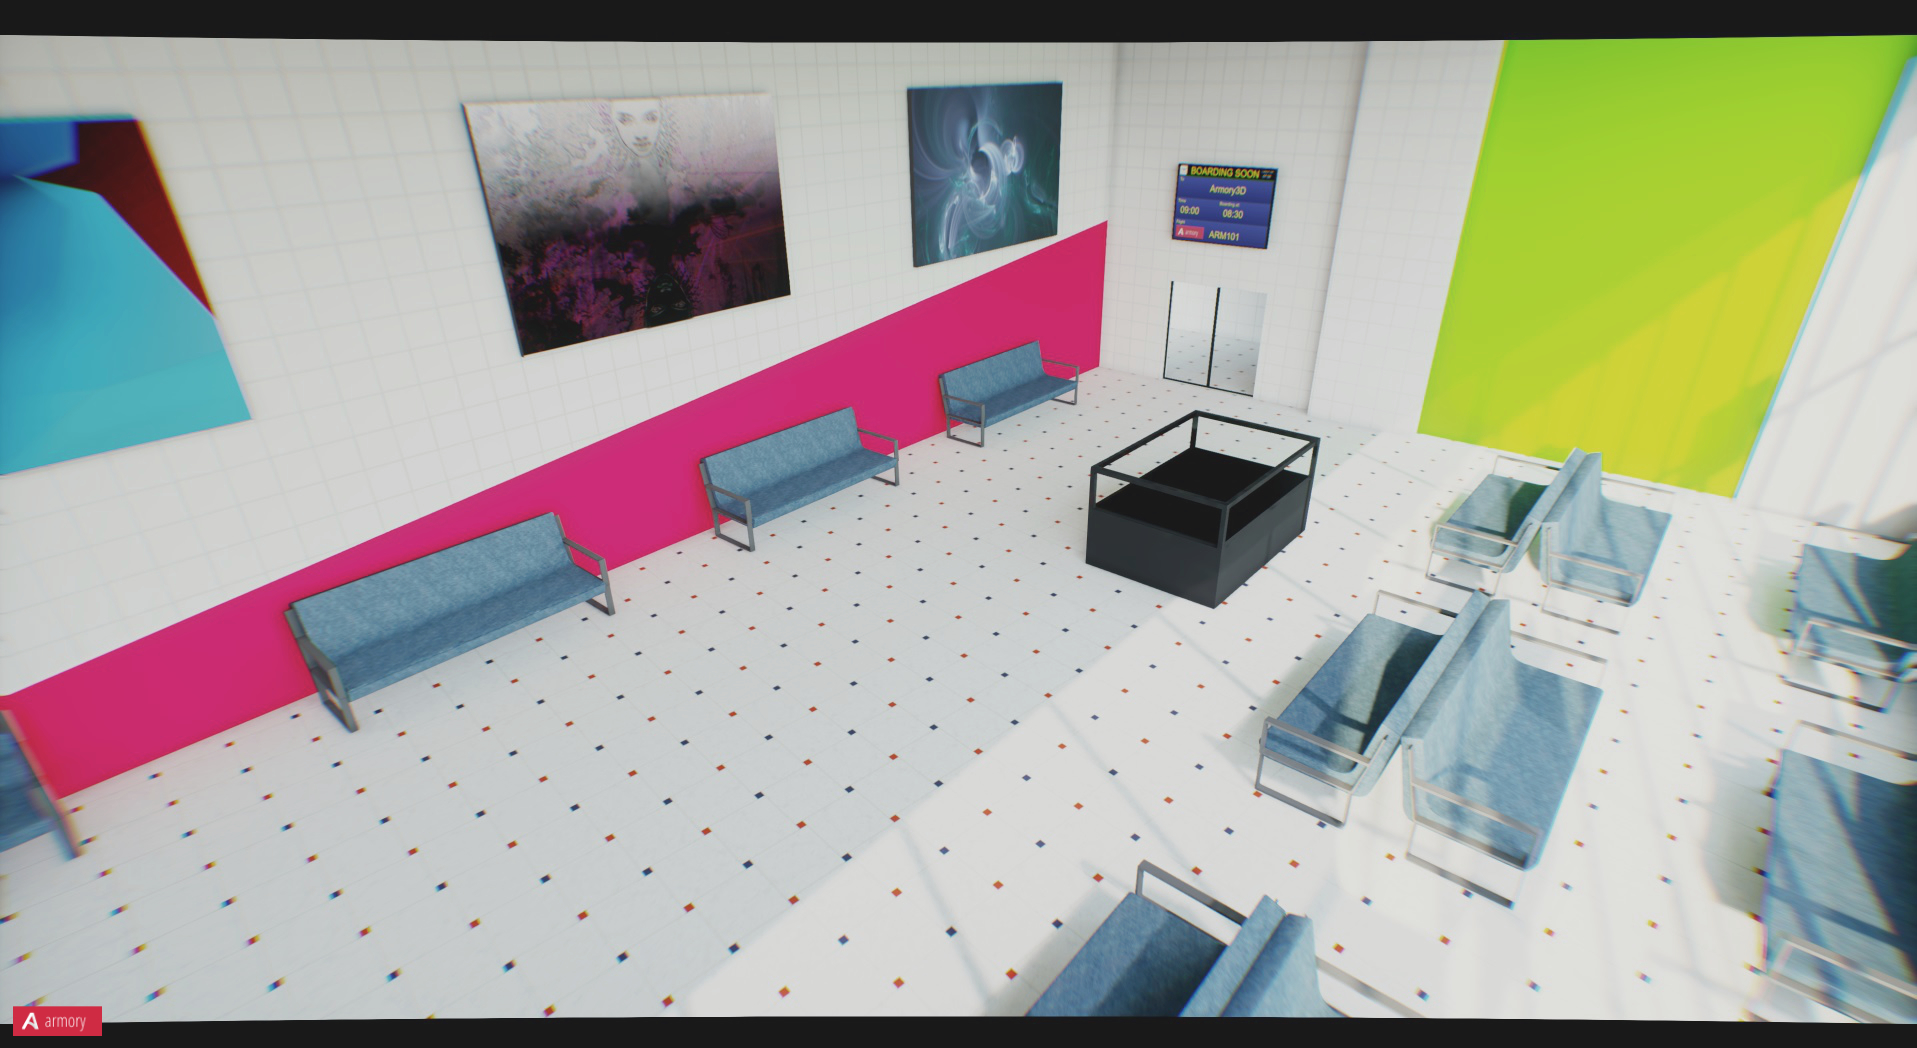
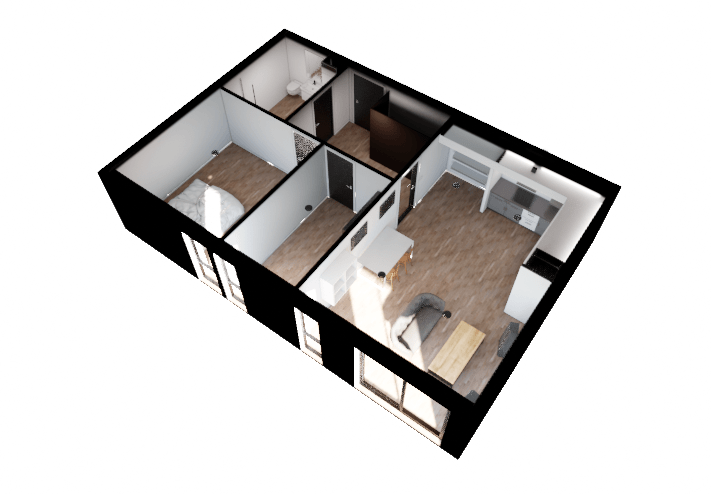
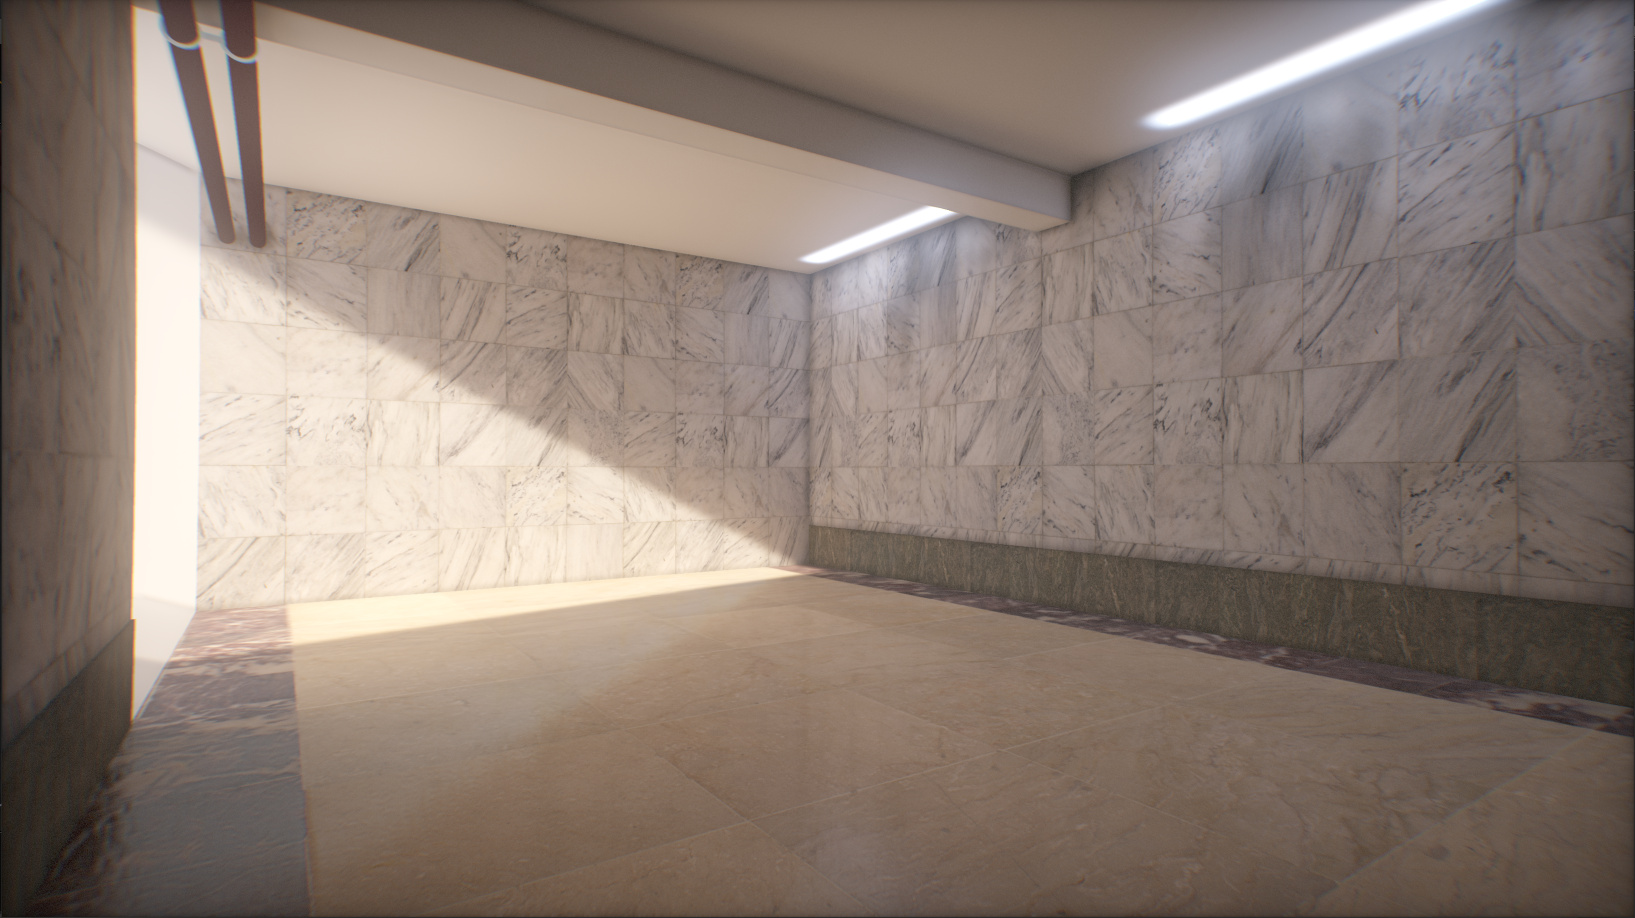
The Lightmapper is a free addon for Blender that implements automated lightmapping and denoising capabilities for global illumination texture baking with support for 32-bit HDR Lightmaps for use with Eevee or external game engines. I’ve been working on it for quite a while, but it’s been somewhat unstable until now.

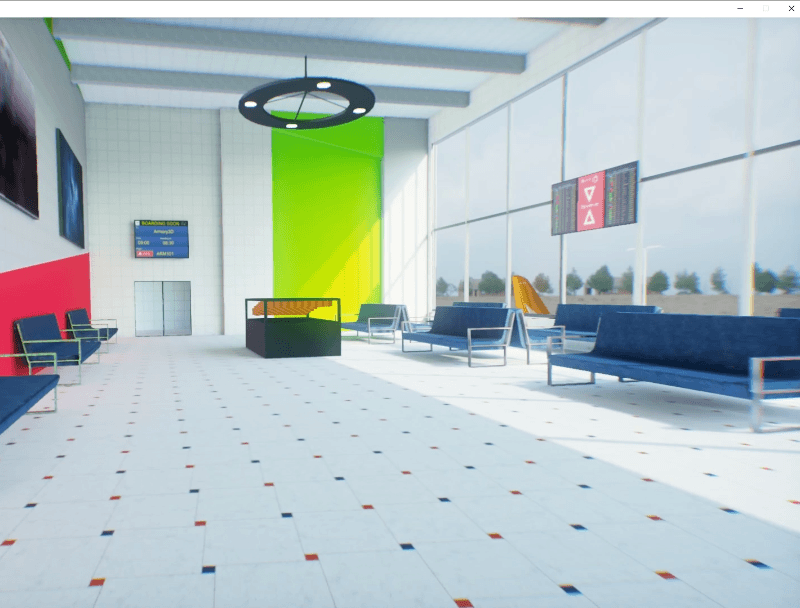
Initially I started working on it as a lightmapping solution for Armory3D, but since it doesn’t technically rely on Armory3D functions anymore, It’s become a standalone addon that works just as well for Eevee, UPBGE and other external game engines through .exr and 8-bit png-encoding support.

Features

  • Automated lightmap baking with Cycles

The addon doesn’t just bake your lightmaps, it also allows you to denoise them, unwraps your meshes, filter them, encode them and set up the materials for you.

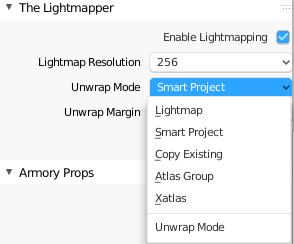
  • Object-centric setup

I wanted to keep it as close to the UE4 approach as possible, so every object can have it’s own lightmap resolution, own margin settings, own filter settings and more.

  • Multi-material support

Your objects can have as many materials as you want.

  • Advanced denoising support

The addon can set up the compositor to denoise for you, but if you prefer a faster solution there’s direct support for OIDN and Optix denoising. Either way, your lightmaps should become noiseless.

  • Performance, speed and ease

Presets are available for both preview and production, allows you to get from testing to result faster.

l

  • Post-process filtering

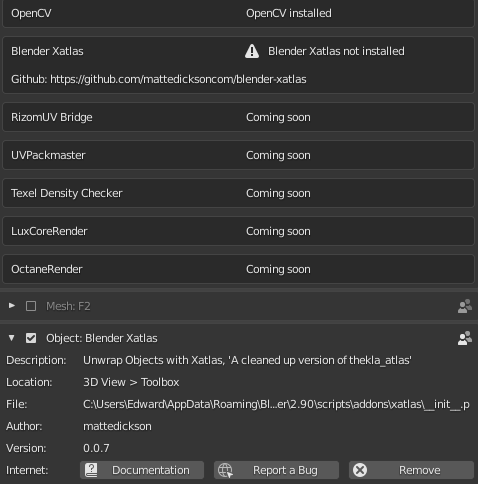
By using OpenCV, post-process filtering can make your lightmaps even smoother and get rid of a few smudges that denoising can’t get rid of, or give your lightmaps a softer more artistic look. Shader-based filtering coming soon too.

  • Game engine support

Convert your .HDR files to .EXR files or better compatibility, encode to 8-bit HDR files for dynamic ranges, bake just the lightmaps and link those as attributes for export.

k

Download

License

It’s free, open-source and GPL

Documentation

There’s not a lot of documentation yet, only rough drafts on the wiki. I plan to improve on this in the coming weeks.

Other information

If you’re using Mac/OSX I’d like to hear if it works for you, the reason I’m asking being that I’ve no possibility to test on that platform, and as such I’m mainly just working in blind.

If you stumble upon any errors, I’d be really grateful if you could post that in the github issue tracker.

Apart from that, any feedback is welcome!

44 Likes

Looks very interesting. Baking lightmaps is one of the areas that are a bit of a pain in Blender so I’ll try this out when I got the time :slight_smile:

1 Like

Out of curiosity, what kinds of uv unwrapping does it do? Like, is it cube mapped or what method? Does it pack to pixels?

I’m not complaining - it sounds like a great add-on - I’m just curious. Thanks!

Hi,

It uses Blender’s own unwrapping methods depending on what you select for that specific object. Apart from that - If you have the Blender_Xatlas addon, it automatically detects that as an option too (for better lightmap specific unwrapping):

image

2 Likes

I’m having trouble setting the resolution… I see the “set resolution 1/1” dropdown, but I set it at 1/1 and it’s coming out at 256pix square, and I was hoping for 1024pix square.

Hi, did you get the version from the release page (0.3) or from the git version? I think this bug was fixed in 0.3.0.5

Anyway, I updated the release version to 0.3.2.0, so it should be fixed in that package: https://github.com/Naxela/The_Lightmapper/releases/download/0.3/thelightmapper.zip

I hope it helps

Fantastic !

This is a fantastic addon that I’m sure I’ll make great use of - but can i say - that sound alert is far too alarming! I jumped out of my skin when I first heard it. Better to use a nice gentle ping. Or someone saying “knock knock” in a more gentle way. I laughted, sure, but … that should be the sound for something like your computer is melting.

Ahhhhh… setting the resolution is in the OBJECT settings - not the render settings where everything else is!

Yes - the resolution is individual for each object, that is to differentiate between large objects (i.e. walls) and small objects (i.e. props). This can be a bit tedious for a lot of objects, which is why I added the override operator in the Selection subpanel, just select your objects, enable override settings and click Enable for selection - Your selected objects should now have the same resolution:

image

As for the alert sounds, I’m adding a new bunch of sounds that are less alarming :smiley:

If I get the time I would love to make a tutorial for this addon.

Hi,

I’d be very happy if someone would make tutorials for this, as I don’t really have the time myself and I’m already taking my time writing documentation

This is a very useful addon, thanks!

Two feature requests I’d have:

  • Add the ability to bake all objects to a single lightmap
  • Add a dropdown in the render settings to chose which UV channel to bake to

Right now I’m manually unwrapping my second UV channel for the lightmap, basically packing all objects into a single UV layout. I know, I can manually set UV2 in each object, but that’s a bit tedious if you have a large set of objects.

1 Like

Hi, thanks for trying out the addon!

As for the first feature request, I think I might already have covered that feature in the WIP 0.4 branch (unstable) by adding Atlas Groups - What these does is it unwraps and bakes all grouped objects together although how much you divide is up to you, to put the whole scene into one atlas group can be done in 3 clicks:

  1. Make a group
  2. Override group selection settings, and select your atlas group as unwrap mode
  3. Enable for selection (with all objects selected)

As for selecting which UV channel to bake to, I’ve added that to my to do list

1 Like

This is an exciting addon.Thanks for all your work, Naxela. I have more or less got it working now, so have written down my steps in case it helps anybody else. Please tell me what I’ve got wrong and I’ll update it.

  1. Install Lightmapper addon

  2. In the Lightmapper addon drop-down, click Install CV. Then restart Blender.

  3. For your object(s) that you want to bake, go to Object Properties / The Lightmapper and Enable Lightmapping.
    a. Choose your resolution
    b. Choose your Unwrap Mode. I think this is the mode you used to unwrap your mesh in the first place. Not sure what ‘Copy Existing’ does - maybe reuse existing UV, without unwrapping again?

  4. Under Render Properties go to The Lightmapper and click on Build Lightmaps. It will then bake your mesh(es), creating new image files as necessary based on the Object name (it appends ‘_baked’ and ‘_denoised’).

    a. If you’ve enabled Alert on Finish and leave your volume turned up, it’ll scare the pants off you when it’s finished!
    b. Clean Lightmaps will delete existing baked image files. Though when you re-bake these will be overwritten anyway, so it is not usually necessary to clean them.
    c. Quality is set here, not with Render Samples. Choose Medium, High etc.

The main thing I’m not sure about is how/when the unwrapping works. TL doesn’t recognise that I have xatlas installed (it works from the Toolbox) so perhaps TL just uses existing UV if that is the case. TL can’t be unwrapping each time I run it, as it is too quick.

I have been working on a Revit-Blender-Cleanup-Bake workflow, via scripts, but have struggled with how to incorporate denoising in order to avoid excessive bake times. TL looks like it could be the solution I have been looking for, so I’m really pleased to see it. Now I just have to work out how to control/call it via Python.

2 Likes

Hi, thanks for trying out the addon!

As for your steps it seems correct most of the way, although I’d like to add a few notes to the additional points:
a. This was fixed in the 0.4 (WIP) branch, I only used the alert myself when I was in another room. I’ve added additional (less scary) sounds.
b. While it overwrites, it doesn’t keep changes you’ve done to your materials after they were baked, so if you adjust your settings after they’re baked, it’ll revert to the settings from before (your non-baked materials).
c. True, although if you want to use Render Samples instead, it can be set to custom.

It’s strange as it should recognize Xatlas by default - If you look into the preferences tab for The Lightmapper, is does it state that Xatlas is found?:

By default, the addon looks through the uvmaps to see if there’s one called “UVMap_Lightmap”, and if there isn’t, it starts unwrapping that specific object - If it finds such a layer, it simply skips that part of the process. Also, if you tested the Xatlas before you ran The Lightmapper, there’s a chance your objects already has such a layer, as it creates it’s own similar named layers. Which could explain why it skips.

To easily remove the uv lightmap layers for the lightmap, just select all your objects and press “Remove Lightmap UV”:

image

I hope this helps

As for your Revit-Blender-Bake workflow, I’d be very interested in hearing more about this as I’ve been tinkering with something similar as a one-click solution, my problem have mainly been on the Revit export part, once you’ve an fbx or something similar it should be trivial to automate the rest of the process in Blender. Also, if you’re developing tools with The Lightmapper I recommend using the 0.4 branch, as it has improvements on the background processing code.

Thanks for the detailed response. Much appreciated.

Not sure what is going on with Xatlas. As you can see from the image below, it is recognised as installed by Blender, but not TL. As it happens, xatlas fails to unwrap my large meshes (works fine on less complicated ones) so I’m stuck with SmartUV anyway. Which is a shame, because it can take literally hours to unwrap some of my meshes with that. Miles of pipework get imported with far too many faces from Revit and Limited Dissolve only takes me so far.

2020-09-28 12_30_46-Blender Preferences

I’d use 0.4, but I’m embarassed to admit that I don’t know how to get it off github without a packaged zip file to download. But anyway, I’ll keep experimenting and will post back here once I have something worth sharing.

I’ll start a separate thread on Revit-Blender, so as not to hijack this one.

Here you go: Revit-Blender-Bake (Blevit)

Do join in the Revit-Blender-Bake discussion. Plenty to think about there.

Hi,

It seems there was an error that occured with the registering, could be something that happened in version 0.0.7, not sure - In any case, it should work fine now in the 0.4 branch.

As for github, I’ve released a pre-release for 0.4 that should be installable in Blender like normal: https://github.com/Naxela/The_Lightmapper/releases/tag/0.4.3.4

As for the Blevit thread, I’ll keep an eye out for it

Hi @Naxela ! This is awesome and will deeply affect my workflow. Right now I’m doing all of this by hand. Quick question: can you also bake the light map with the textures? Auto UV and then bake lightmap + ao + materials inside of blender that were assigned to surfaces?

The reason I ask is because the engine I’m working with does not support lightmaps, so everything has to be a diffuse texture. I have all my textures in Blender and then I just assign to faces and manually adjust. Then I bake everything into a single texture. And then I manually paste the ao map, as well as the light map with GIMP, and then use it in the game. That’s quite time-consuming.

Hi, currently it’s just a different lightmap on a different uvmap layer, although I can probably add what you ask for on my todo list. Currently there’s only Direct+Indirect, Indirect and AO as possible options. If I understood you currently, that would be something that is Ligthmap (Direct+Indirect) + AO on the same uvlayer as your reguler textures, and with the materials set up accordingly?

In the meantime, I think in those cases where you want complete maps baked into the same texture, add ons such as these might be more what you seek, although I’m not sure they have denoising support:

1 Like