VDB-WDA disney Cloud scattering tests

(Note…thread originally started in Newtek/lightwave forums, thus some lightwave references, but these are rendered directly in cycles viewports) I am prometheus over there.

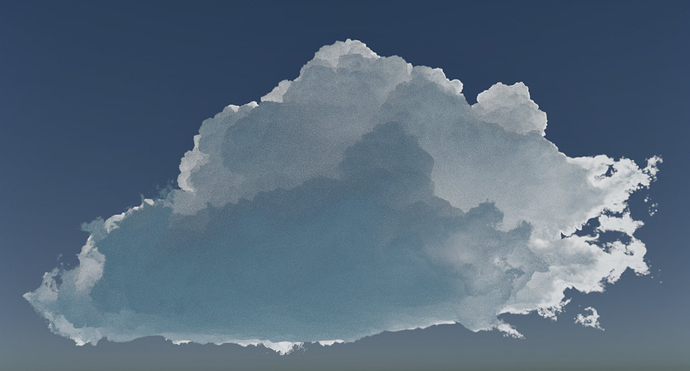
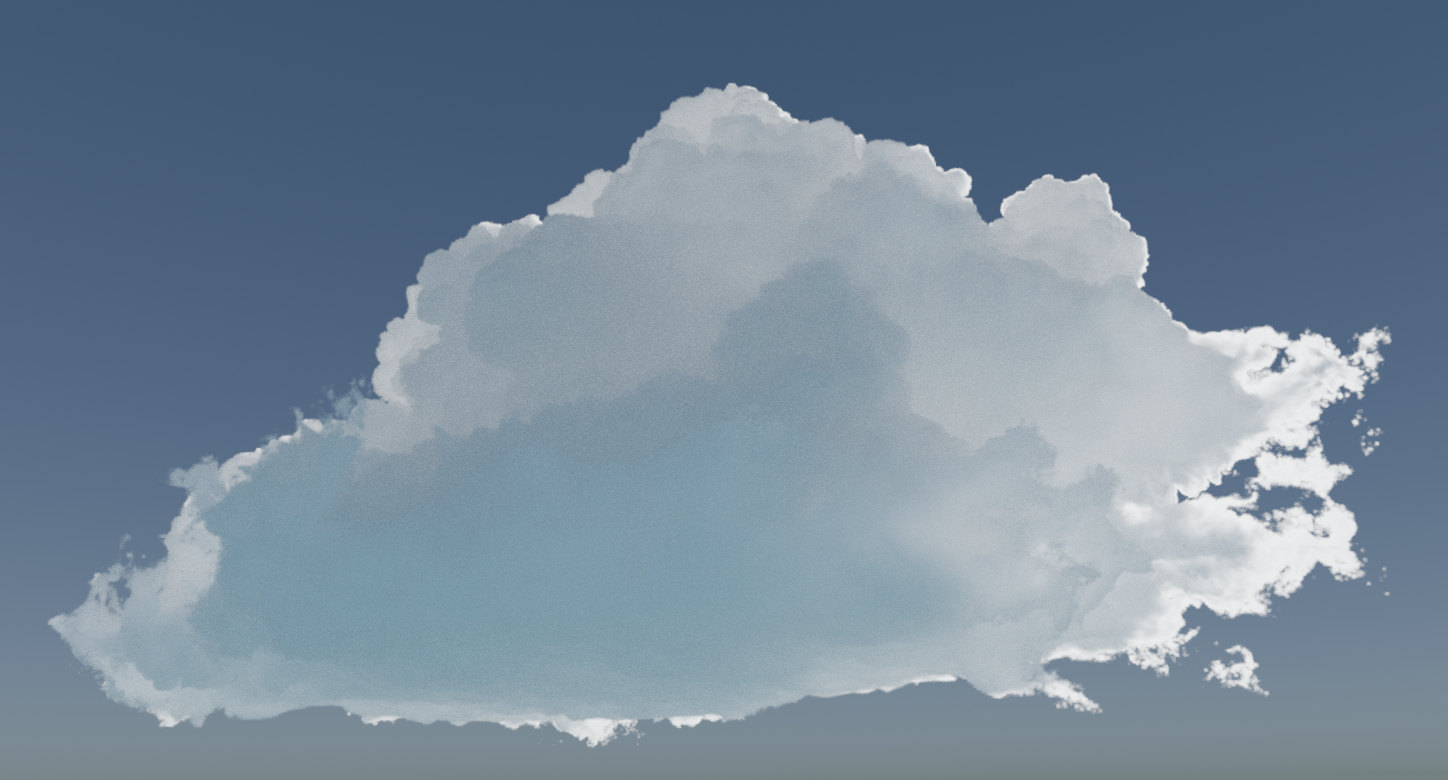
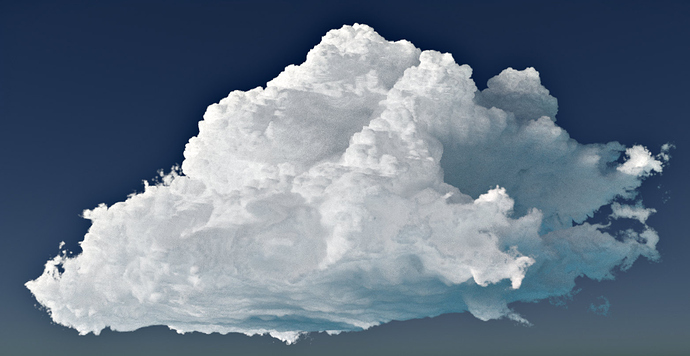
Finally I think I have found a method that seems to work nicely when it comes to scattering in the clouds, I can still not compare it to any hyperion or arnold renderer, but I just started to get it somewhat decent without faking it with emission as I have done before (shown in newtek forums/Lightwave forums)

I would also have to change lighting angle/direction to match that…but for this test I wanted more backlit scattering effect.
But finally great to have setup that works even if I change light direction, which doesn´t work properly with the fake emission setups previously.
I used the quarter resolution wda sample for this, so that is only 64 mb or so, and I also would need to adress some smoothing softness of the thinner edge parts…which in the hyperion renders are soft and smooth and in my renders a bit thick and blobby.

I noticed that when turning off cast shadows within the light, the cloud shading started to show a little powder scattering effect, but that will not work for realistic lighting since it excludes any directional light and any internal scattering, it just gives some shadows on the outside based on the volume and the lights.

So with that in mind I started to wrestle with some of the light paths nodes in blender to try and avoid a full shadow strength that would destroy that volume shadow effect when you turn off shadows(think shadow intensity in lightwaves primitive volume and how that with low settings can help bring forth a volume …which otherwise is sort of taking on too much strength)

So I then set up two volume scatter nodes and mixed, some other nodes as well to balance all this up, the scatter nodes are the older scatter nodes and not prinicpled volume, there is a difference there, where the principled node has density channel built in, while the older ones needs to have an attribute density node fed in to the density of that scatter node.

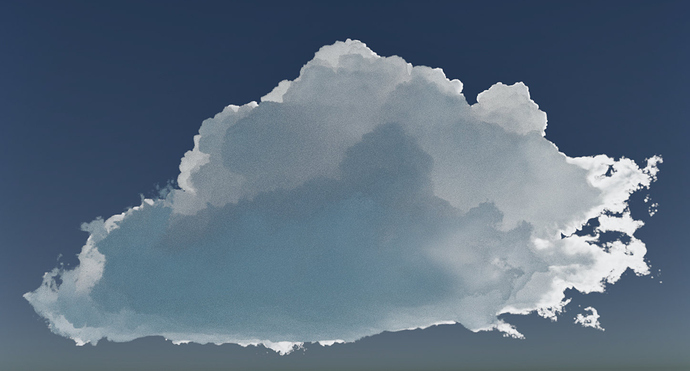
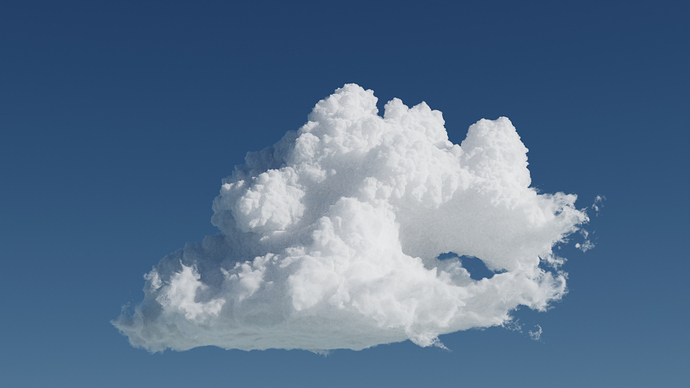
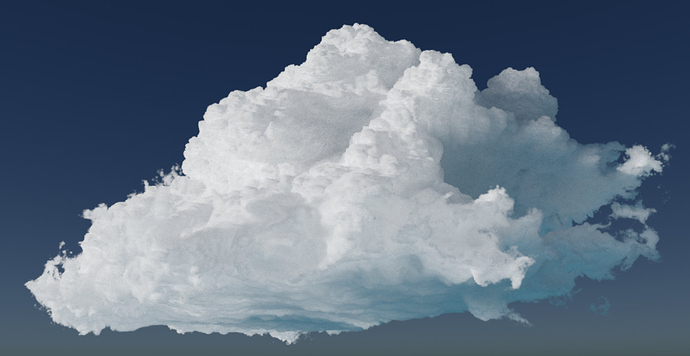
As seen in the images, two main renders with two different anisotrophy settings for the first scatter node, that is 0,1 and 0,5…that is the only difference in the settings of the volume, the other images is then just post processed a bit in krita (I could use tonemapping curves directly in blender though.

The lower anisotrophy brings out more detail as the light isn´t scattered so far…I think

a lot of volume bounces 50 bounces and additional increasement in some of the other bounce settings for the rendering, thought it rendered decently well anyway for 100 samples.
Only screenshots directly from the interactive cycles renderer.

I have tried a lot with Lightwave to get to this point, but the nature of GI bounces and the volumetrics and render speed makes it very hard to get there. (octane not refered to at all here)
So for me it finally may come together using blender for this kind of stuff.
GPU mode for the rendering, otherwise it would be very slow to render.
17 Likes

Awesome test,the clouds looking great.The lighting is looking great.
I hope that one day a dev would have more love for realtime clouds and atmospheric lighting,even after seen this kickass unreal 5 preview.

1 Like

Thanks, it can only get better I think, I need to fully understand each setting and node I have used here and make sure the cloud looks great and what to be expected as of when I change lighting direction.

It was only today I started to mess with this kind of setup, and discarded any emission shading or values in the setup, so it is two normal scatter nodes …no principle nodes, then some additional light path node, contrast and balancing all that.

nice start then,wait for more to come…

Looks good. Fun to see that you’re finding your way into Blender land.

Thanks,

Yeah…vdb was a welcomed implementation, and fluids will probably work well for some cloud sims.
For me blender still needs to step up for the fractal based cloud generation, and that means more specially designed fractals that are easy to use, but Ivé talked a lot about that before.

I need to find a place to talk about it, to push on it for any blender developer as well somewhere.
And apart from the fractals, a faster way to setup the volumetrics with decent falloffs.

It´s still by far easier to start with those things in Lightwave if you go for fractal based noise volumes…as a workflow as well as the huge library of fractals at your disposal.

I had a plan to make the comprehensive guide to all Lightwave procedurals for serving in the Lightwave forums, as well as serving as a showcase to what procedurals are available for blender devs to look in to.

I still haven´t contacted Dennis Pontonnier, regarding if he is interested in converting his Rman collection to a blender format.

But for VDB´s in blender, it´s a nice start, though I think lightwave has more VDB tools to construct all kinds of things, while VDB in blender is sort of more off import and export for the moment.
But then again, the performance of orbiting around a vdb file in blender is Soo much faster in blender, what can be orbited around in realtime, lightwave chokes on with it´s bad tick display also…
And as I said, the GI scattering in lightwave isn´t just as easy, fast or good looking as it is in blender.

Still aim to get closer to arnold or hyperion renders, but for that I need to do more research on how they render it all in there, which could be problematic to follow to it´s full extent, if you do not have access to the software and can follow it all by doing.

for more fractals I would try to collect the most used fractals and try to poke a developer that has worked with the procedural textures in Blender.

Maybe this guy. Look at devtalk here

I heard that Brecht said that this is the first implementation of VDB and in the future it may be possible with VDB displacement and sculpting.

Absolutely, and thanks for the links, I can see some adoptation from cinema4D noises, which is a software that also seem to have an extensive library of noise fractals.

But I really need to gather the complete guide first with images and such,
To bad though that the simbiont shaders/textures isn´t working for Lightwave anymore, it had some nice ones, two-three issues with them though, messy to install, slow for rendering, and the tweak options were too few, but in some of it´s preset default state, they did a nice job for some things.

Off topics:)…


1 Like

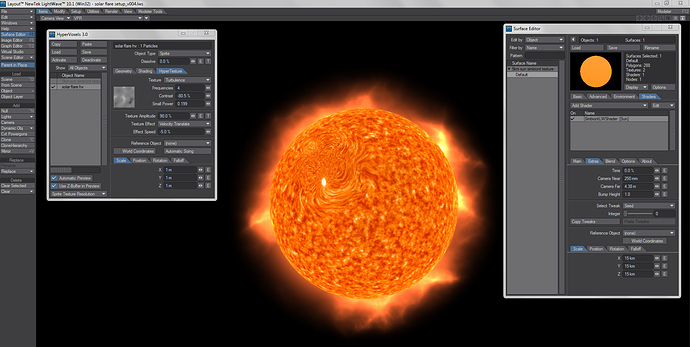
Sorry for the lw images that was a bit off topic…

Another image,
Though I am just messing a bit…this one doesn´t have a powder effect…which I need to research more on, i still have to go through the disney papers on that.

There is also this research and apparently blender renders, with VFS database and OLS shader, which I yet have to look in to…if that could work with the VDB files now.
https://forum.appleseedhq.net/t/the-vsf-database-a-collection-of-osl-shaders/834

My previous images had a little bit of bad settings for the albedo in the sky texture, that is why it came out too much cyan, I have corrected that by setting/adjusting the albedo more correctly.

Only 50 volume bounces, click on image to enlarge a little bit more.

2 Likes

I guess you have seen the paper of Horizon Zero Dawn clouds? There you can see how they done the power effect.
http://killzone.dl.playstation.net/killzone/horizonzerodawn/presentations/Siggraph15_Schneider_Real-Time_Volumetric_Cloudscapes_of_Horizon_Zero_Dawn.pdf

btw great render.

Yes, seen it before…but it really isn´t connected to the wda clouds or rendering methods they use, and it is merely mentioned a couple of times as beer powder effect …without any deeper description on how too…I think it´s better to look at this which will give you more meat to chew at for learning…
https://docs.arnoldrenderer.com/display/A5AFMUG/Rendering+a+Cloud

I use light path nodes, and a set of double scattering nodes, various contrast and curves sometimes and mess around with various anistrophy settings.

But using these nodes required additional density attributes nodes fed in to various input to avoid the scattering becoming just blocks, unlike principled nodes …the standard scattering doesn´t have that built in…however I feel the scattering is much better within these standard scatter nodes …compared to principled, so for clouds I have decided that principle nodes isn´t optimal…for fire/smoke yes…but not clouds.

Here´s another sample…much softer…but still not any full powder effect, a lot also have to do with the lighting angle as well.

And actually some of the first images I posted here have a little more of that, but they need a more softer look to them as well…so I am still researching on it, and it is a bit of testing and testing without fully understanding each node properly…once I know that, I will be satisfied, the mid images was more of a backscatter and as such a little powder effect is seen, but it´s much harder to get that effect when a cloud isn´t backlit, while in reality such effect happens as well under the right circumstances…not always.

But one principle, don´t ever use emission channels, for clouds it´s about light scatter, lot´s of volume bounces and absorbing, they really doesn´t excert any energy light emission, unless a lightning is in there.

2 Likes

A little volume bounce guide, it´s not from the latest image above, but I think you all get the idea of volume bouncing.

Sample going from 0,1,5,10,20,30,40
Only interactive render to 100 samples in viewport, so no noise filtering in this case, not really needed for the showcase.

4 Likes

And here´s a little more, this one is shaping up a bit on the softer dark shadows, though I experimented too much so the density isn´t correct on edges, and it´s a bit too much in contrast in some nodes so it is a bit strong highligh in the middle of the cloud, also…not sure, seems I may have stretched the scaling a bit…have to check with the original later.

A bit of color correction in krita, and noise removal, since I just let the cycles viewport render it with gpu, should I try to render final, I would probably need to switch to CPU and thus longer rendertime.
100 samples in viewport, 50 volume bounces.

two volume scattering nodes (no principle volume shader) mixed with curves, contrasts and light path node

light pitch (y) 45 degree (z) 360 degree

I will try and make it a little better with background, restoring more proper density and scaling.

hyperion original here…

And another one,
a little slightly changed lighting, the previous may have been more correct in lighting angle.
The image to the right is krita processed with tone enhance, sligth noise removal and color correction, the tone enhance deepens shadow and brings forth more shadows, but still keeping it round.

Changed back lighting to default, only 45 degree pitch…
applied one krita filter again (tone enhance)
Compare to original hyperion render to the right.

Now…I only used the quarter resolution, while the Hyperion most certainly is the Higher resolution.
Some addition noise filtering while rendering or in post that I could improve on, as well as change to higher esolution vdb, som camera angle adjustment and focal adjustment and some color correction.

As for improving directly in node shading, I am sure I could do that, cycles are quite fast with GPU, but when you are reaching 50 bounces, your direct feedback of every tiny shading change will still take a bit of a time to refine.

There are some gamma, brightness and curve color management within the renderer as well…which actually is making the raw renderer too dark, with tone enhance in krita it get´s back to more normal look, while adding detail and darkness to the shadows only.

How much faster this process would be with Octane or Ecycles, I do not know.

1 Like

Installed blender 3.1 some day ago.
checked some nodes, not sure if they were there before, but started to working with some of that with this asset again, think it may be easier to fix the clouds up a bit more, some samples.

To note, I ripped these images from newtek forums since I posted them there first where I also had a thread about the WDA cloud asset, so not sure it works if you click them full scale, sorry for that.

To note, in 2.8 blender, I think I couldn´t even load the full WDA vdb file which is 2.73 Gb, but this time it worked, not sure if it is enhancement in blender of me not running so many other processes in the background.
interactive renders only at a final of 300 samples, though I could probably stop at 150 and still have enough decent images without too much noise.
No post processing, no noise filtering.

Can´t tell you the exact rendertimes on this, it takes many minutes though, will try a final render on them as well later, maybe 20-30 seconds to get a pretty decent refine image of the cloud anyway, but to refine it fully without noise…a lot lot longer.

The GPU in cycles handled all the interactive rendering well without crashing, final render on the full size 2.73 GB file may crash or shut down…we´ll see.
Filmic high contrast color management, exposure 0,3, gamma correct 0,8 and a slight curve tweak on it as well.
30 volume bounces
40 transparent bounces

Map range nodes, vector math node, math nodes, light path nodes, curve nodes are used in some sort of a mix to provide this result…all fed in to the principle volume nodes various inputs.
Images below are exactly the same volumetric shading and settings, but going from quarter, half and finally full size resolution of the VDB asset.

There is more difference in looks between the quarter file and the half resolution file than half to full resolution.
Step rate render was maybe set abit too high at a value of 5, normally it´s default is 1, so I could lower that to get even finer detail, but it also affects the general look overall on the whiteness and darkness in the clouds.

Images below, again …300 samples, no post processing, no noise filtering, interactive rendering only.

Full size 2.73 Gb VDB file

Half size 469 Mb VDB file…

Quarter file size 65.2 Mb VDB file…

And today I actually learnt how to use the global volumetric scattering in blender cycles, previously I always had issues with it going black, so I didn´t understand what extra was required to fix that, but some nodes are needed it seems.

Anyway, it´s a bit slow the first iterative levels to get a good picture since it scatters light so much with alot of noise, it get´s better after a while though and still not that bad in rendertimes perhaps.

So good to finally learning the global volumetric scattering in blender/cycles, most fellows seem to use box geometry with volumetric material, I did too, but wanted something that works globally, and finally I learnt how to adjust that, by experimenting with nodes, did not see anyone describing it properly …will have to check the manual.

A high level of anisotrophy here in blender at 0.8 so the light scatters more in the cloud when backlit
I could probably punch that look much more with curves, and other nodes in blender, but it´s a bit tricky when using full out volumetrics on clouds and global scatter volumetrics and a lot of volume bounces, could use a faster engine still since when adjusting such things require tweaking feedback, and as mentioned…that is not
going smoothly the first frames.

5 Likes

Looks amazing! Are you planning on selling this shader? It’d be an instant buy for me!

Hi Scoped,

Didn´t plan on that initially, however, som other´s have asked for it as well and such, so I will look in to that.
But I wouldn´t just sell this only, but compile various shading styles from some of the others setups as well.
And maybe include some of my own VDB clouds as well.

1 Like

You need to set the anisotropy to .975, use a step rate of 0.01 and 1024 volume bounces.

Hi DHX

To who did you target this question and what example?

The settings you suggest for a volume is highly dependent on what size the VDB file is from the beginning, and what you suggest is by no means necessary, not for step rate, not for Volume bounces, and not for anisotrophy either.

The anisotrophy at that level is dependended on other settings in the nodal shading, and as such it most liely will yield too much dispersed light and not as sharp shadows within a backlit volume model.

It depends on the look you want, I can agree that raising the anisotrophy slightly will illuminate it a bit more, but at 0,975…it will become too illuminated, washed out and less shadows remaining.
Please take a look also at my first post, and some other samples of backlit clouds.

0.01 in step rate for GPU rendering would probably fail, system shuttin down.
volume bouncing that high will not yield much better illumination that drasticly changes the look in a way you still can adjust a lot on with curves instead or other shading settings.