Pov-Ray Setup
First install and confirm that it works before proceeding. https://www.povray.org/
Blender Setup
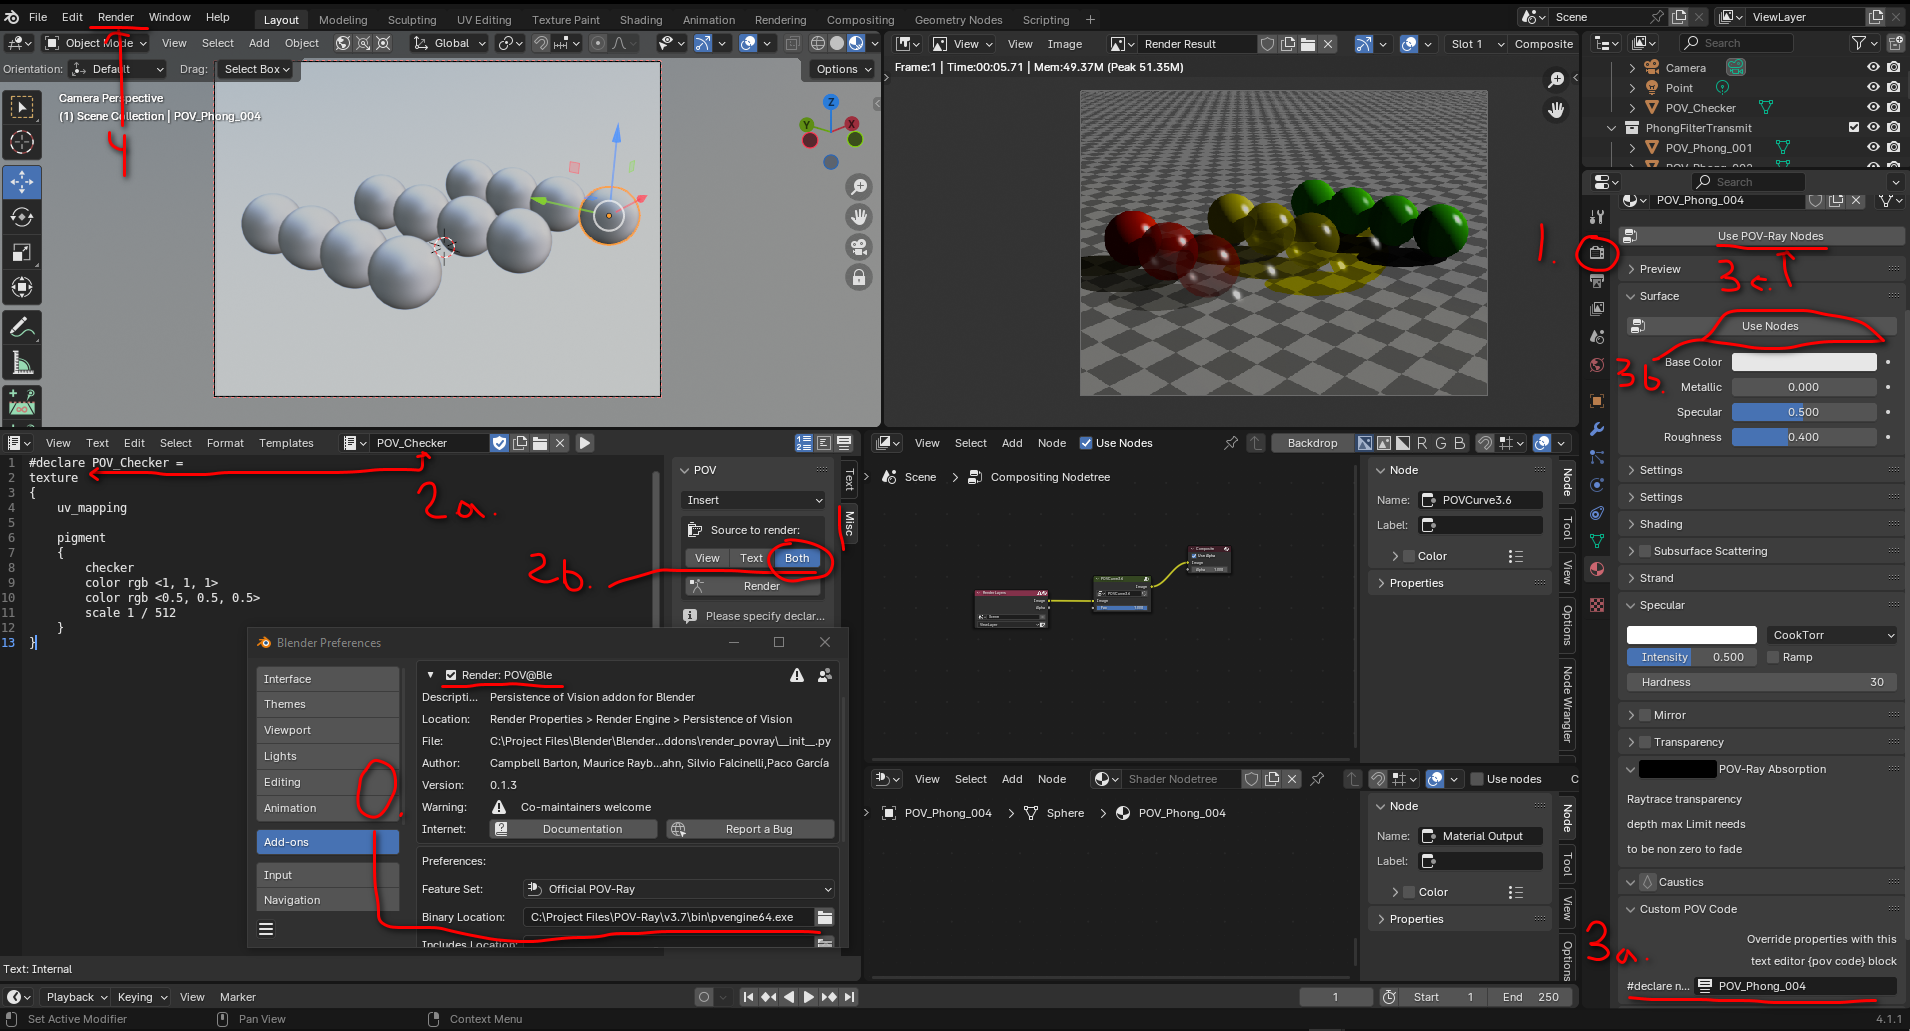
0 . In the add-ons section for POV@Ble set Binary Location to include the full path to the POV-Ray program and leave the other setting alone. Example path C:\Project Files\POV-Ray\v3.7\bin\pvengine64.exe
1 . Set the render engine to Persitence Of Vision.
(No need to mess with any of the other settings for now)
2a. In the text editor create a new file I would give it the same name you plan to use for the Pov texture in code. In my case I called it POV_Checker. Note: You can put multiple textures in the same code.
2b. In the text editor side tab labeled Misc make sure that Source to render is set to Both for each text file you create containing Custom POV Code.
3a. To use your Custom POV Code go to your objects material tab and under Custom POC Code enter the name inside your code so if it looks like this #declare POV_Checker = texture enter POV_Checker.
3b. You can do this step before or after but at the top of the materials tab make sure to click Use Nodes only once.
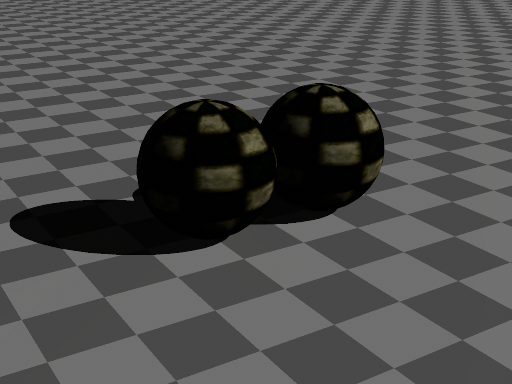
3c: After clicking Use Nodes if you click Use POV-Ray Nodes you can use nodes just like in the shader editor. The tab to use is called Povray Object Nodes not the shader editor. The only downside is I have yet to figure out how to get patterns to work with nodes.
POV-Ray 3.6 and 3.7 default render outputs are noticeably different. I added a color curve to get a similar look to 3.6 (I like it over 3.7). I tried to use POV3.6 with Blender but I think only 3.7 is compatible. Any info to get a more accurate 3.6 look would be appreciated. In short some renders can look different because of the version used to render said image.
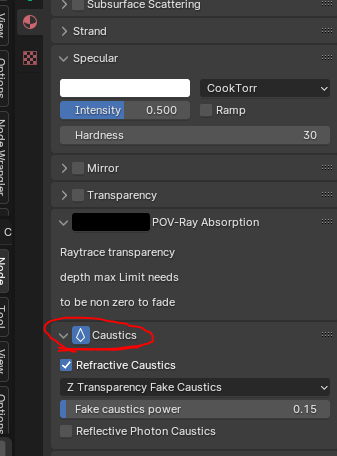
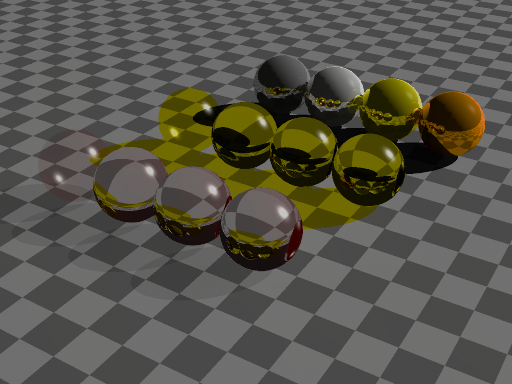
To get that more glassy look enable Caustics in the materials settings.
Only a single material can be used on an object.
If you have a skinned model (rigged character) make sure to remove any color attributes or it wont render properly.
I Included 2 blend files for those interested. Using POV-Ray with Blender is not like using it alone, it’s a bit of hybrid workflow and not always straight forward.
I’m new to using POV-Ray and that includes using it with Blender, so I don’t have much more to contribute. That said, I just wanted to help out those who find themselves struggling to get this thing working.
Side note: I too was also trying to find out how to get 90s looking renders in Blender and in my searches I found multiple posts by Jannik_F. These awesome threads inspired me to figure out how to get POV-Ray working. Go check their work out!
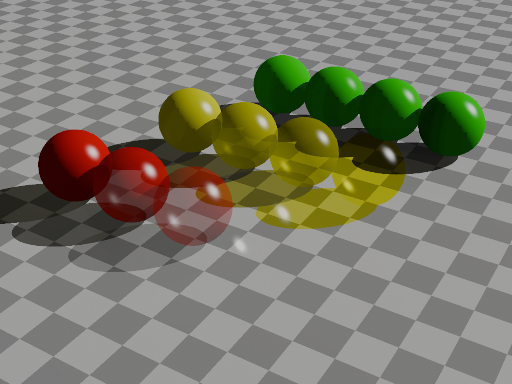
I decided to experiment with this a bit. I’ll be separating this into multiple posts since I can currently only add 1 image per post. First, here is a render using POVRay 3.7 with Blender, including the color curve you provided:
Using the .pov file that Blender generated, I then rendered it in POVRay 3.7 (outside of blender):
As you mentioned, the result is quite different without the corrective color curve.
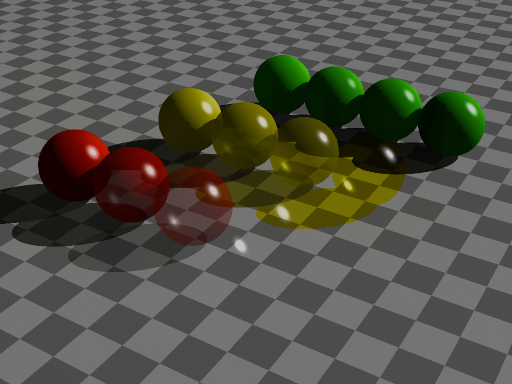
I decided to see if I could get the file to work with POVRay 3.6. At first it didn’t work, so I modified the .pov file to remove any settings it errored on. Eventually I was able to get it to render, but it still looked quite different from the color-corrected version from 3.7. After removing the line assumed_gamma 1.0 from global_settings, it looked a lot closer:
I tried just removing that line from the file blender generated (and changing any srgb values to rgb, as those don’t work without setting assumed_gamma) and rendering with 3.7, but that alone wasn’t enough for it to look like 3.6. I then tried rendering the file I’d adjusted to work with 3.6 in 3.7:
As you can see, it’s not quite the same, but it’s pretty close. So it seems like it is possible to get a POVRay 3.6 look in 3.7 by modifying the .pov file. I’m not sure yet if it’s possible solely within blender.
@mothnox Thank you for sharing your findings, not only with me but also with everyone who comes across this guide.
I too tried messing with gamma settings in POV-Ray 3.7, but I unfortunately never got it to look exactly like 3.6 either. Definitely feel free to contribute any further findings.
Realistically it may not be possible to get an exact 3.6 look in 3.7 because of all the changes between the versions. But I’m still very happy with the end results when I adjust the gammas.
Extras
One thing I did find in my research is that a global gamma value can be set for all renders in the master settings file. It’s called povray.ini and you just need to add this line File_Gamma=#
Another thing I discovered was that in my original POV_Basics.blend file (made with 4.1) the output/file gets muted and is not the same to what POV-Ray3.7 renders. It turns out there is something in blend files made in older version of Blender that produce the correct image. I have no idea what actual settings Blender has made different, but using an “older” file it now produces the right results in Blender 4.1. I updated my POV_Basics.blend to version 2.
Note: No custom color curve was used in the image below. I changed the world horizon color from black to white to better showcase the color muting. I also didn’t update the color curve in the blend file since it’s not really accurate to begin with.
Hmm… Any chance you could upload a 3.6/3.7 comparison so I can get a better idea of what you’re trying to achieve? I uploaded the last image in my previous post since I’m allowed to now. As you can see, they’re quite similar, though 3.7 has slightly darker shadows, compared to 3.6’s slightly “warmer” shadows.
Edit:
Here’s a less shadowy comparison (with 0.5, 0.5, 0.5 ambient light):
So far, I feel like my best option for using POVRay might be to create models with Blender, export them with the plugin, then edit the files manually before rendering. There seem to be quite a few settings that Blender gives default values, which as far as I can tell there’s no way to change from within Blender. Also, my usual text editor is a much nicer experience than Blender’s.
Hi,
Glad to see some interest in all of this at last, sorry to have been so long to answer
Indeed, the add-on is “opinionated” First things first , if you don’t want to learn about linear workflow, do not touch gamma settings, but do use Radiosity to your advantage !
This implies that the sky is of a light enough color to bring some GI bounces in the shadows (or you could also use lights and their specific presets) Once model is there and this is set up, switch from defaults to fast, and then “two bounces” in the radiosity presets. These are ordered from faster to slow but higher quality. don’t rush over 04th before final render though
I would also strongly advise not to use nodes currently.
That’s the reason, because they don’t work, I am personnally more interested in having a complete workflow than an “everything-node-nodes-only-and-nothing-else” workflow. But of course I know they can be fun. However the person who initially developed them for POV@Ble stopped contributing, we would need one more developer to step in to develop them further. Sorry for the inconvenience.
This thread, and the example blend files, have both been a great help on getting things running.
For anyone curious, I was able to get some nodes working - but only by specifically using Blender 4.1
I did have an issue, which I wasn’t sure if it was a bug to be reported. Or if I just wasn’t understanding the function:
If I try to set up an object in blender, with multiple material slots - the render will fail, but only when any of the materials use a Custom POV Code override, or a POV node setup. Which is a big hindrance if I am trying to use image textures, or anything beyond the properties you can fiddle with in the object properties tab.



 (or you could also use lights and their specific presets) Once model is there and this is set up, switch from defaults to fast, and then “two bounces” in the radiosity presets. These are ordered from faster to slow but higher quality. don’t rush over 04th before final render though