So much for the update. I’ll use this thread to update you on further experimentations and hopefully one day have something worthwhile in blender, short of using actual Bryce3D (which I can’t get to work and not gonna pay for), or learning how to code materials into the POVray plugin in blender (which might end up the solution regardless).
Please let me know what you think, if you have any tipps or advice and can give me some pointers. Otherwise please let me know which version you think looks better, keeping in mind that the goal is to have something that looks like 1995 MYST, 1997 Fallout, or 1990s Nintendo promotional renders.
Yeah that wouldn’t be too difficult, it’s just primitive shaders like Diffuse, Gloss and Add.
Have you had a chance to get Bryce3D working? I tried to get the supposedly free 5.5 version working, but ended up having to download something completely different because it doesn’t exist anymore?
Other options of course aren’t free, like Bryce7, Maya and C4D. POVray just has a learning curve with the material setup, but it’s actually fairly usable in blender.
I installed Bryce for Windows 95 I found at https://archive.org/details/Bryce3DCD
Mounted iso image first and then ran with wine (using Linux atm.).
Works, but screen resolution is way too small to actually work on anything
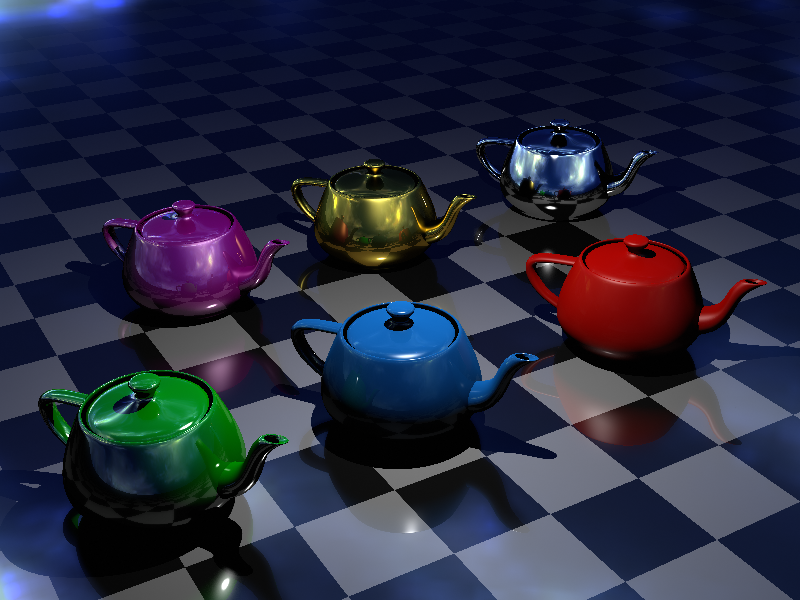
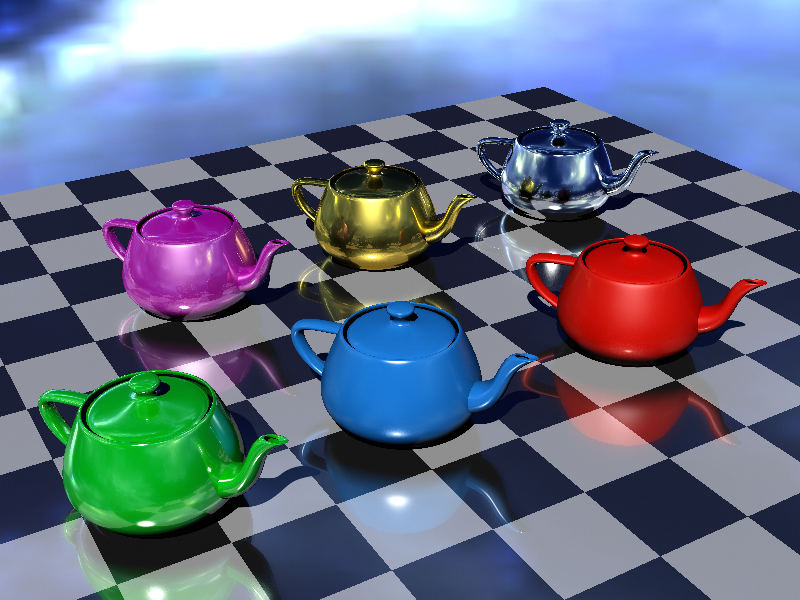
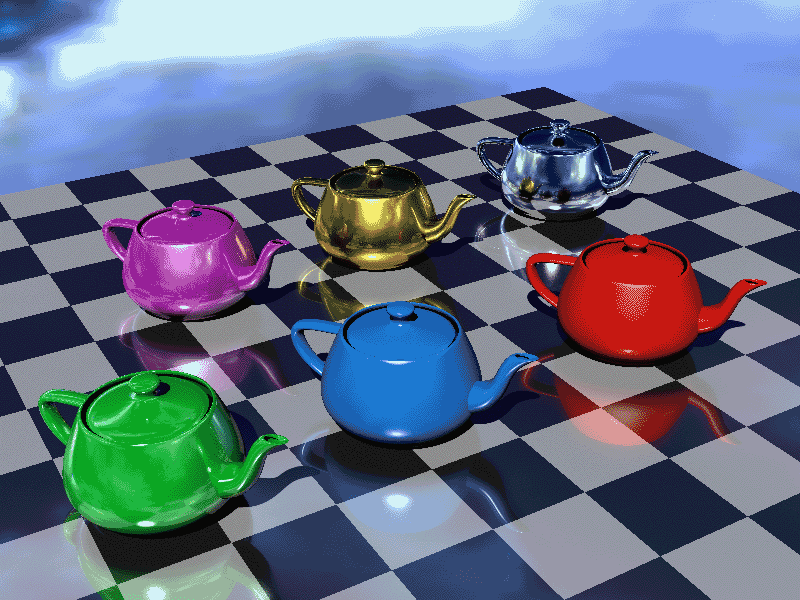
To truly get the 90s look you have to disable all gamma related view transforms, GI, light bleed, physical lighting and shadows, raytracing etc, and fake the GI and light bounce/bleed with more lights. Why would you want to go back to the 90s?
And I swear that I didn’t spend 1990 implementing Floyd-Steinberg error-diffusion algorithms to view greyscale raytracings on B&W monitors… those rumours are malicious and completely unfounded!
@cmzy@Anabran While worth a shot, few old render-engines are as user friendly for modeling, scene composition and other quality of life improvements quite as blender is. Also blender is free. The goal is to make this style affordable for everyone who is as crazy as me, not just to finally get my project started. But I appreciate the engagement, guys. Really
The style I’m shooting for was actually made in early raytracers such as POVray. There’s a gallery of old renders for comparison: https://www.irtc.org/old/
It’s not easier these days. You have any idea how many crazy words I had to learn just to make sense of half of it all?
The Anisotropic Noise in Stochastic Gradient Descent: Its Behavior of Escaping from Sharp Minima and Regularization Effects. Yeah. Say that three times fast. I DARE YOU!
and @Renzatic – That’s why blender is here to the rescue. And I’m happy with my latest attempt. I think I’ll finally rest. Thank you to everyone who’s followed my journey and given feedback
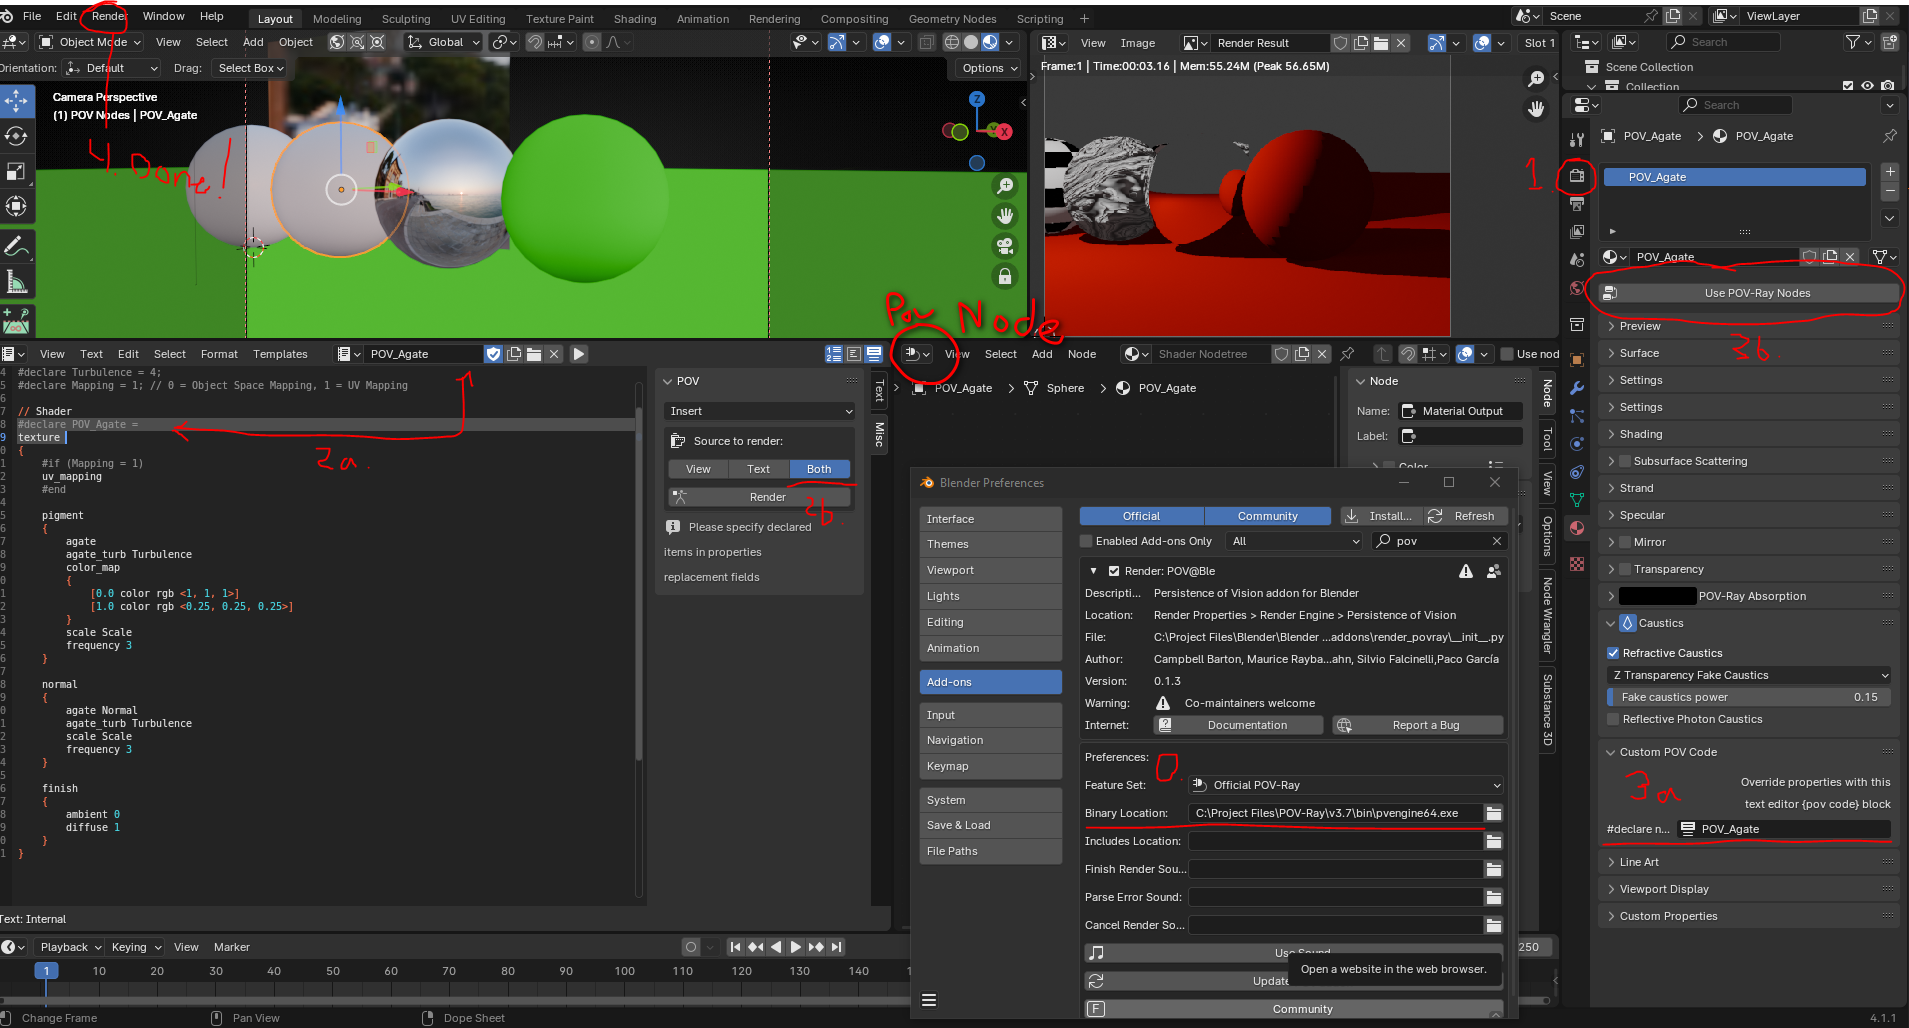
For anyone who comes across this topic here’s a rundown of setting up POV-Ray to work within Blender 4.1 (works with other versions too).
First make sure to install POV-Ray for your system and setup completely.
0 . In the add-ons section for POV@Ble set Binary Location to include the full path to the POV-Ray program I’m on windows so it looks like this. C:\Project Files\POV-Ray\v3.7\bin\pvengine64.exe*
(Leave the other settings alone.)
1 . Set the render engine to Persitence Of Vision.
(No need to mess with any of the other settings for now)
2a. In the text editor create a new file I would give it the same name you plan to use for the “Shader” (to make things easy to follow) in my case I called it POV_Agate.
2b. In the text editor side tab labeled Misc make sure that Source to render is set to Both for each text file you create containing Custom POV Code.
3a. To use your Custom POV Code go to your objects material tab and under Custom POC Code enter the name inside your code so if it looks like this #declare POV_Agate = texture enter POV_Agate.
3b. You can do this step before or after but at the top of the materials tab make sure click Use POV-Ray Nodes only once.
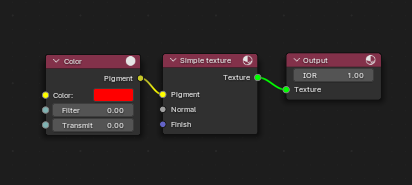
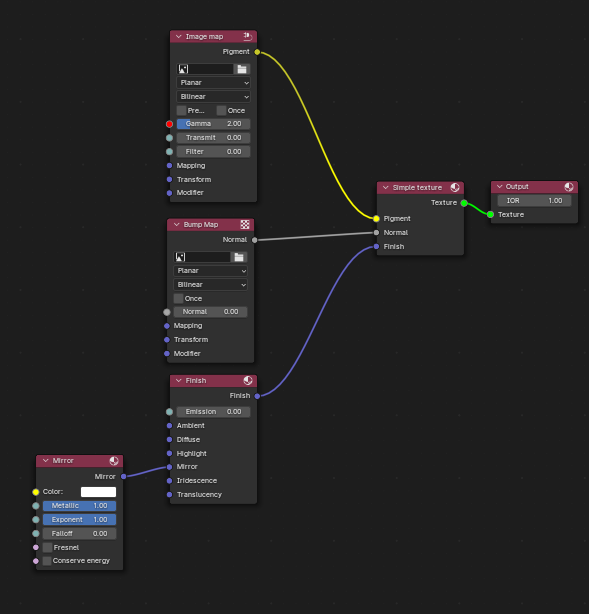
Note: Clicking it again will make it use the nodes (useful for using textures, but the procedural patterns don’t seem to work). I Included two pictures of node setups. Use the tab called Povray Object Nodes not the shader editor.
Because the CG in the 90’s looked like magic at the time, people could not believe what kind of art was now possible with off-the-shelf computers. My young self quite enjoyed going through galleries of those who use Bryce and Pov-Ray to see what they were cranking out.
Now these images show that even when trying to dumb down Blender rendering, you still get reflections and the like that gives the impression that they were rendered with incredible skill with brilliant placement of environmental maps. It is a completely different situation from how difficult it used to be to make an image from Blender Internal look like it was made in a paid engine.
Looks too simple to be true. Could this be the answer to my years of trying? I’ll try this out soon, when I got renewed motivation, but big thank you for your contribution!